Zax - secure messaging between you and your Guardians
Contents
If you're just learning what Zax secure messaging is, we have another article explaining that.
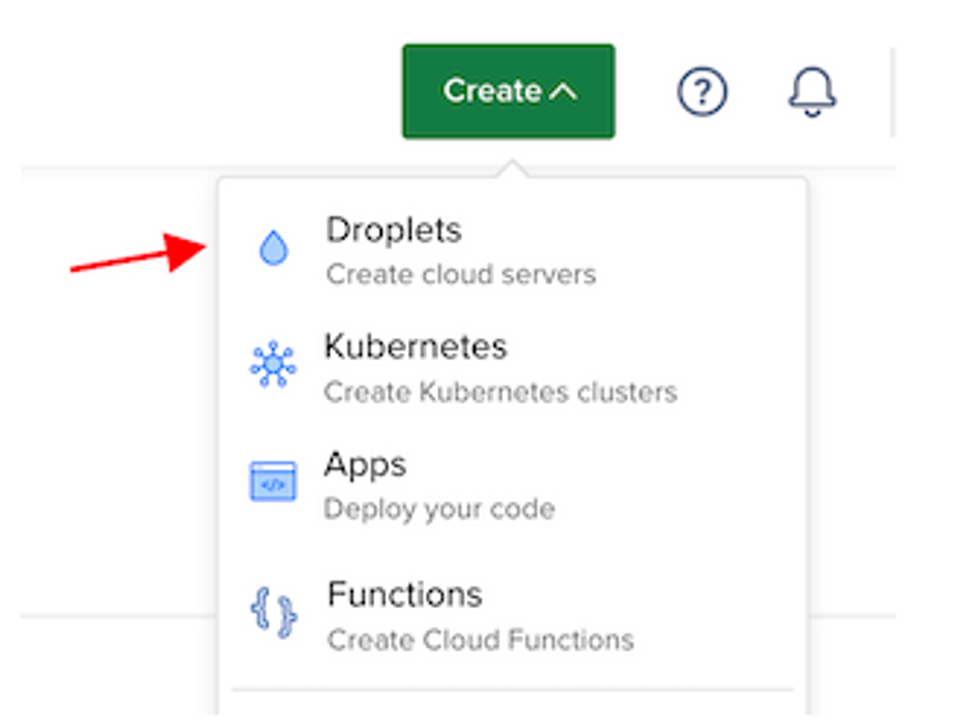
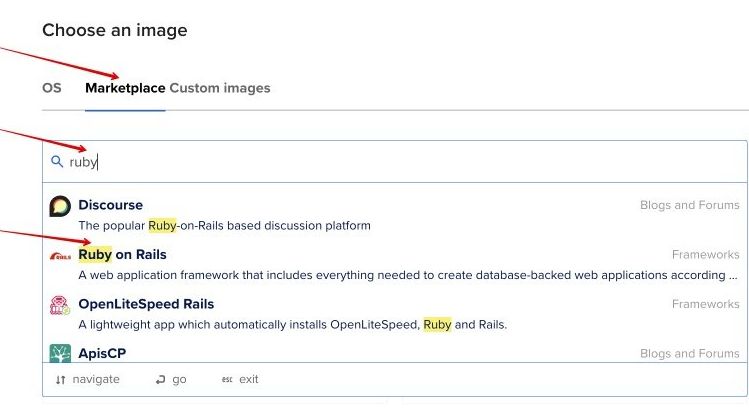

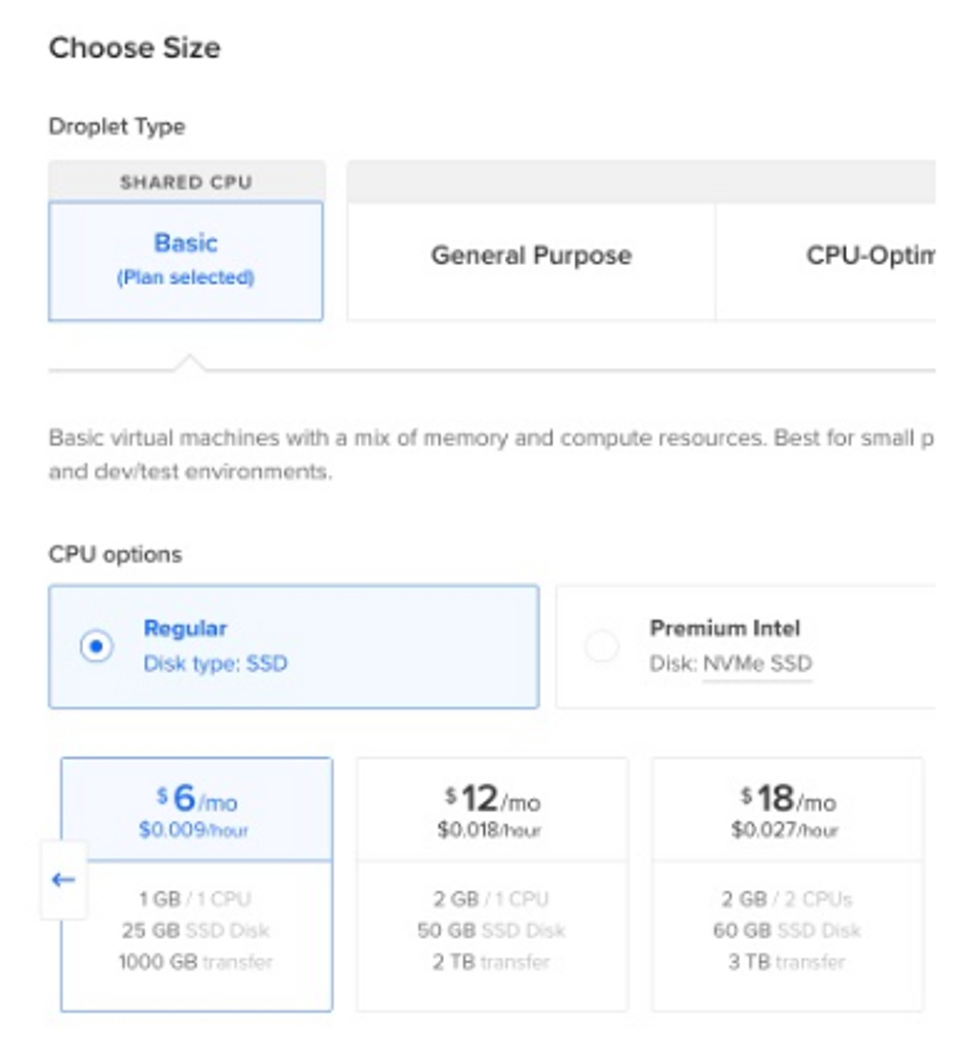
Once the Droplet is ready:
ssh root@your_droplet_ipv4
Install Redis on the Droplet by following steps below, or the original guide by Digital Ocean:
apt install redis-server
nano -l /etc/redis/redis.conf
systemctl restart redis.service
su - rails
git clone https://github.com/vault12/zax.git
cd zax
./install_dependencies.sh
By default, Rails 6 applications reject all requests that are not made to the configured host. So you need to uncomment and modify the production configuration file config/environments/production.rb.
Uncomment the line (approximate line number 11) containing the following text:
11 | # config.hosts << "zax.example.com"
and insert your own IP address (IPv4) or hostname, so that it looks similar to this:
11 | config.hosts << "64.1.1.255" # use your Droplet's IP address (ipv4) or hostname.
Exit from the rails user session by entering exit.
Open rails service config:
/etc/systemd/system/rails.service
and update the WorkingDirectory and ExecStart directives as follows:
WorkingDirectory=/home/rails/zax/
ExecStart=/bin/bash -lc 'rails s --binding=localhost --environment production'
Save the changes and exit the editor.
/etc/nginx/sites-available/rails
and replace the server_name _; with the correct address (IPv4) or host name (e.g., server_name 64.1.1.255;).
ufw allow 'Nginx Full'
systemctl daemon-reload
systemctl restart rails.service
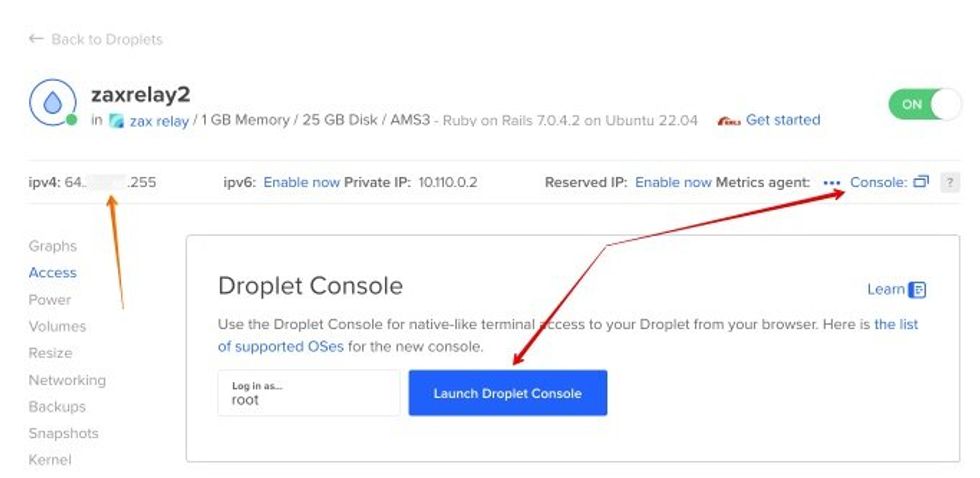
Open in a browser the IPv4 IP address you used above, like http://64.1.1.255. (At this step you will use http instead of https, since you have not yet configured your Nginx and DNS domain name with an SSL certificate to be used for secure HTTPS connections).
You should be able to see the dashboard of your own Zax relay, similar to this dashboard:
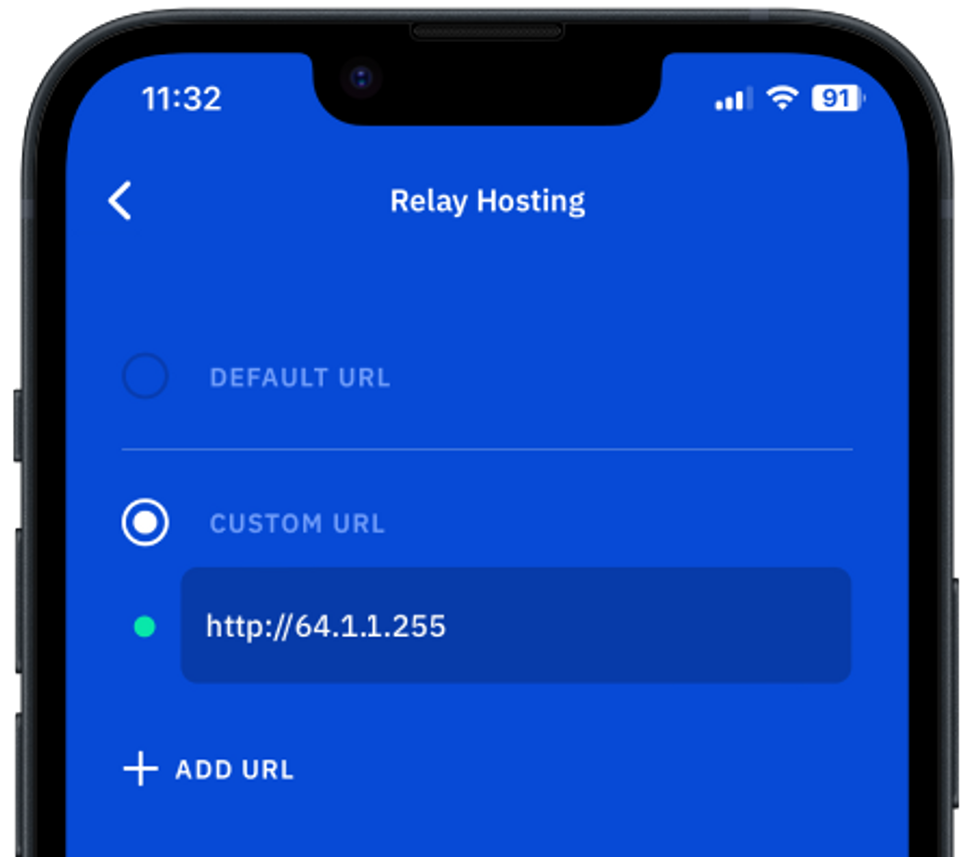
Now you are ready to verify that your newly created Zax relay can connect to your Vault12 Guard app:
The green indicator should indicate that the app is connected to your relay. Note that when you leave this screen, the app might request to restart.
At this point, the Zax relay is functional. However, for security purposes it is necessary to add some standard layers of network defense to your Droplet. Please continue on to Part 2, below, for important additional steps needed to secureyour Zax relay and run it in a production environment.
For safety and privacy reasons, you may prefer to disable access to the Zax Dashboard of your private relay. To do this:
su - rails
config/environments/production.rb
This action will prevent the Ruby server from serving files from the public/ directory.
To configure DNS for your domain, log in to your domain registrar's website and access the DNS management section. Add a DNS A record by specifying your domain name and your Droplet's IP address. Save the changes and wait for DNS propagation, which may take some time.
1. Obtain SSL certificate using Certbot with Nginx plugin:
certbot --nginx -d zax.example.com
2. Delete the rule for Nginx HTTP:
ufw delete allow 'Nginx HTTP'
3. Reload the systemd daemon and restart the Rails service to apply the changes:
systemctl daemon-reload
systemctl restart rails.service
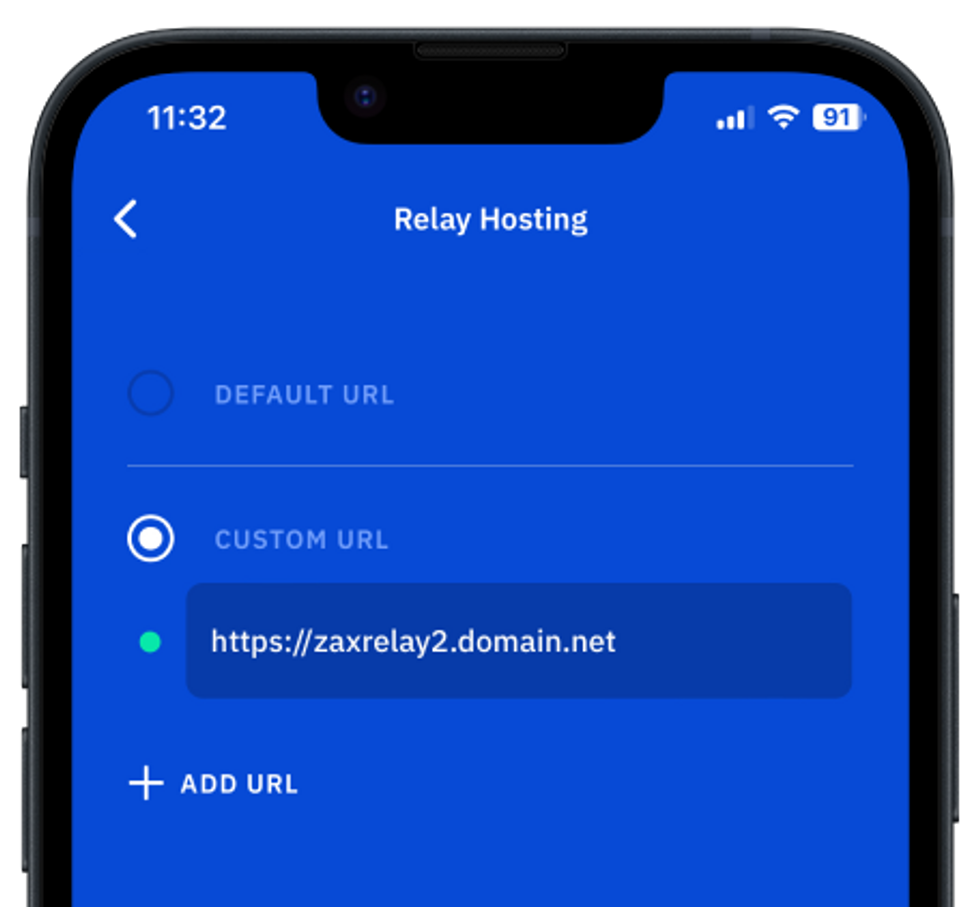
Now you are all set to switch your Vault12 Guard app to work with your secure Zax relay:
The previous custom URL (using http) should now be red, since you have disabled unencrypted HTTP access to Nginx.
The green indicator should now indicate that Guard is connected to your secure custom relay. Note that when you leave this screen, the app might request to restart.


Art is a crypto-security expert and researcher with serial entrepreneurship background. Having a degree in physics and experiences in multiple cutting-edge industries like fintech, secure hardware and semiconductors, and identity gave him a unique multi-faceted perspective on the problem of key management for individuals in the crypto networks and the evolution of the internet in general.
In his current work, he is specifically researching how cryptographic keys can be inherited without posing a threat to 3rd parties in edge cases. In addition, he advocates for "fault-tolerance via secrets automation". He discusses the quantitative impact of user experience factors on the uptake of non-custodial solutions.
As one of his most notable accomplishments, he co-founded and led through the early years of the company that contributed to the complex technology behind Apple's recent M-series CPUs. He is also the creator of the most friendly and aesthetically pleasing, but nonetheless super secure and fault-tolerant hardware wallet - U•HODL.
Check out his curated series of "Vault12 Learn" contributions below, and follow him on Twitter and LinkedIn for more sharp insights.
Get The Vault12 App Onto Your Phone