Contents
- Intro to Hardware Wallets
- The Innovation of Trezor
- Security features of Trezor Model T
- Compatible Wallets
- Unboxing your Trezor Model T
- Trezor Wallet and Trezor Suite
- Setup with Trezor.io/start
- Connect your Trezor
- Trezor Bridge (optional) - How to install Trezor Bridge if USB connection is not successful
- Trezor Bridge (optional) - Verify PGP signatures
- Trezor Bridge (optional) - Verify PGP Signature on Windows
- Trezor Bridge (optional) - Verify PGP Signature on Mac OS
- Trezor Bridge (optional) - Verify PGP Signatures on Linux
- Install Trezor Model T Firmware
- Trezor Wallet Creation
- Create with Single Backup
- Accept Terms of Service
- Create a backup
- Finish backup on your Model T
- Write down your recovery seed
- Verify your recovery seed
- Success
- Set your PIN
- Name your device
- Bookmark Trezor Wallet
- Finished Setting Up Trezor Wallet
- Import an existing Recovery Seed
- Recover BIP39 Wallet
- Set up Trezor Suite
- Download Trezor Suite Desktop
- Verify your Trezor Suite download
- Verify Trezor Suite Signature Windows
- Verify Trezor Suite Mac OS
- Verify Trezor Suite Linux
- Open Trezor Suite
- How to update Trezor Suite
- Congratulations!
Welcome to the Vault12 step-by-step guide to securely configuring the Trezor Model T, the high-security hardware wallet created by Trezor. This guide will walk you through either creating a new wallet, or initializing an existing wallet by importing a recovery seed.
This guide focuses on the security choices you can make when setting up your wallet; if you are looking for the official setup guide, please click here.
Let's get started.
TLDR;
Hardware wallets are widely considered to be the safest way to store cryptocurrency.
The Trezor Model T is considered to be among the best hardware wallets available on the market.
The Trezor Model T is compatible with multiple 3rd-party software wallets.
The Trezor Model T supports a wide variety of coins and tokens.
This guide complements the official documentation.
Intro to Hardware Wallets
Most cryptocurrency wallets on the market today are software wallets running on computer systems that are connected to the Internet, and this makes sense - the blockchain itself is software, and if you want to conveniently interact with it, a few mouse clicks in a software wallet can quickly execute a transaction. However, a potential threat emerges that is present in all applications: software is hard to keep secure. Not only is the wallet application itself susceptible to attack, but the operating system of the host computer, and even the security of the hardware that runs the operating system can be the target of attack.
This is why specialized secure hardware exists - the smaller the set of tasks that a device performs, the smaller the "attack surface," and the less likely that bad actors can find a way to compromise its security.
No matter which hardware security setup you use, hardware attacks are still possible. For this reason, Trezor recommends using a BIP39 passphrase if you think that you are at risk of physical attacks; however, you must still BACK UP both the passphrase and seed phrase. Similarly, another option provided by Trezor is to use Shamir's Secret Sharing - but the same responsibility exists - you must back up the shards. Vault12 addresses all of these scenarios by providing an easy-to-use back up and retrieval mechanism for passphrases, seedphrases, and shards.
For a software wallet to be secure, the application has to be built without security flaws, the operating system hosting the application has to be hardened (configured to reduce the likelihood of successful attacks), and both the application and the operating system must be kept patched to address any newly-emergent security flaws. Every day reveals new unexpected vulnerabilities discovered by creative hackers. A choreographed team of application developers, system administrators, and network engineers must constantly monitor and defend online applications against security threats.
Hardware wallets have emerged as a solution to these threats. Hardware wallet manufacturers design security features into purpose-built, customized hardware that protect your private keys by keeping them inside the device and permanently isolated from the Internet. No matter what new vulnerabilities are discovered in software, if your private keys are stored in an offline specialized hardware device, your keys are safe.
The Innovation of Trezor
The Trezor Model T is an open-source, fully auditable hardware wallet developed by Satoshi Labs. The team at Satoshi Labs are trailblazers in the cryptocurrency space, making open-source contributions that are in use by thousands of wallets every single day. Among Satoshi Labs' significant contributions are the BIP39 protocol that is the industry standard for wallet generation, and the protocols that determine the wallet derivation paths for native-SegWit and non-SegWit addresses: BIP44 and BIP84.
In fact, in 2012, Trezor released the very first hardware wallet for Bitcoin. The Trezor Model T is the culmination of almost a decade of work on open-source hardware wallets.
The Trezor Model T has a number of security features that are unique, and due to its open-source nature, many other hardware wallets on the market use the source code from Trezor in their products. Satoshi Labs welcomes and fosters this, in the spirit of driving innovation in the open-source model. The approach is working, with hundreds of developers having contributed code to the Trezor ecosystem.
Security features of Trezor Model T
The Trezor Model T builds in a number of security features.
The main threat model of the Trezor Model T is to protect against digital attacks from hackers and malware, which are the most common threats facing cryptocurrency users. Your Trezor Model T protects your private keys, never sharing them or exposing them to any 3rd party.
To achieve this, the Trezor Model T operates on a zero-trust principle. What this means is that by default your Trezor Model T does not trust Trezor Wallet or any 3rd-party wallet. The principle of "Don't Trust; verify" is at the forefront of the design of the Trezor Model T.
When you initiate a transaction from your wallet application, the raw transaction is sent to your Trezor Model T, with a request that the raw transaction be signed. In order for a crypto spending transaction to be broadcast to the blockchain network, it must be signed with the private key associated with the blockchain address that holds the crypto.
Before signing the transaction with your private key and returning it to your wallet application to be broadcast, your Trezor Model T will perform a series of "Don't Trust; verify" checks.
To protect against a compromised wallet, when your Trezor Model T receives a raw transaction, the details will appear on its display. This gives the user the ability to confirm the amount, address, and fee, before signing the transaction. This prevents malware from changing the destination address, or making unauthorized transactions.
In order to sign a transaction, your Trezor Model T will require you to input your PIN code. Your PIN is 1-9 numbers, and is used anytime action is taken involving private or public keys. To protect against brute force attacks, the device wipes its memory after 16 failed PIN attempts. A 9-number PIN has so many possibilities that this guessing attempt limit ensures that no attacker will be able to gain access to your device. This prevents someone with physical access to your wallet and your Trezor Model T from being able to send transactions.
Building on the zero-trust principle, the individual components in the Trezor Model T do not trust each other. The device ships with only the boardloader and bootloader installed, and requires firmware to be installed at the first setup. The main function of the boardloader is to verify the authenticity of the bootloader. The boardloader is write-protected, and has no ability to be altered or upgraded.
Once the bootloader has been verified to be authentic, the device starts up and proceeds to check the authenticity of the firmware. If the firmware is not signed by Satoshi Labs, a warning will be displayed on the screen.
The firmware is the operating system of the Trezor Model T, providing all the instructions and directions. By default, the firmware does not trust incoming transactions from wallets. As described in the above paragraphs, the firmware instructs the device to display the transaction details; amount, address, and fee, and requires the user to confirm accuracy with the PIN code.
To limit the possible attack vectors, the Trezor Model T was built with only the functionality that was needed to perform its task: protecting users' private keys, even if connected to a compromised computer. The Trezor Model T only connects over USB - there is no wifi, bluetooth, or cameras installed on the device.
The Trezor Model T also has a number of security features built in to protect against physical attacks on the device. Physical attacks on the device include when an attacker has physical hands on the device and is able to manipulate the hardware.
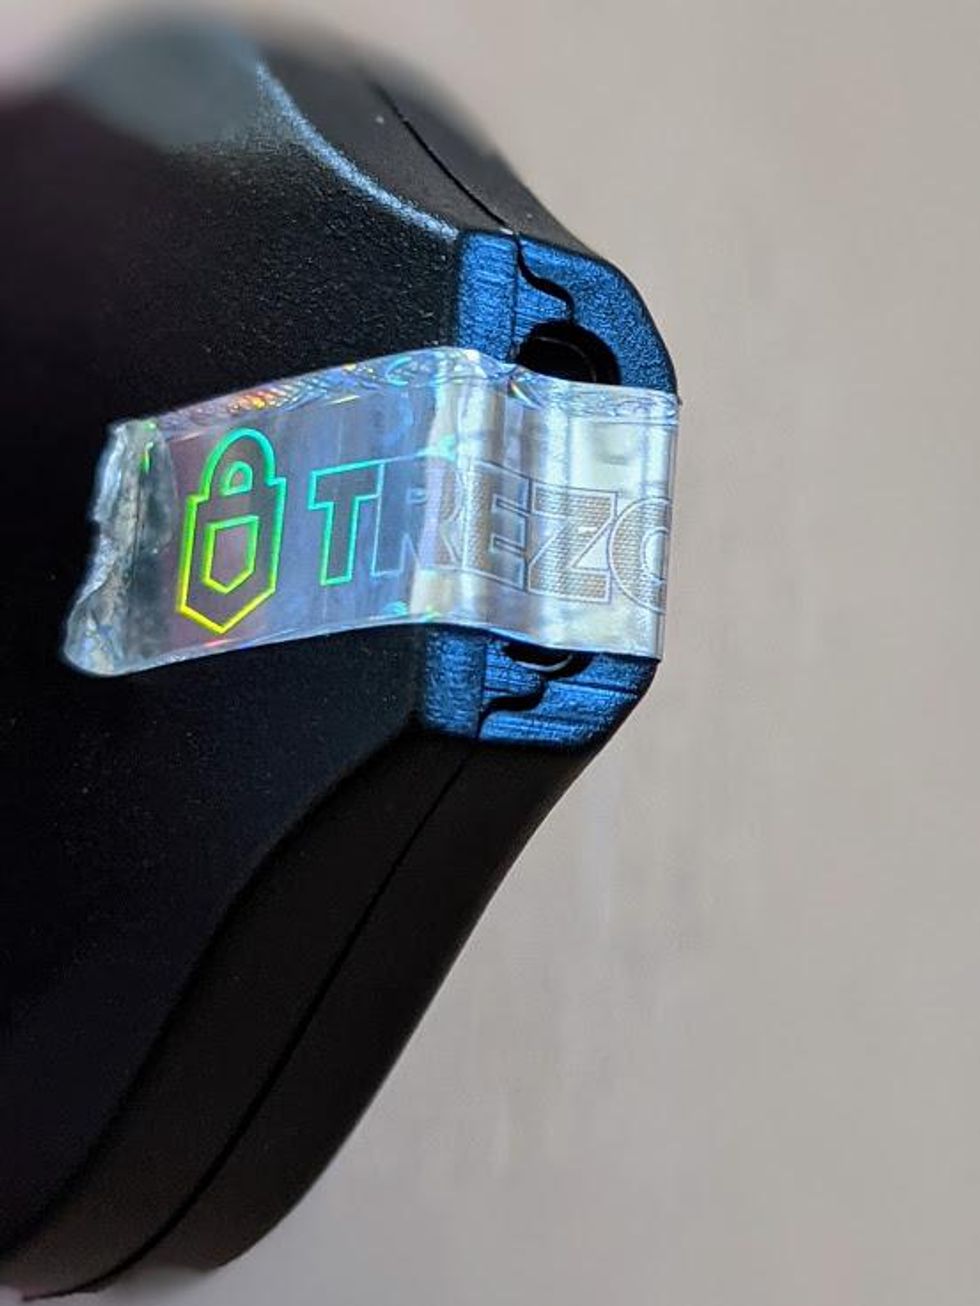
When your Trezor Model T arrives, a hologram sticker will be covering the USB port. This holographic strip is ultrasonically welded to the hardware, creating a very strong seal. In order to use the device, the hologram strip must be removed, which leaves a noticeable debris on the hardware. This simple protection prevents bad actors from being able to modify the hardware of a Trezor Model T, and then resell the device to an unsuspecting victim.
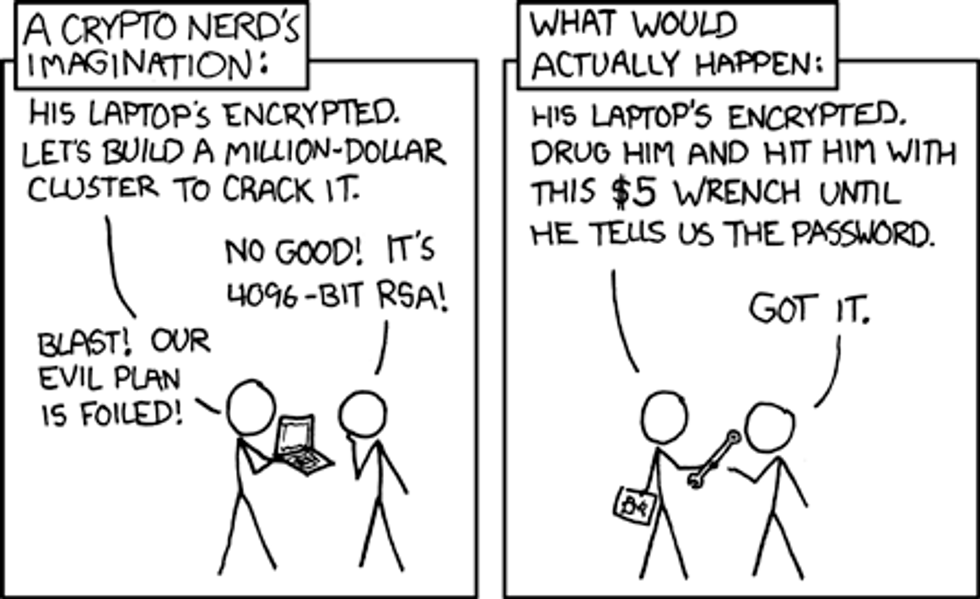
To protect against the infamous "5-dollar wrench attack," in which an attacker beats you with a $5 wrench and forces you to unlock your device, the Trezor Model T supports and recommends using BIP39 passphrases.
BIP39 passphrases are supported as an advanced feature that adds an extra phrase to the end of your recovery seed. Using a BIP39 passphrase generates a completely new and separate wallet. This offers a clever way to protect against a$5 "wrench attack." How this works in practice is that you would use wallets generated by BIP39 passphrases, and if an attacker forced you to give up your recovery seed, you would provide the recovery seed - without the BIP39 passphrase. This would open up a dummy wallet that might hold a small amount of cryptocurrency, while your wallets that may hold more cryptocurrency would remain hidden. You can set up BIP39 passphrases in both Trezor Wallet and in Trezor Suite.
Additionally, the Trezor Model T supports multiple advanced security configurations, including:
- Running your own instance of Trezor Wallet, and running your own backend,
- Using the Trezor Model T as a hardware 2FA, similar to Yubikey,
- Configuring a specialized PIN that when entered will completely wipe your device,
- Encrypting the PIN with a microSD card, and
- Using Trezor for passwordless SSH keys, and GPG signatures.
Instead, the team at Satoshi Labs has been building its own open source Secure Element chip, and has created a new company around it called Tropic Square. It is expected to deliver samples next year, and it will likely be included in newer Trezor models.
Compatible Wallets
Due to the open-source nature of the Trezor Ecosystem, many 3rd-party wallets and service providers integrate with the Trezor Model T. In fact, Satoshi Labs maintains an actively-developed API for wallet providers to integrate with Trezor wallets.
When integrating with a 3rd-party wallet, keep in mind that the level of integration will vary from wallet to wallet. Some wallets only provide watch-only wallets, while some wallets are closer to full-featured, such as Electrum and Exodus. It is best to consult 3rd-party wallets' documentation to make sure that the features you need are available.
Below is a non-exhaustive list of wallets that are integrated with the Trezor Model T:
Wallets supporting transactions
- Electrum
- Electrum-DASH
- Electrum-LTC
- Etherwall
- Exodus
- MetaMask
- Mycelium
- MyCrypto
- MyEtherWallet
- Nano Wallet
- Walleth
Watch-only wallets
- ArcBit
- BitWallet
- Blockonomics
- Sentinel
Exchanges and Services
- Bitex
- Bitstamp
- Coinmate
- Coinmap
- Coinpayments
- Cryptee
- Emoon
- Portfolio
- Faa.st
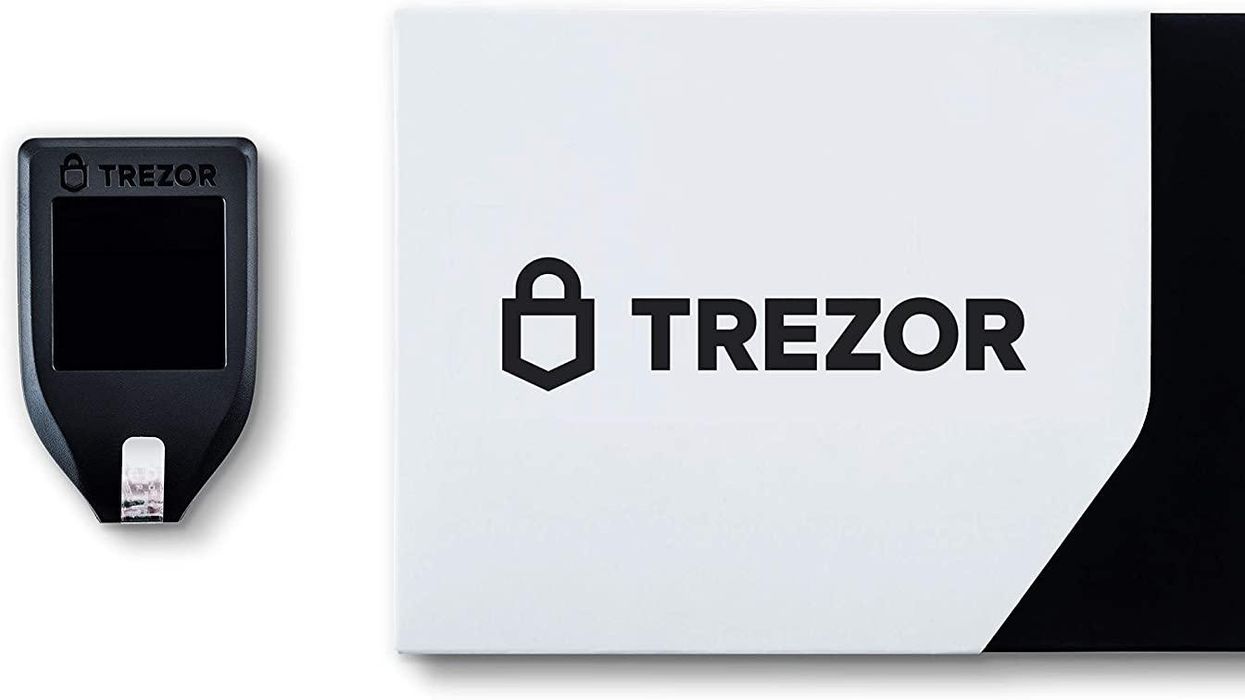
Unboxing your Trezor Model T
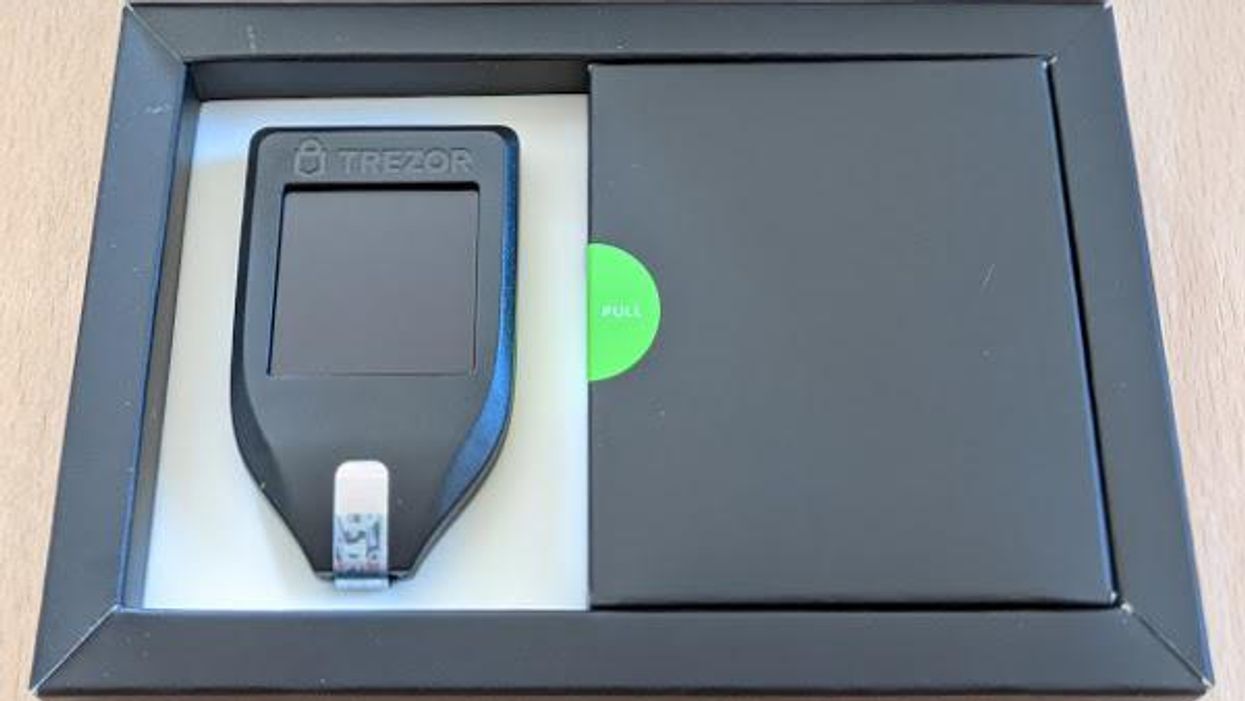
If you have not opened your Trezor Model T, do so now. Inside the box, your Trezor Model T includes:
- The Trezor Model T
- A magnetic docking pad
- 1 USB-A to USB-C cable for connecting your Trezor to your computer or mobile device
- 2 Recovery Seed cards
- 4 Trezor Stickers
- A Getting Started guide
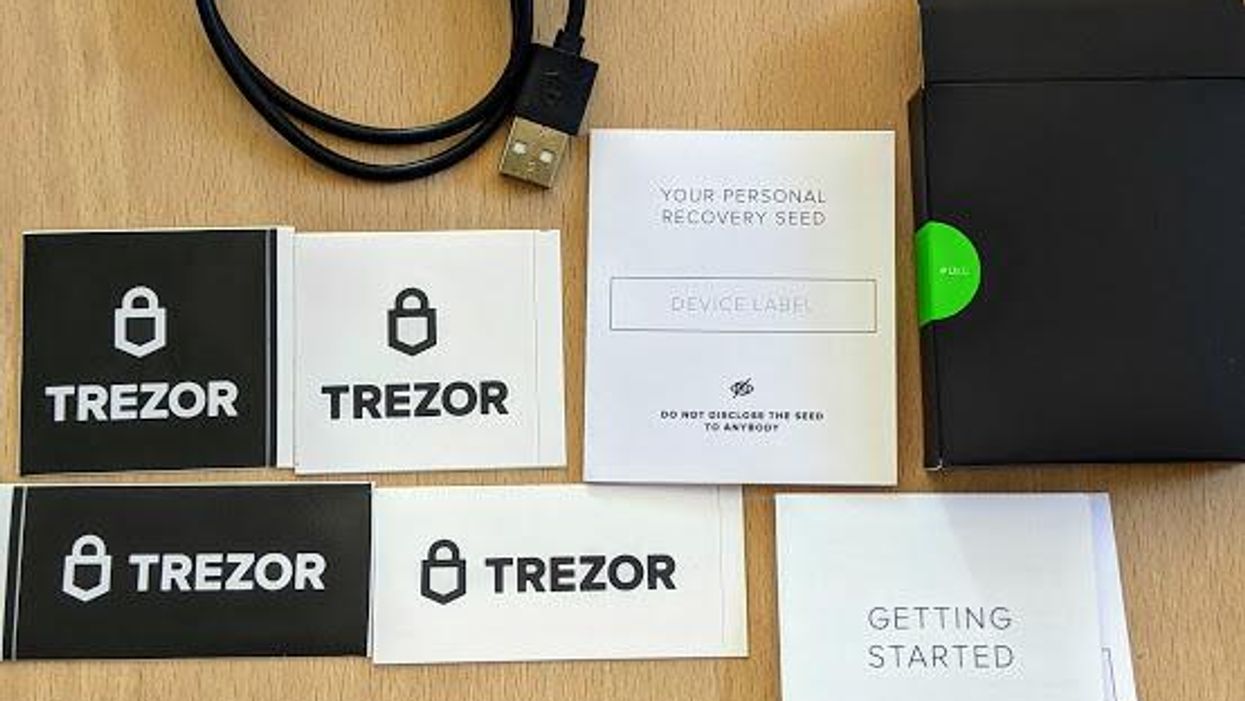
The contents of the accessories box
Trezor Wallet and Trezor Suite
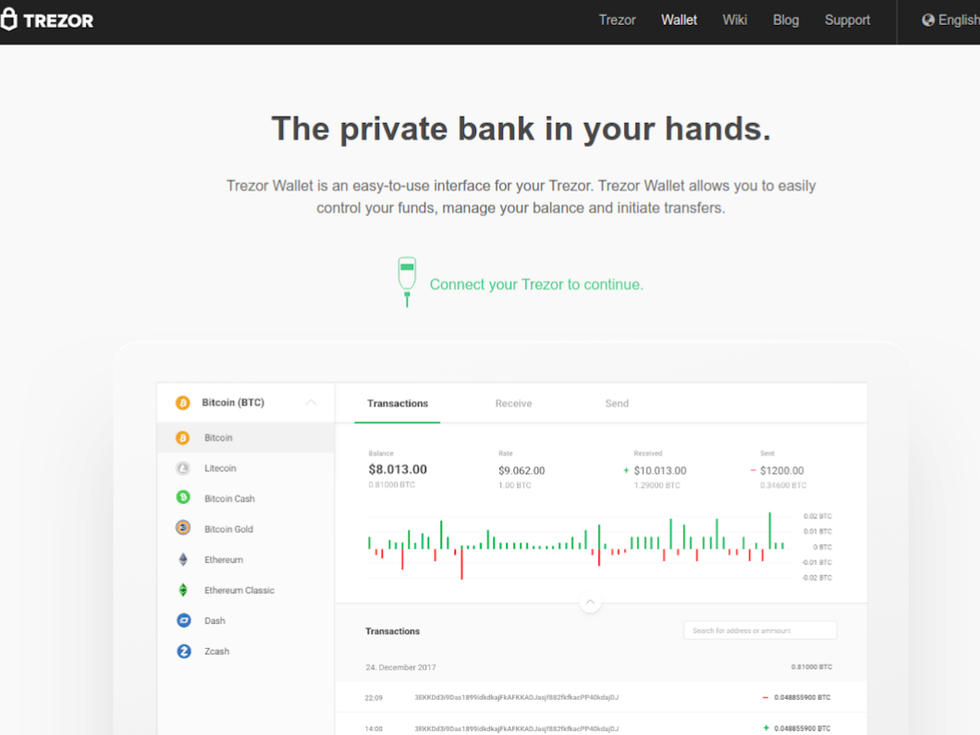
The setup process for your Trezor Model T originates on the web. Currently, the official setup procedure involves going to https://trezor.io/start, and connecting your Trezor Model T to your computer via USB.
At the time of publishing in June 2021, Satoshi Labs is in the process of a major upgrade to Trezor Wallet, rebuilding it from the ground up. The new wallet is called Trezor Suite.
Trezor Suite is a desktop application available with enhanced features, including running your own full node, and routing transactions over Tor. It is available for use today in beta mode.
For this tutorial, we will cover setting up your Trezor Model T with trezor.io/start, and how to migrate to Trezor Suite later. (As a bonus, at the end of this guide are the setup instructions for Trezor Suite.)
Let's begin!
Setup with Trezor.io/start
If you want to complete the setup using Trezor Suite, which is currently in beta, the steps outlined below are identical. The only difference is the host application. Vault 12 does not recommend using Trezor Suite until it graduates from beta and is officially recommended by Satoshi Labs.
Alternatively, if you want to use Trezor Suite, Vault 12 recommends setting your wallet up using the official method at trezor.io/start, and then migrating to Trezor Suite. This is the process we will be following in this tutorial.
- Open a web browser and navigate to https://trezor.io/start.
- Verify that the URL is correct: https://trezor.io/start.
- Look for the lock icon next to the URL, indicating a connection over HTTPS.
- Clicking on the lock icon, you should see "Connection secure."
Make sure you see the closed lock
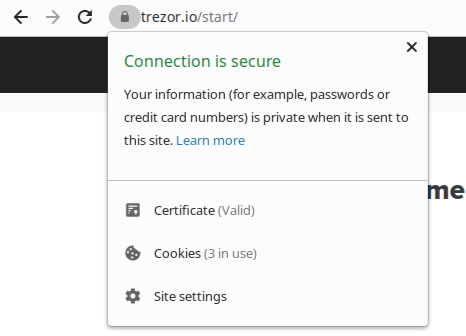
Click on the lock, you should see connection is secure
Now that we have verified we are on a secure URL, we can safely proceed with setting up our Trezor Model T. The first step is to select our device from the available options.
- Select "Trezor Model T" to continue set up.

Select Trezor Model T
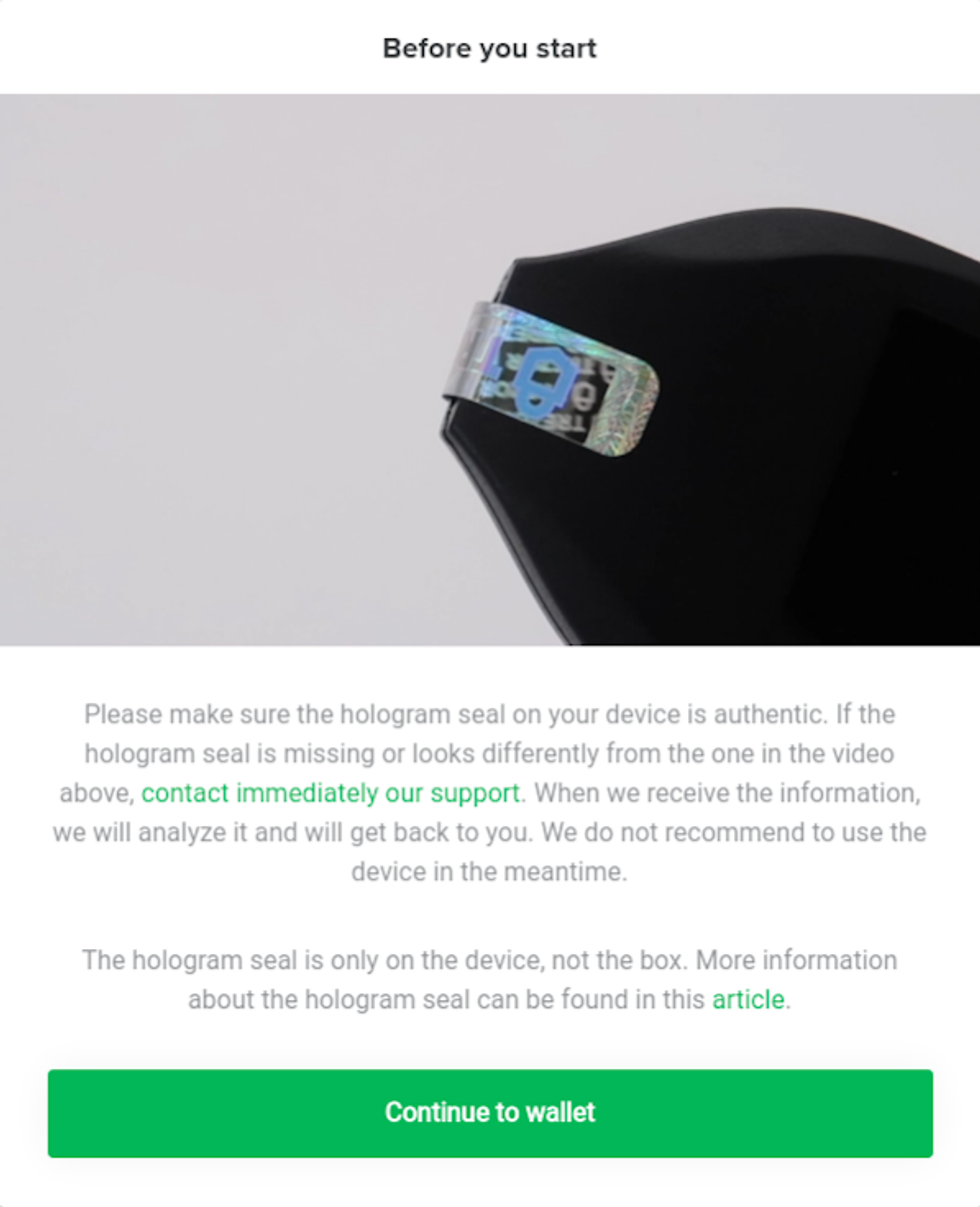
After selecting our device, a pop-up will appear on the screen. The pop-up will ask you to verify that the hologram sticker on your Model T is authentic. To help with this, a 3-second video plays on a loop.
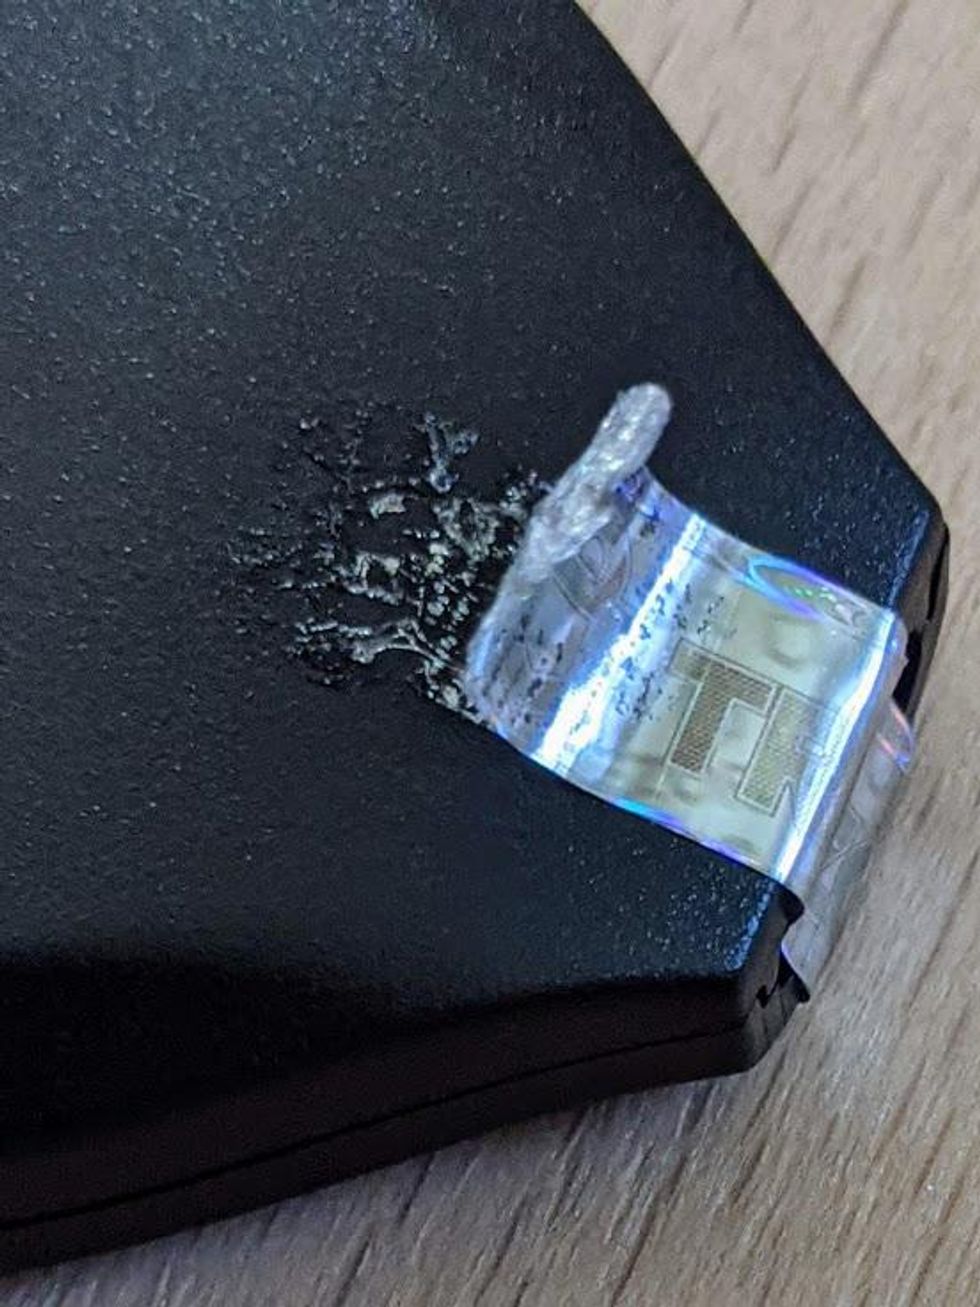
The hologram sticker is a security feature of your Trezor Model T that is designed to detect if the device has been tampered with. The hologram sticker is using very sticky glue, and when you remove the hologram a residue will be left behind.
Using the video as reference, look at your hologram and compare it to the hologram in the video. We have also included a picture below that you can use.
After verifying your hologram, remove the hologram sticker.
Click on "Continue to Wallet."
Verify your Hologram

Connect your Trezor
Now that we have verified the hologram on our Trezor Model T, it is time to connect it to your desktop computer or mobile device via USB cable. The Trezor Model T does not support any wireless connections. The only officially supported operating systems are Windows, Mac OS, Linux, and Android. iOS is not supported by Trezor.
iOS is not supported by Trezor. For this reason, it is recommended to not use your Trezor with iOS devices. You are using the Trezor to secure monetary value, and using it with an unsupported operating system comes with inherent risks.
Trezor Model T connects to your web browser using a protocol called WebUSB. WebUSB allows web browsers to securely interface with USB devices. Your web browser should pick up the Trezor Model T automatically, and your browser may ask you for your permission to access your Trezor.
If you are not seeing the Trezor Model T, follow these troubleshooting steps:
- First, connect your Trezor Model T to your device using the supplied USB cable. You will need to use a little bit of force when connecting the USB cable to the Trezor Model T: you should hear a small click when the device is connected.
- You may need to install Trezor Bridge, a compatibility tool for your Trezor.
Connect your Trezor
Trezor Bridge (optional) - How to install Trezor Bridge if USB connection is not successful
If your browser does not automatically recognize your Trezor Model T, you may need to install Trezor Bridge. If you were able to connect your Trezor, you can safely skip this step.
To download Trezor Bridge, scroll to the bottom of the screen and look for the following text:
"Device not recognized? Try installing the Trezor Bridge"
Click on Trezor Bridge and it will bring you to the Trezor Bridge download page.
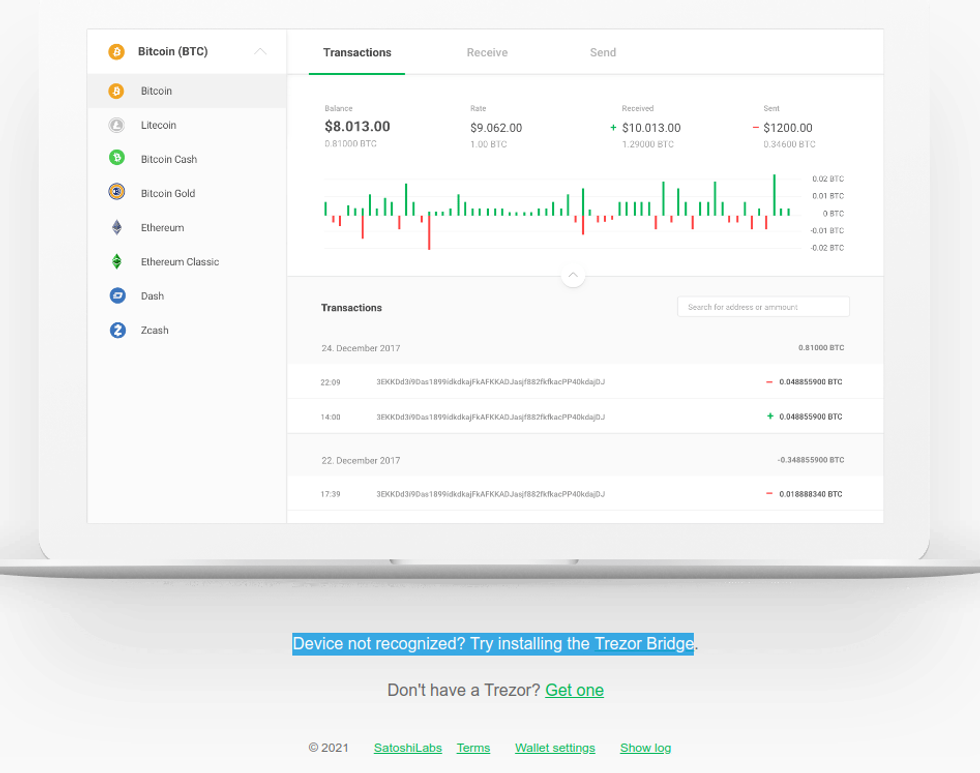
Trezor Bridge
- On the Trezor Bridge download page, select your operating system and click on Download.
- For Mac OS and Windows, download the PGP signatures.
- For Linux users, the .deb and .rpm files contain the PGP signatures.
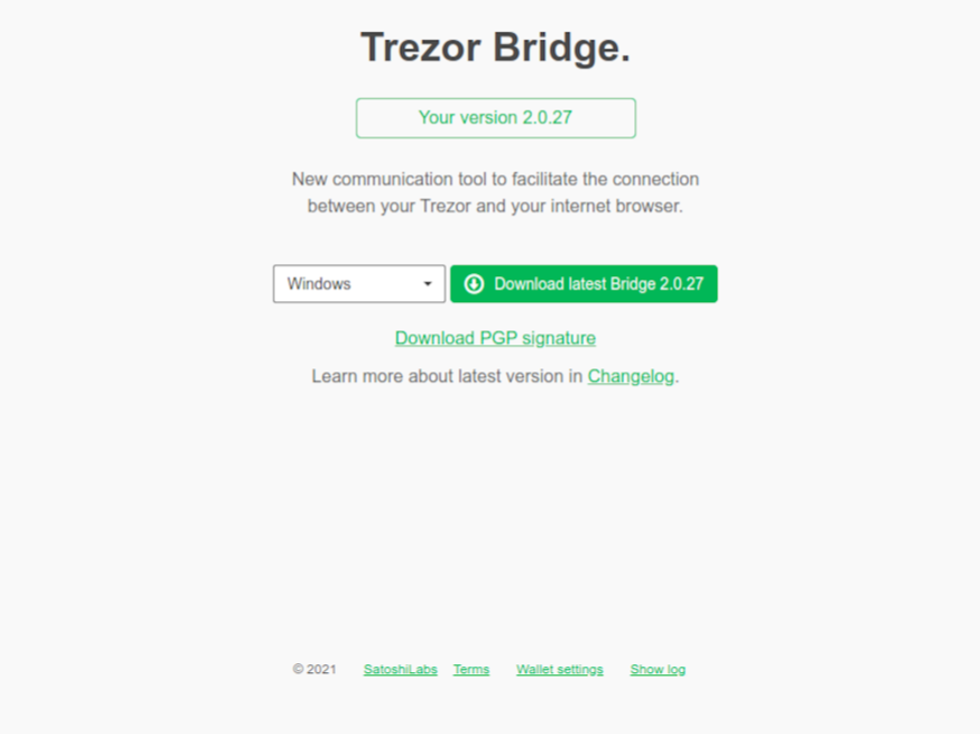
Trezor Bridge download
Trezor Bridge (optional) - Verify PGP signatures
Trezor Bridge is signed by Pavlo Rusnak, the co-founder and CTO of Satoshi Labs. For some reason, on the download page for Trezor Bridge, the signature files are provided, however Pavlo's key is not provided, it has to be tracked down.
Tracking a key down across the internet is problematic, as you could download any key, and you have to make your best determination that the key is trustworthy. Whenever this has to be done, it is best to get multiple sources of confirmation that the key is correct.
- First, we will locate Pavlo's GitHub account and verify that he contributes to Trezor.
- Pavlo's github: https://github.com/prusnak.
- From his GitHub, we can see he contributes to Trezor, including to trezord-go, which is the repo for Trezor Bridge.
- From his GitHub, we can see his homepage is https://rusnak.io.
- His PGP key is listed on his homepage here: https://rusnak.io/public/pgp.txt.
- We can verify this further by locating his keybase account, here: https://keybase.io/stick.
- We can verify this even further by locating this twitter post, where he posts his GPG fingerprint: https://twitter.com/pavolrusnak/status/74842941222.
- Download the key, and make sure it is saved as an .asc file.
Next, we have to verify the signatures of Trezor Bridge and make sure they match.
Trezor Bridge (optional) - Verify PGP Signature on Windows
- Download Gpg4win (https://gpg4win.org) - this is a windows utility that installs GPG, a GPG key manager, and configures it all to work across many apps on your Windows.
- For this guide, you do not need to create your own GPG keypair. However, GPG is used a lot and it is good to be familiar with it.
- Verify your download by using the `check integrity` page provided by Gpg4win. The "check integrity" page is where Gpg4win lists its code signatures for each release.
- Open Gpg4win (https://gpg4win.org) and look for the Download button. Below the Download button you will find the check integrity link. You should now be on the URL https://www.gpg4win.org/package-integrity.html.
- In the File Explorer, navigate to the Downloads folder and right-click on gpg4win installer. Follow the path Properties -> Digital Signatures -> Details of Signatures. This will open the signature information.
- Compare the signature data on Gpg4win's check integrity link and the signature data on your Windows device. They should be identical.
- Run the Gpg4win installer. If you have Windows Universal Access Control enabled (it's enabled unless you disabled it) you will be asked to confirm that you want to run Gpg4win. Check the publisher data: the publisher should be "Gpg4win Initiative."
- During installation, you will be asked which packages you want to install. To complete this guide, you will only need GnuPG and a key manager.
- When installation is complete, your key manager, Kleopatra, should start automatically. If it hasn't, open Kleopatra from the start menu.
- In Kleopatra, click on "Import" in the top menu. Select Pavol Rusnak's PGP key that you just downloaded, and import it. After importing, you will be able to see the key listed in your keychain.
- In Kleopatra, right click on Decrypt/Verify in the top menu.
- Select the signature file and click "open."
- A popup will appear with the results. Look for "Good signature from "Pavol Rusnák." This indicates a good, valid signature!
- You might see the text "Undefined trust," or a warning that the key that signed the file is not trusted. If so, this is likely because you have not signed Pavol Rusnak's GPG key with your own GPG key, which lets GPG know that you trust this key.
Trezor Bridge (optional) - Verify PGP Signature on Mac OS
- Download and install GPG Suite (https://gpgtools.org) - this is a Mac utility that installs GPG, a GPG key manager, and configures it all to work across many apps on your Mac.
- For this guide, you do not need to create your own GPG keypair. However, GPG is used a lot and it is good to be familiar with it.
- Verify your download by using the checksum. Checksums are not as secure as GPG signatures, but we don't have GPG yet! So checksum it is.
- On the download page for GPG Suite (https://gpgtools.org) - hover your mouse over "SHA256." SHA256 is the hashing algorithm used to generate the checksum.
- Open the terminal app, found in Applications -> Utilities -> Terminal and run this command, but don't hit ENTER yet!
- shasum -a 256
- Open the folder containing GPG Suite, and drag and drop the application in the terminal - this will automatically fill in the rest. Now hit Enter!
- Your terminal will generate the sha256 checksum. Compare the result to the result on https://gpgtools.org when hovering over sha256.
- Now that you have confirmed that GPGTools is secure, Open GPG Keychain, and import Pavol Rusnak's PGP key that you just downloaded.
- Open your downloads folder, and right click on the Trezor Bridge OSX executable file (.dmg).
- Look for services -> OpenPGP: Verify signature of File and click on it
- A pop up will appear with the results. Look for "Signed by Pavol Rusnak." This indicates a good, valid signature!
- You might see the text "Undefined trust," or a warning that the key that signed the file is not trusted. If so, this is likely because you have not signed Pavol Rusnak's GPG key with your own GPG key, which lets GPG know that you trust this key.
Trezor Bridge (optional) - Verify PGP Signatures on Linux
- Open a terminal and $ cd into your Downloads folder, or whatever folder contains the Trezor Bridge download and Pavlo's GPG signature.
- Import Pavlo's GPG key by running the following commands:
- gpg --import keyname.asc # the name of the saved file
- Verify the Trezor Bridge download by running the following command:
- $ gpg --verify trezor-bridge*.deb # for Debian-based systems
- $ gpg --verify trezor-bridge*.rpm # for RPM-based systems
- You should see good signature from Pavol Rusnak
- Now you can install Trezor Bridge:
- $ sudo apt install /path/to/treorbridge.deb # For Debian-based systems
- $ sudo rpm -i /path/to/trezorbridge.rpm # For RPM-based systems
Install Trezor Model T Firmware
After Trezor Wallet recognizes your Trezor Model T, the first action it will take is to install firmware on your device. Your Trezor Model T ships with no firmware installed. This is by design, and is a security feature. By installing the firmware at device setup, you prevent running outdated firmware.
Warning: If you receive a Trezor Model T and it already has firmware, it is not recommended to use it. Instead, Satoshi Labs wants you to contact them.
- Click on Install Firmware to begin installing the Firmware.
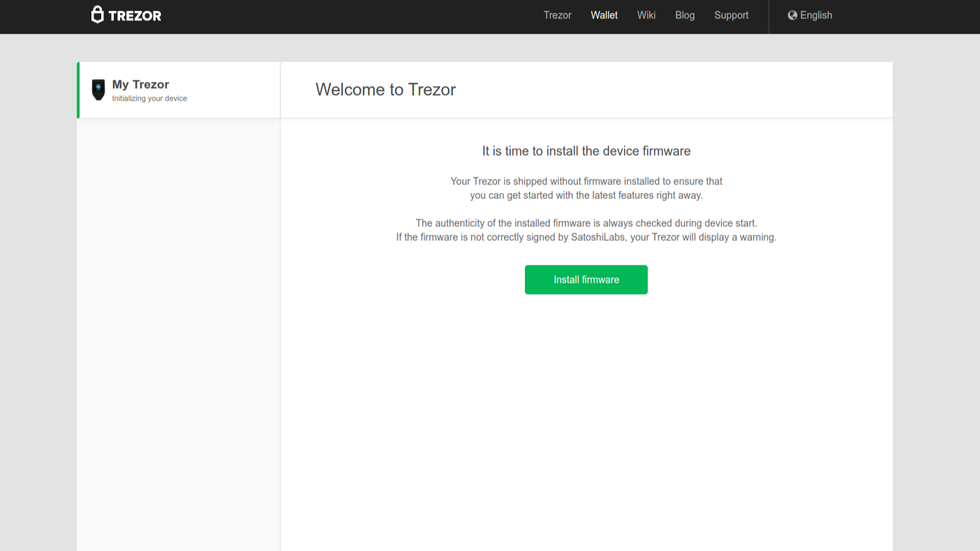
Click on install firmware
Trezor Wallet Creation
When the firmware is finished installing, you will be greeted with "Welcome to Trezor." This is the beginning of the wallet creation process.
- Two options appear on the screen:
- Create a new wallet
- Recover an existing wallet
- Select Create a new wallet by clicking on the green Create Wallet button.
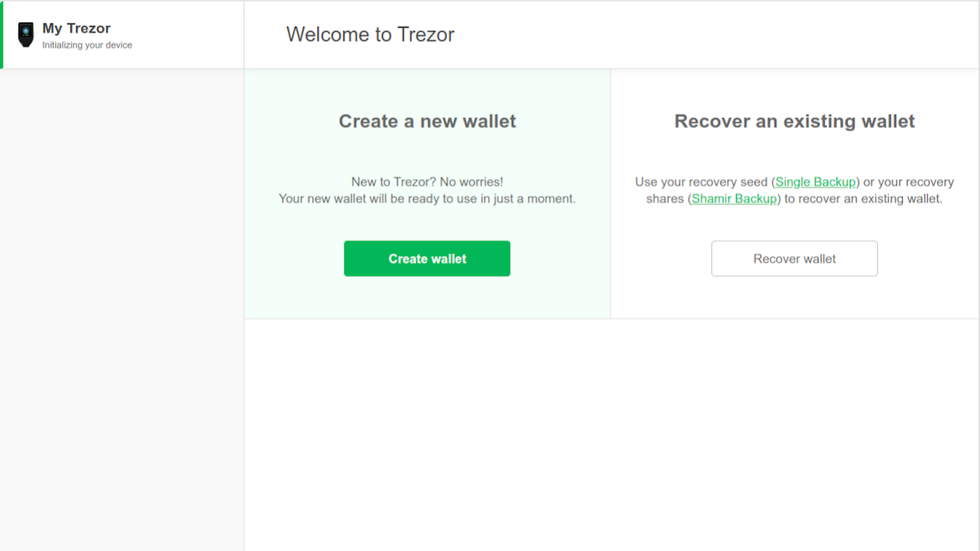
Create wallet
Next, Trezor wants to know how we would like to create our wallet. We are presented with two options:
- Create with Single backup
- Create with Shamir backup
- Click the green button "Create with Single Backup."
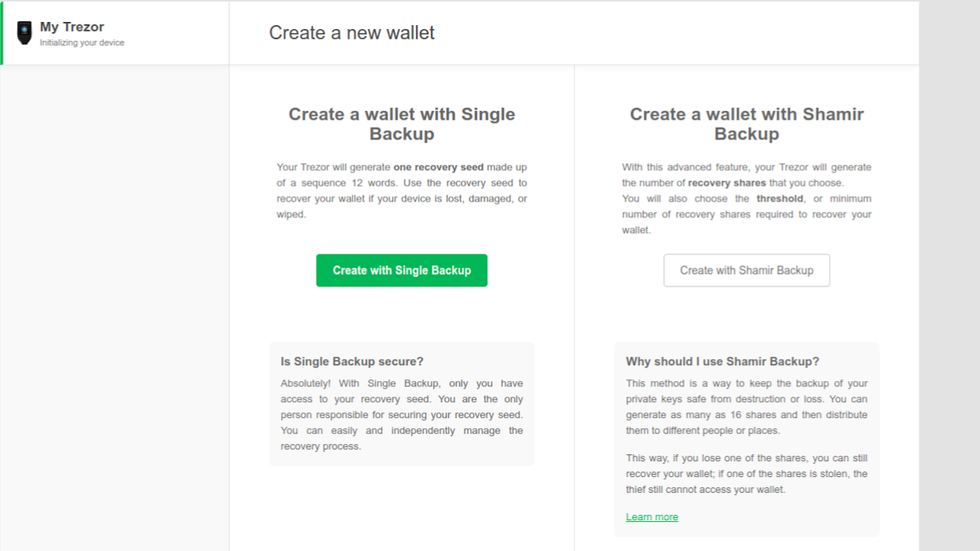
Create with Single Backup or Shamir Secret Sharing
Create with Single Backup
The following instructions are for creating a wallet with a Single BIP39 backup.
If you want to create a wallet using Shamir's Secret Sharing, skip this section.
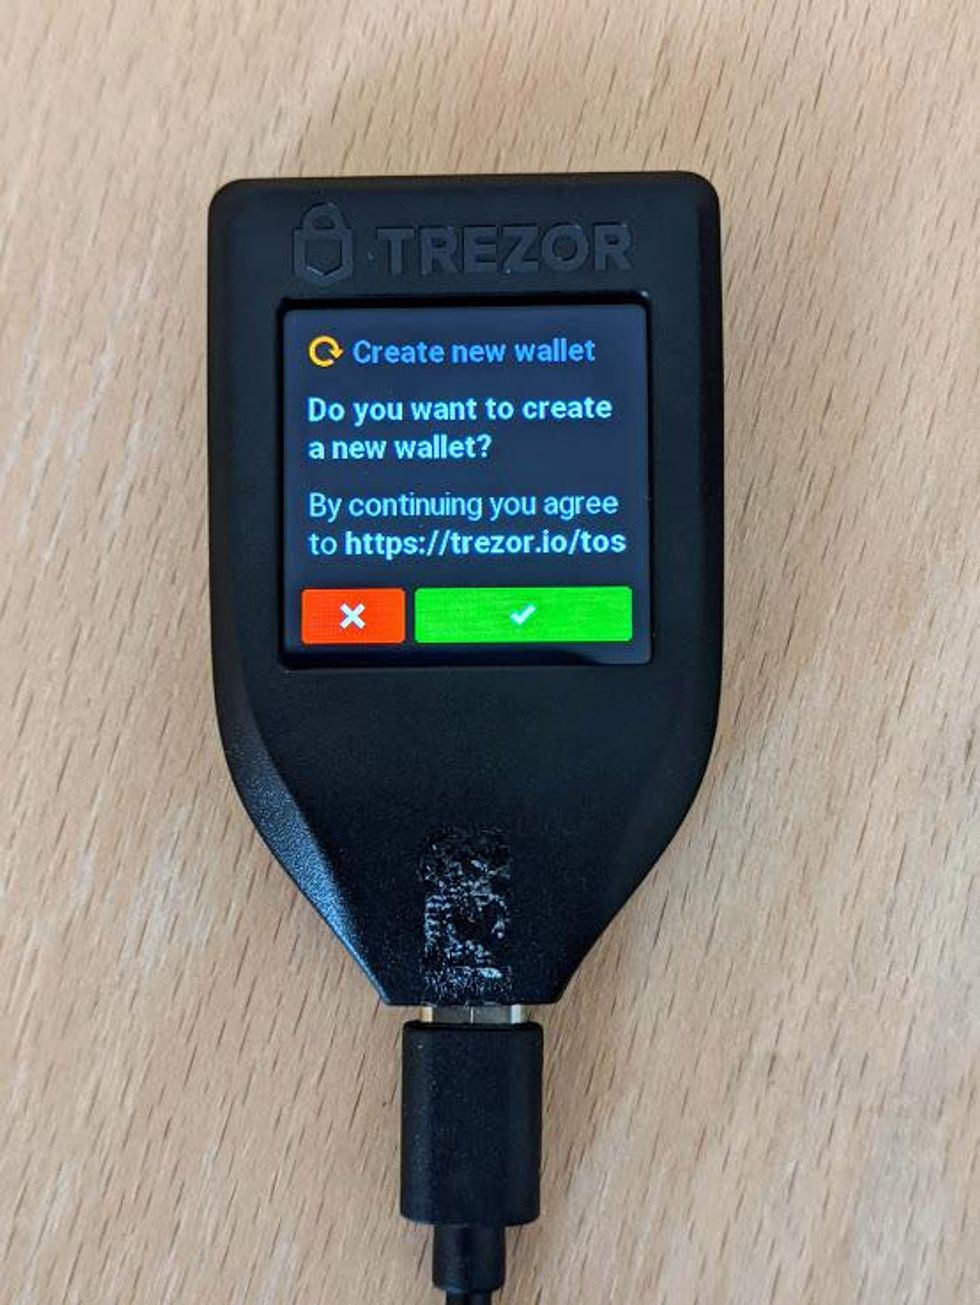
Accept Terms of Service
Before proceeding, you will need to accept the Terms of Service. A pop-up will appear in Trezor Wallet asking you to confirm the Terms of Service by clicking on Confirm on your Trezor Model T.
- Turn your attention to your Trezor Model T, and tap on the green checkmark on the touchscreen to accept the Terms of Service.
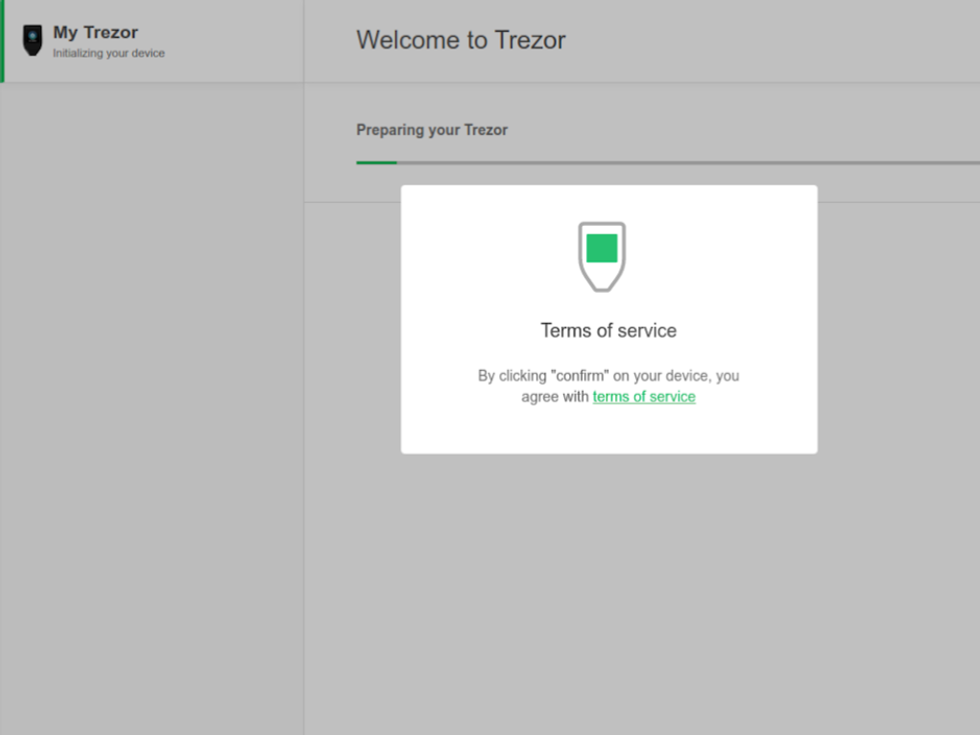
Terms of Service
Create a backup
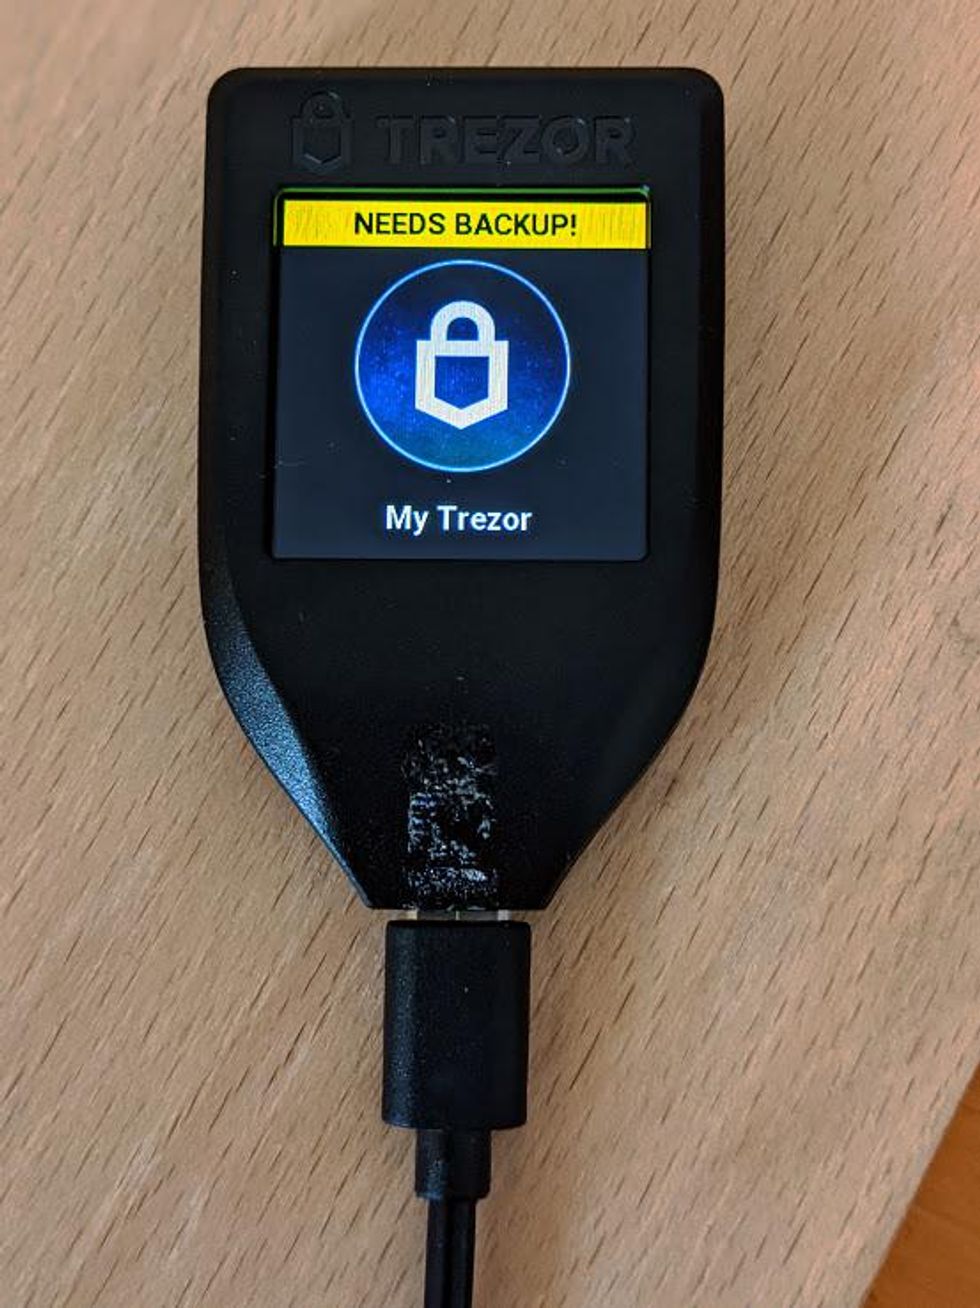
After accepting the terms of service, your Trezor will initialize your wallet. When this process is done, you will notice a yellow bar on the top of the touchscreen that says "Needs Backup."
- Return your attention to Trezor wallet, and click on the orange "Create a backup in 3 minutes" button.
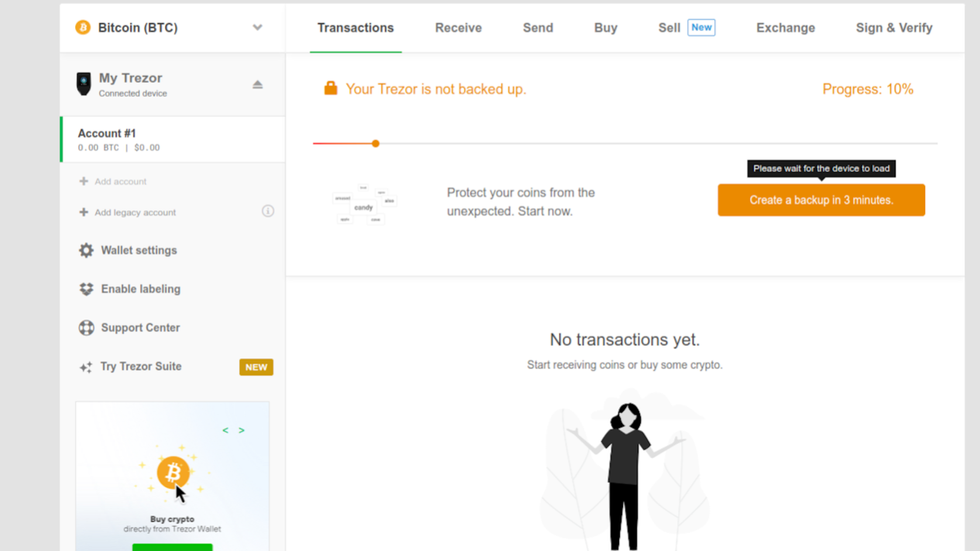
Create a backup in 3 minutes
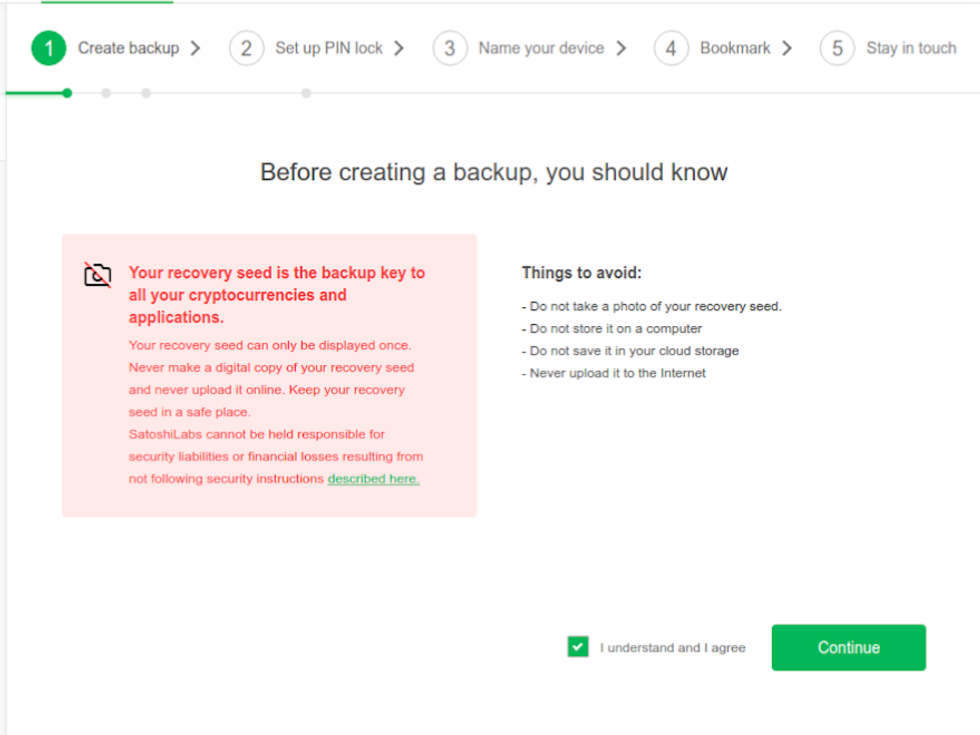
Before beginning the backup process, Trezor Wallet displays some important information about your seed phrase (they call it the "recovery seed." Read all of the information listed; it will only take a minute. The information mirrors what the Guides listed here on the Vault12 Learn site advise about best security practices.
Also, take notice of the steps listed on the top of the popup. These are the security configuration steps Trezor Wallet is going to walk you through in setting up your device. They are as follows:
- Create backup
- Set up PIN lock
- Name your device
- Bookmark
- Stay in touch
- Read the security best practices overview about backing up seed phrases.
- Check the "I understand and I agree" checkbox.
- Click on the green button that says "Continue."
Good security information
Finish backup on your Model T
Trezor Wallet will be displaying a popup telling you to complete the backup on your Trezor Model T. This is because the rest of the backup process happens on your device.
Here is a high-level overview of the backup process on your device:
- Trezor Model T is going to display your 12-word recovery seed on the touchscreen.
- You will write down your 12-word recovery seed.
- Trezor Model T will quiz you on 3 random words, asking you to select the correct word.
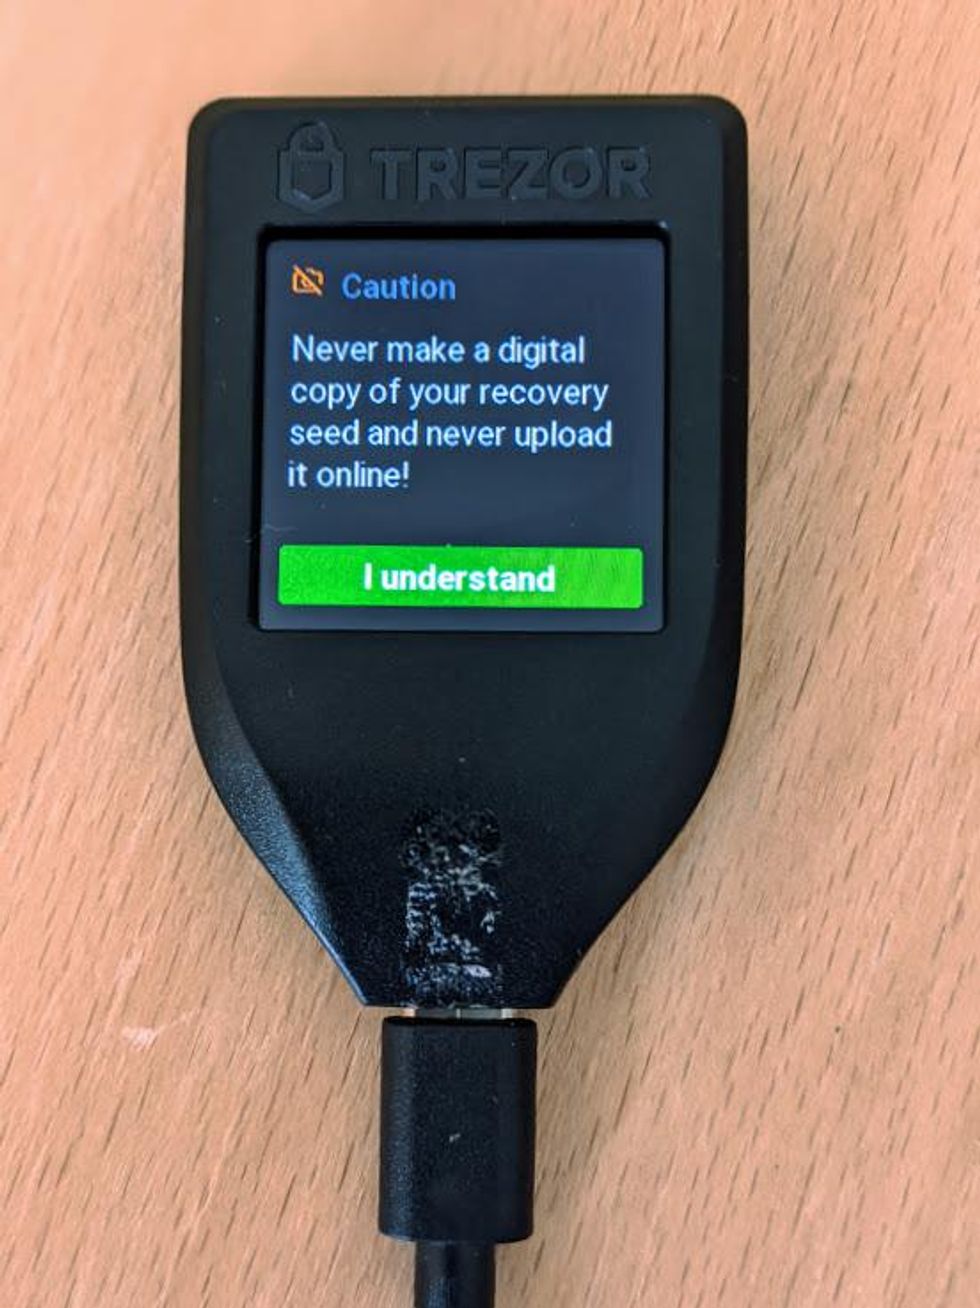
Don't make digital copies of your recovery seed
Write down your recovery seed
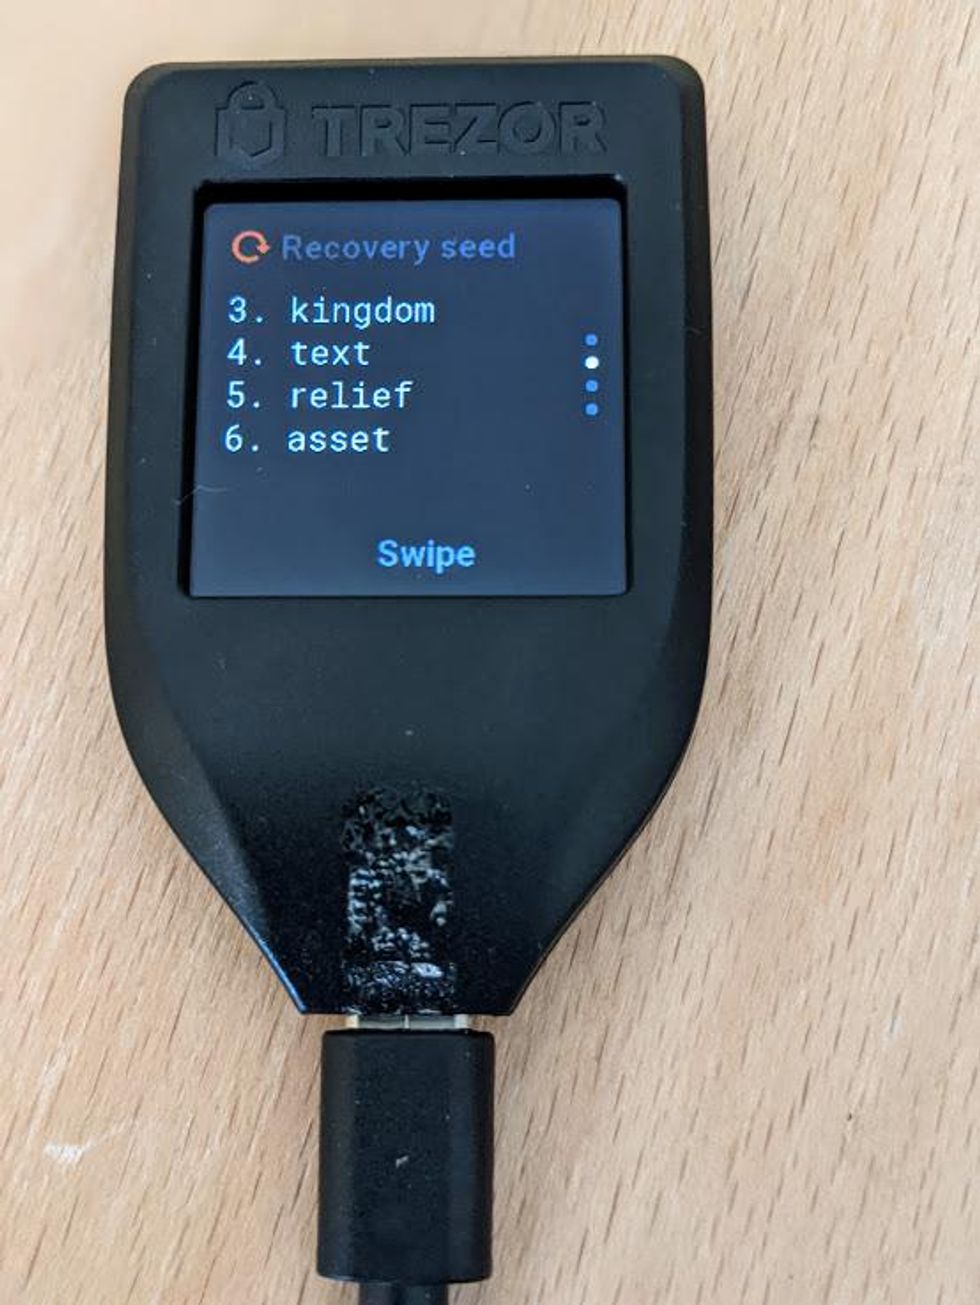
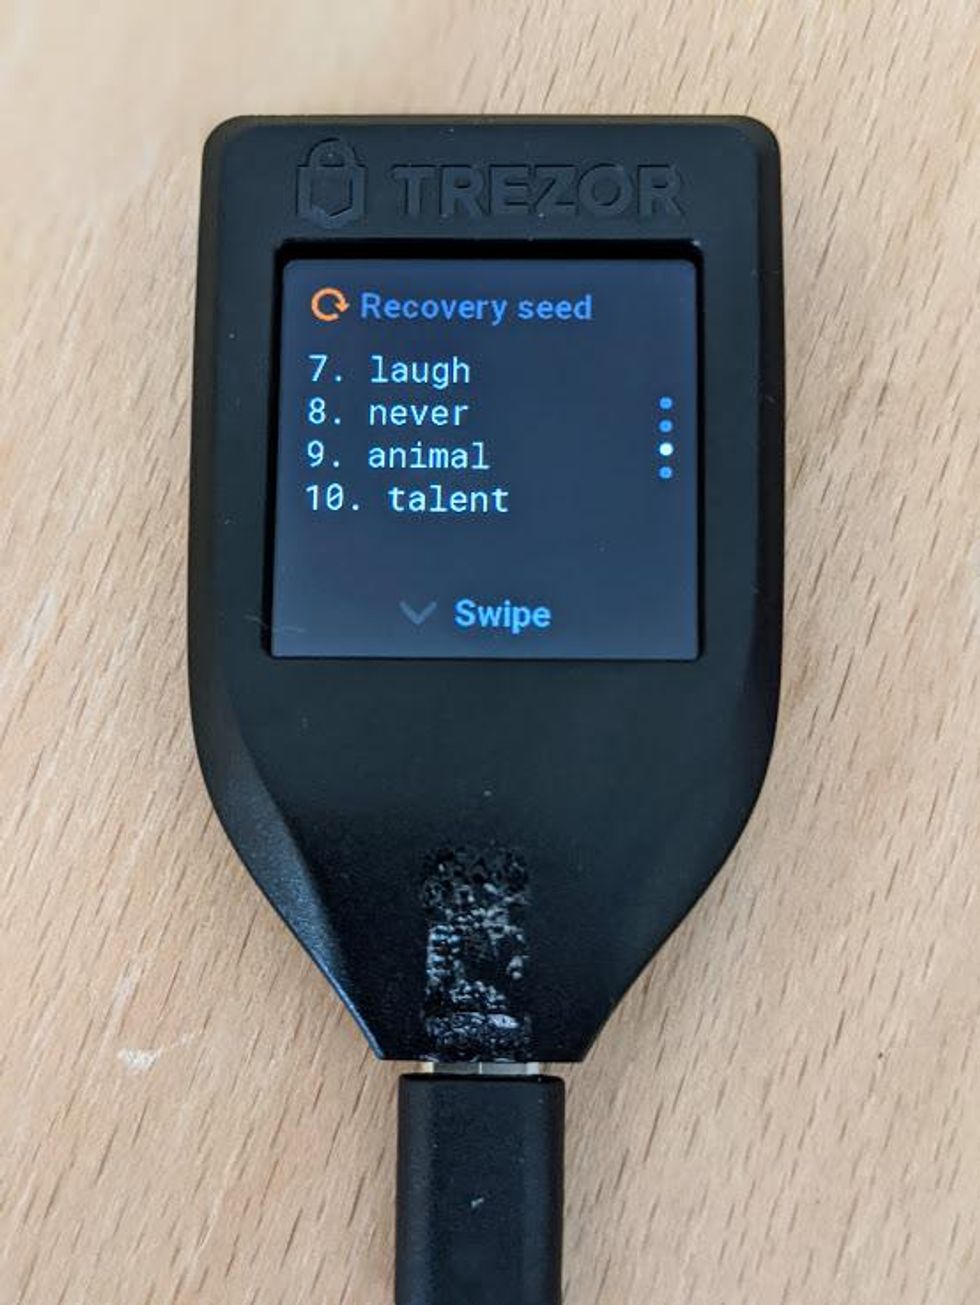
- Your 12-word recovery seed will now be displayed on the touch screen.
- In order to see all the words, you will have to swipe in a fashion similar to smart phones. You will notice the arrow says Swipe down, but you really have to swipe up to go down.
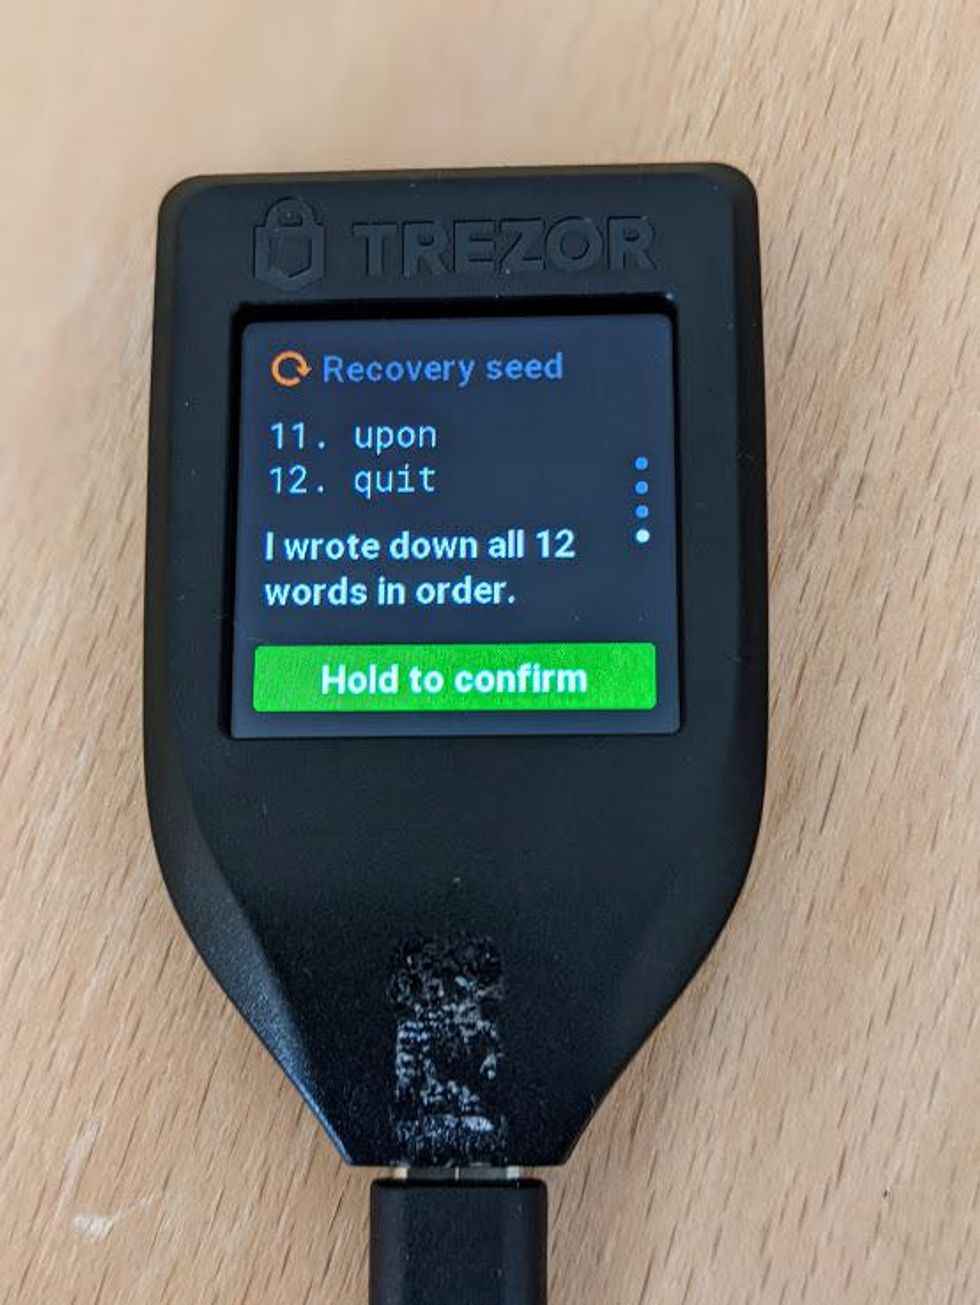
- Write your recovery seed down on a piece of paper and when you get to the last word you will see "Hold to confirm."
- Press and hold on "Hold to confirm" to confirm that you have written down your recovery seed.
Writing your recovery seed on paper is not sufficient for long-term backups. Paper is vulnerable to loss, theft, and damage. Your Trezor Model T ships with a "recovery seed booklet" for writing down your recovery seed. However, it is not advised to use this as a long-term method.
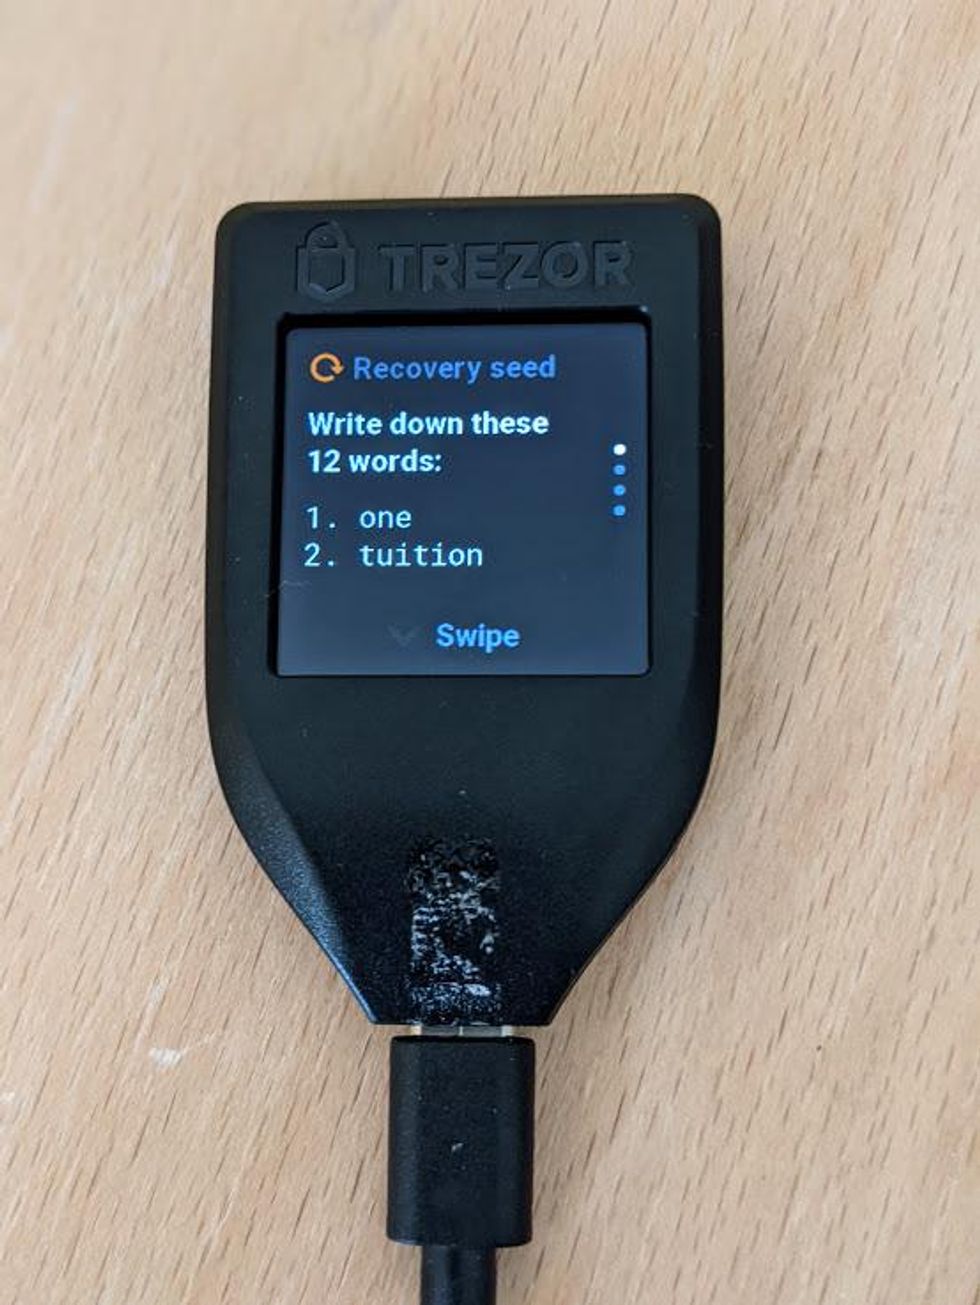
Recovery seed words 1-2
Verify your recovery seed
- Select the correct word from the available choices.
- You will do this for 3 random words.
- When you are finished, a Success message will appear on screen. Tap on the green "Continue" button.
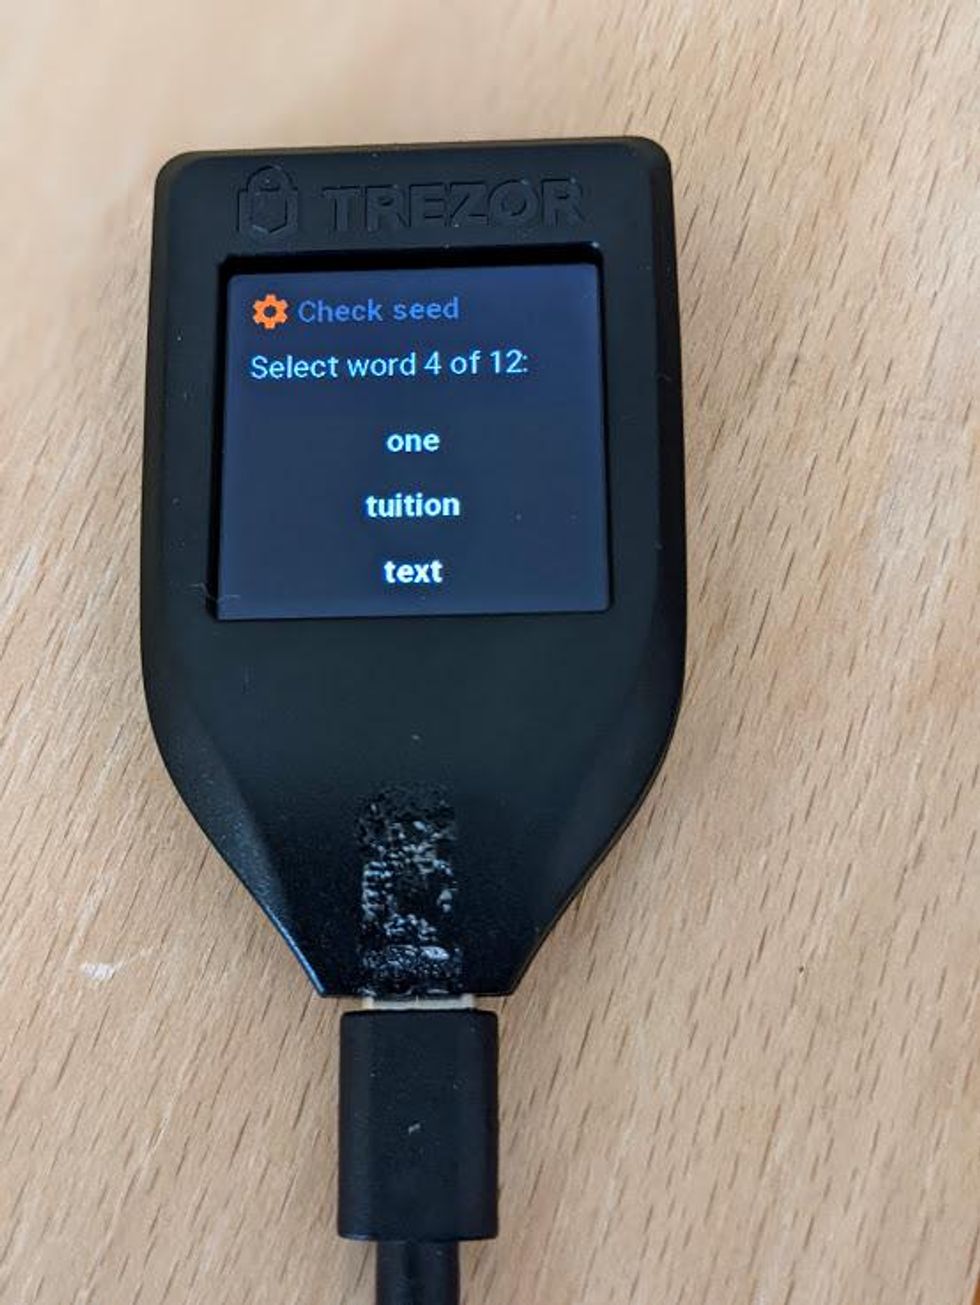
Confirm recovery seed
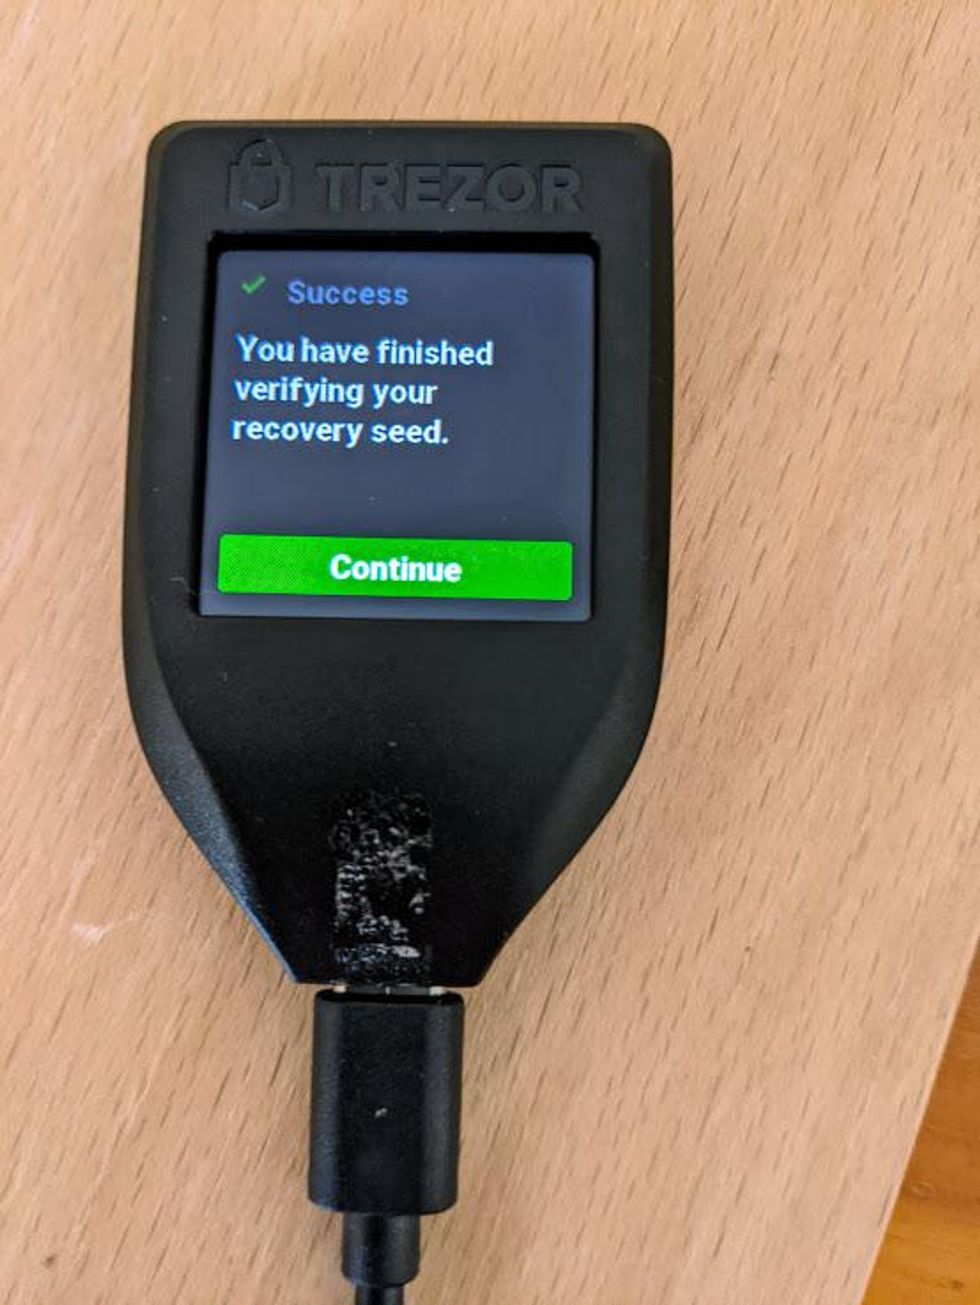
Success! Tap Green button to continue
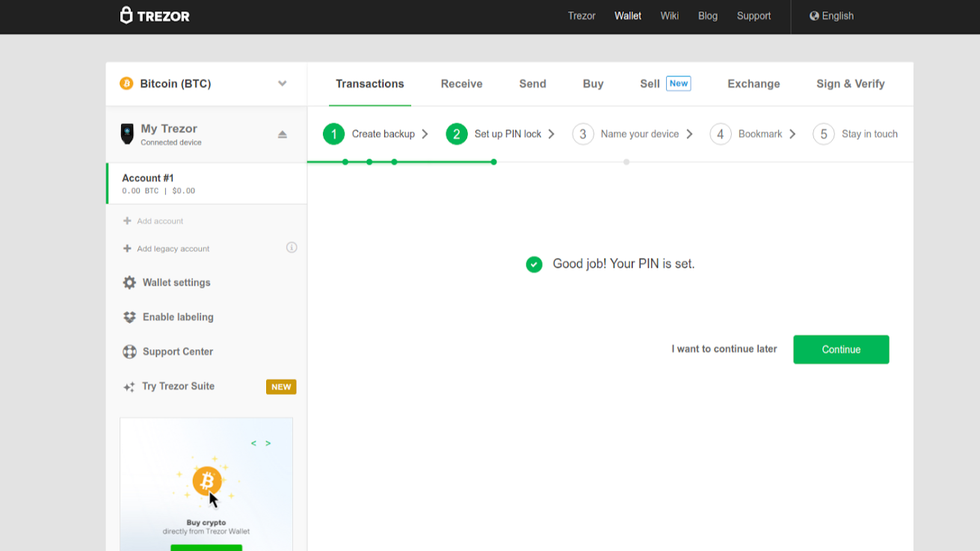
Success
Good job! You have created and backed up your recovery seed. Now it is time to set up your PIN.
Set your PIN
Good work on backing up your recovery seed - it is important!
Now, you will notice that your Trezor Model T still has the yellow bar across the top, but this time it says "PIN NOT SET!"
Your device PIN works as a passcode to protect your device from unauthorized access. Everytime you want to send funds, change a setting, or any significant action, your Trezor Model T will ask you to input your PIN code to the touch screen.
The device PIN can be anywhere from 1 number to 9 numbers. Let's set up our PIN now.
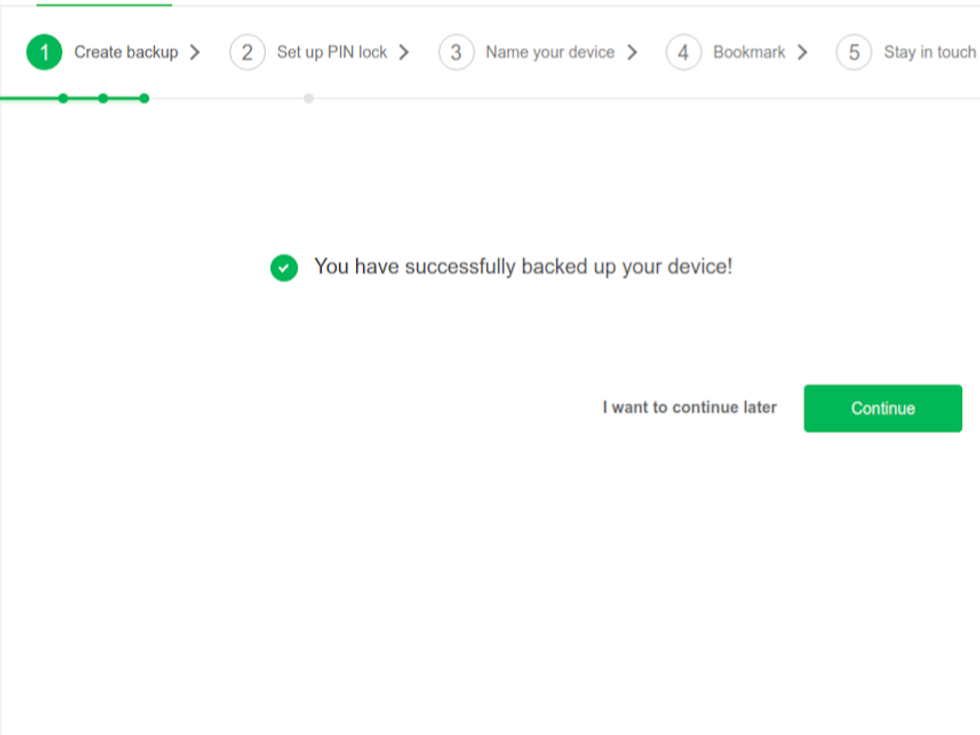
- Focusing your attention back to the Trezor Wallet, you should see a "Success" message confirming that you have backed up your seed phrase.
- To setup your PIN, click on the green Continue button.
- After clicking Continue, you will be directed to focus your attention back to your Trezor Model T to set up your PIN.
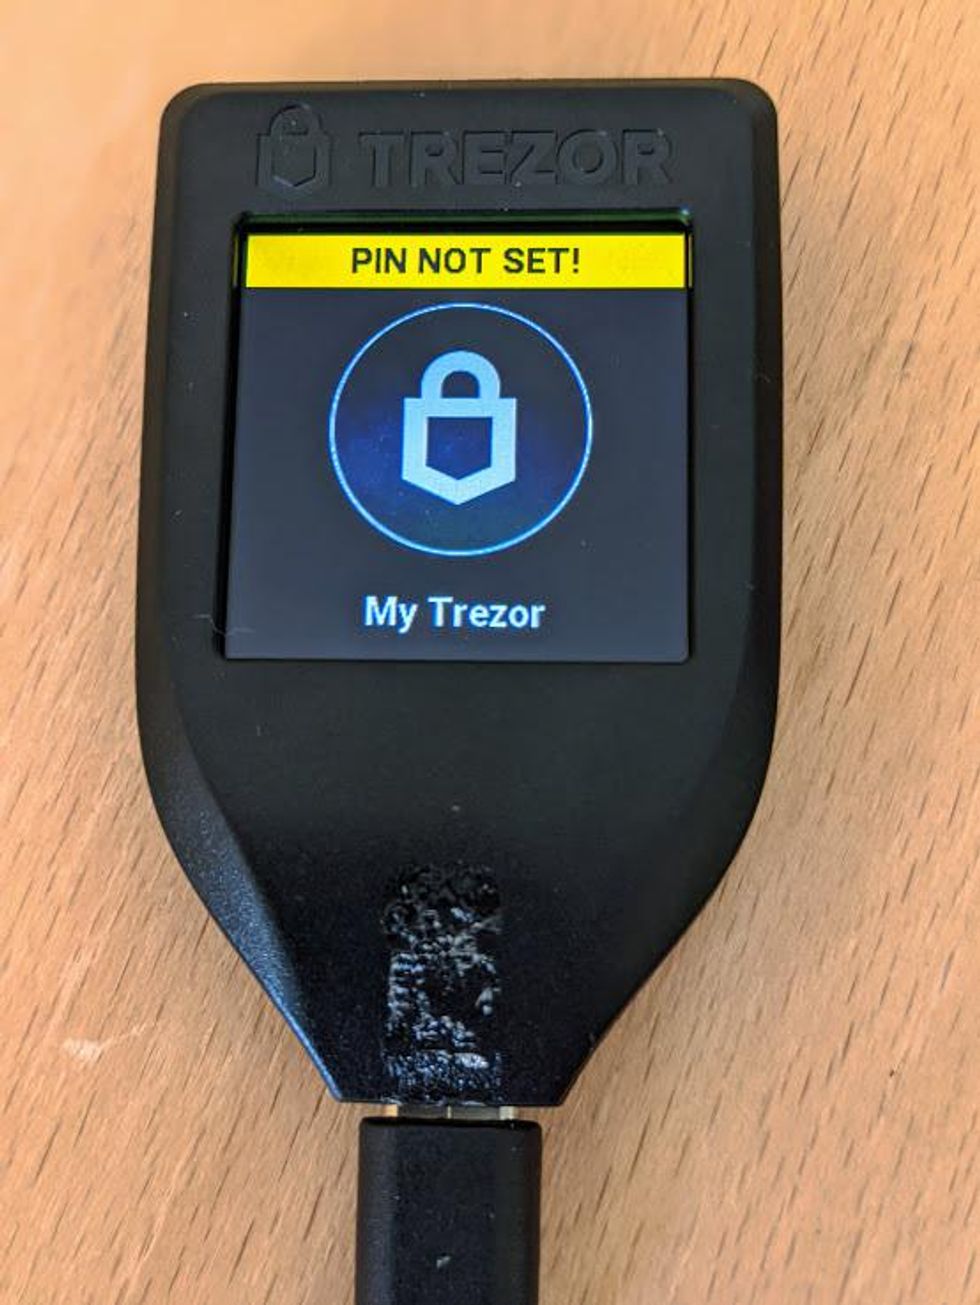
PIN not set
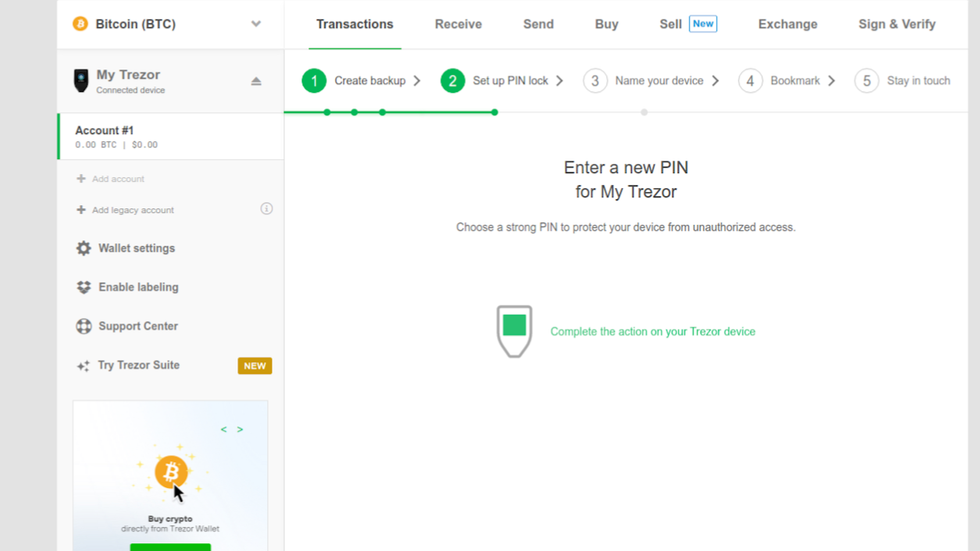
- On your Trezor Model T, the display will be asking you if you want to enable PIN protection. Tap on the green checkmark to confirm.
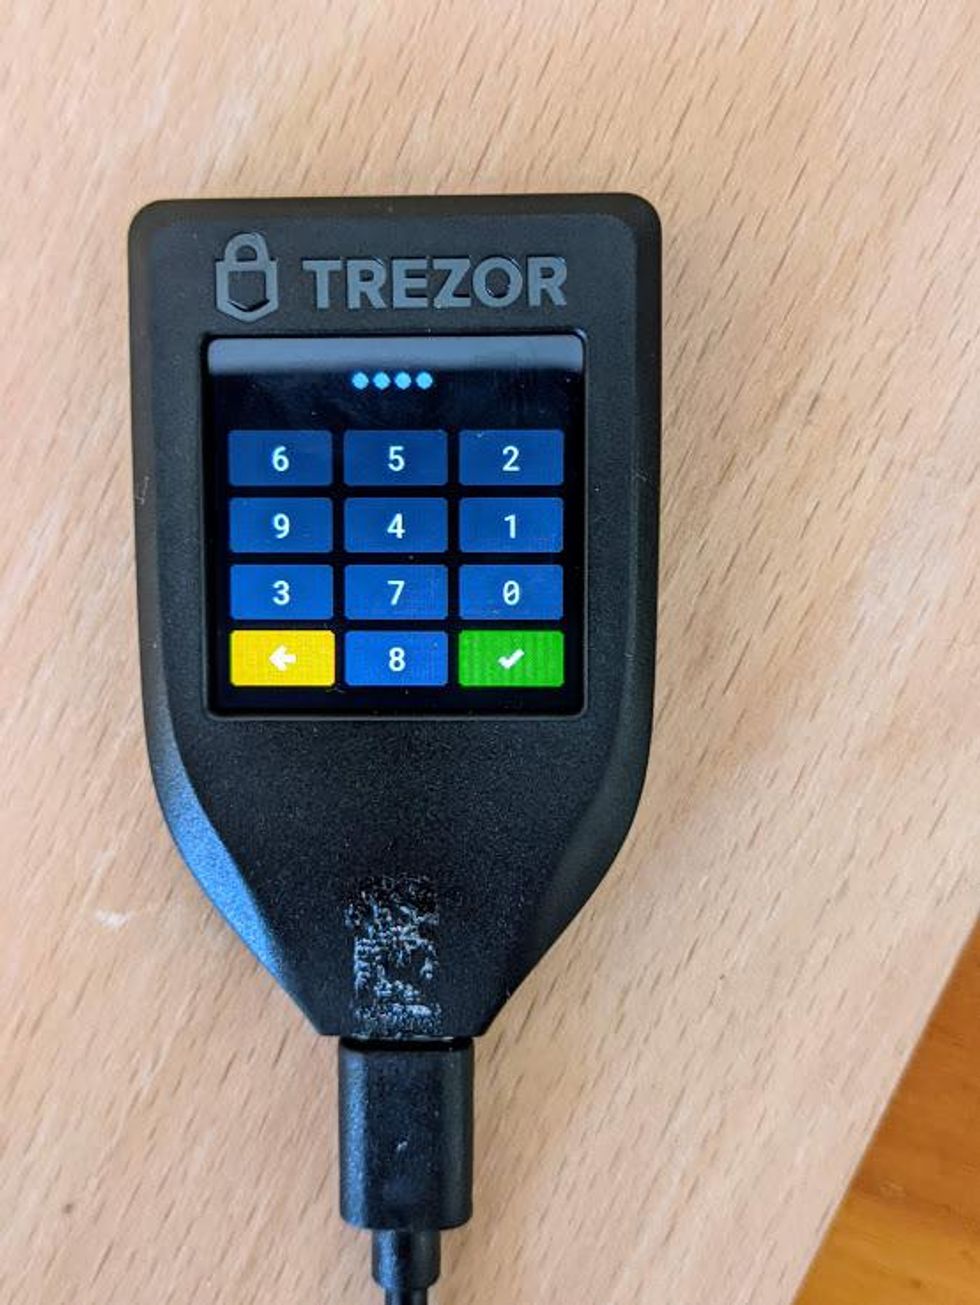
- Displayed on the screen is a keypad with numbers 0-9. The numbers are displayed in a random order on the screen.
- Using the touchpad, create your PIN. The maximum length of your PIN is 9, and the minimum length is 1.
- When you have created your PIN, tap on the green checkbox.
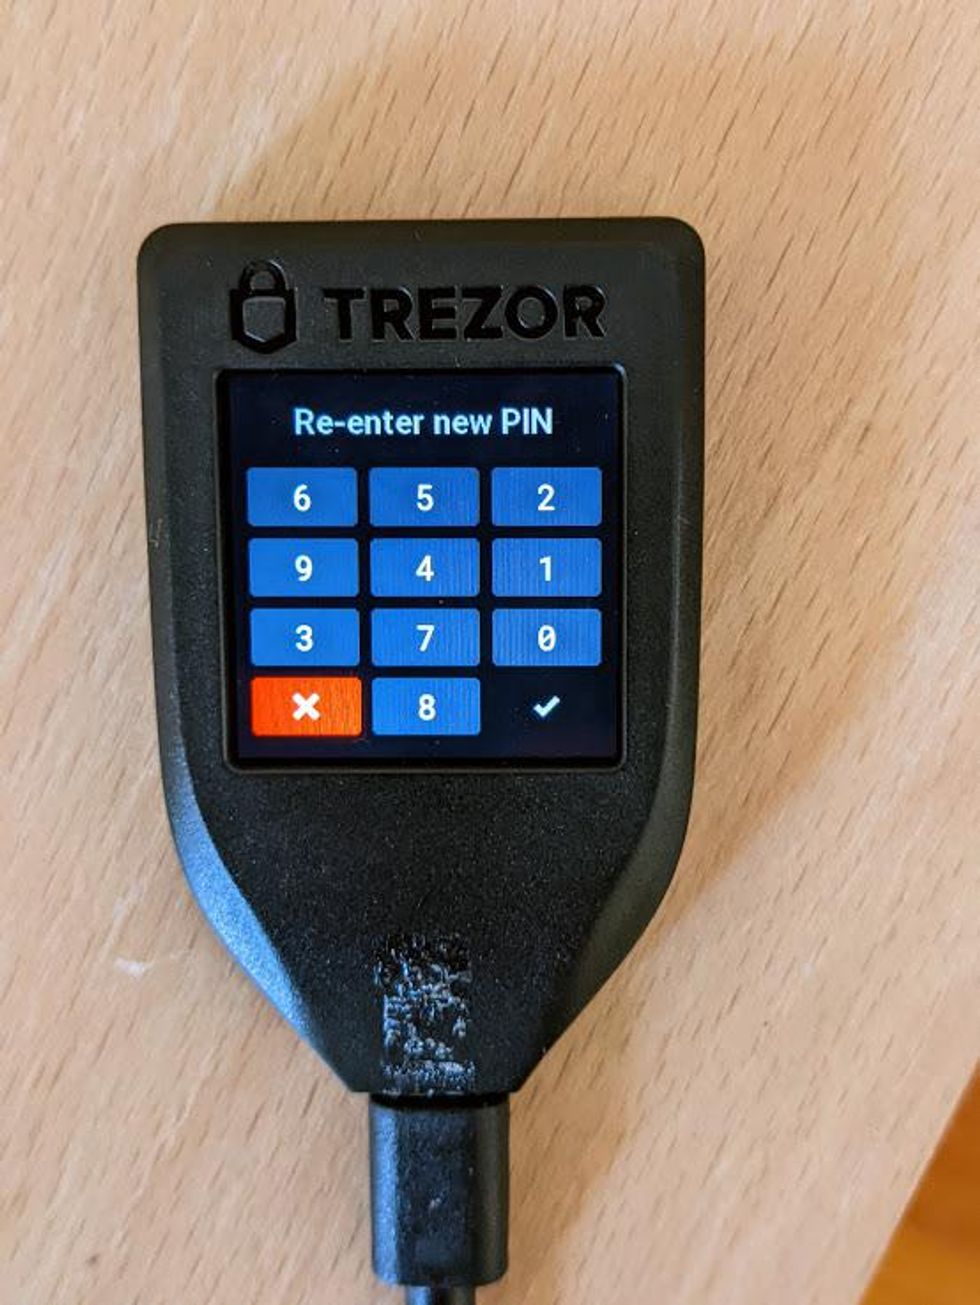
- Re-enter your PIN to verify it. Notice that the layout of the numbers has changed; make sure you select the correct numbers.
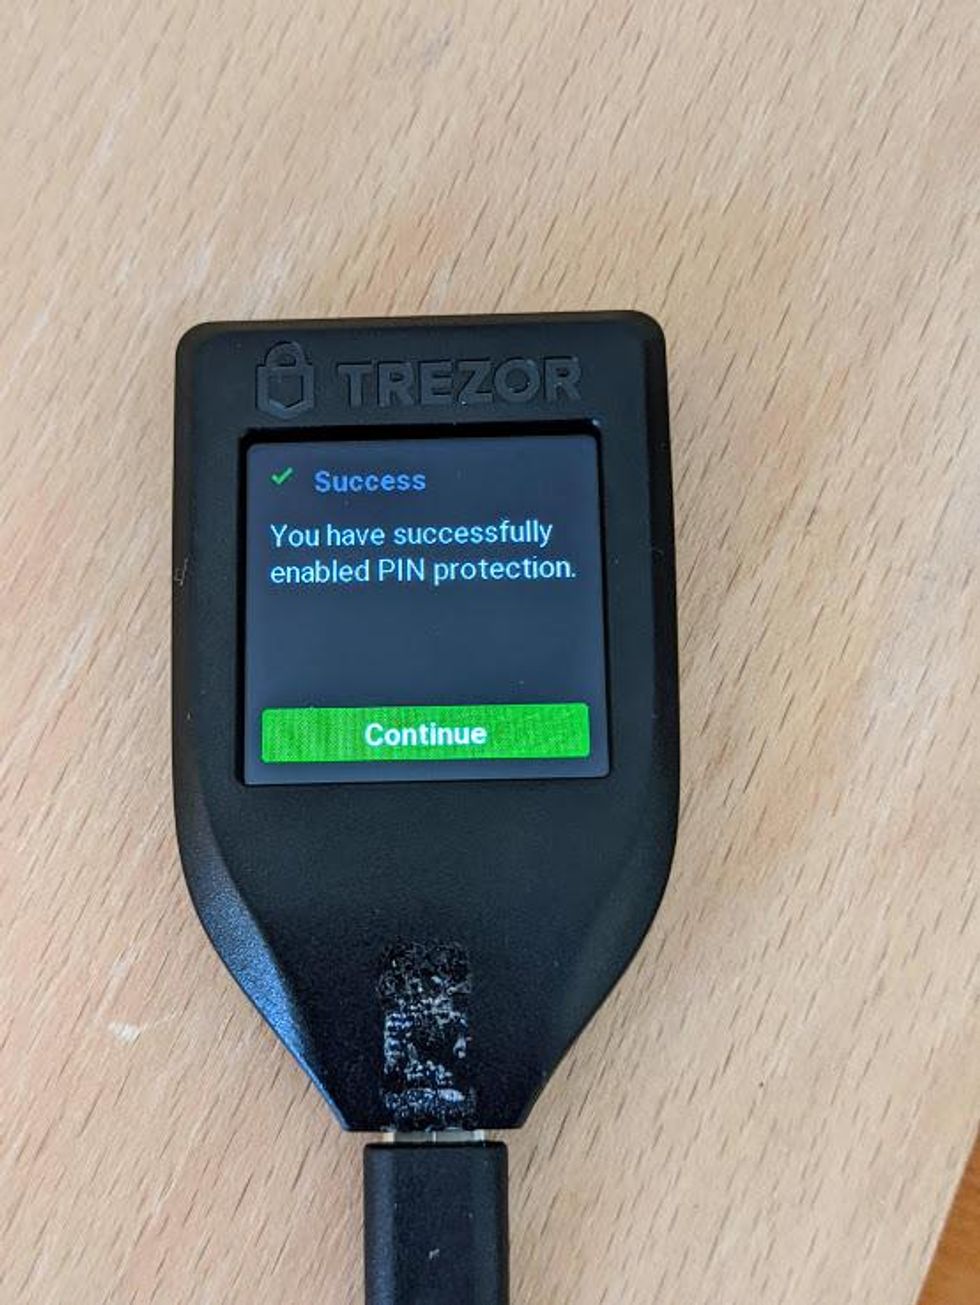
- When successful, your Model T will confirm success on the screen. Tap on "Continue" to proceed.
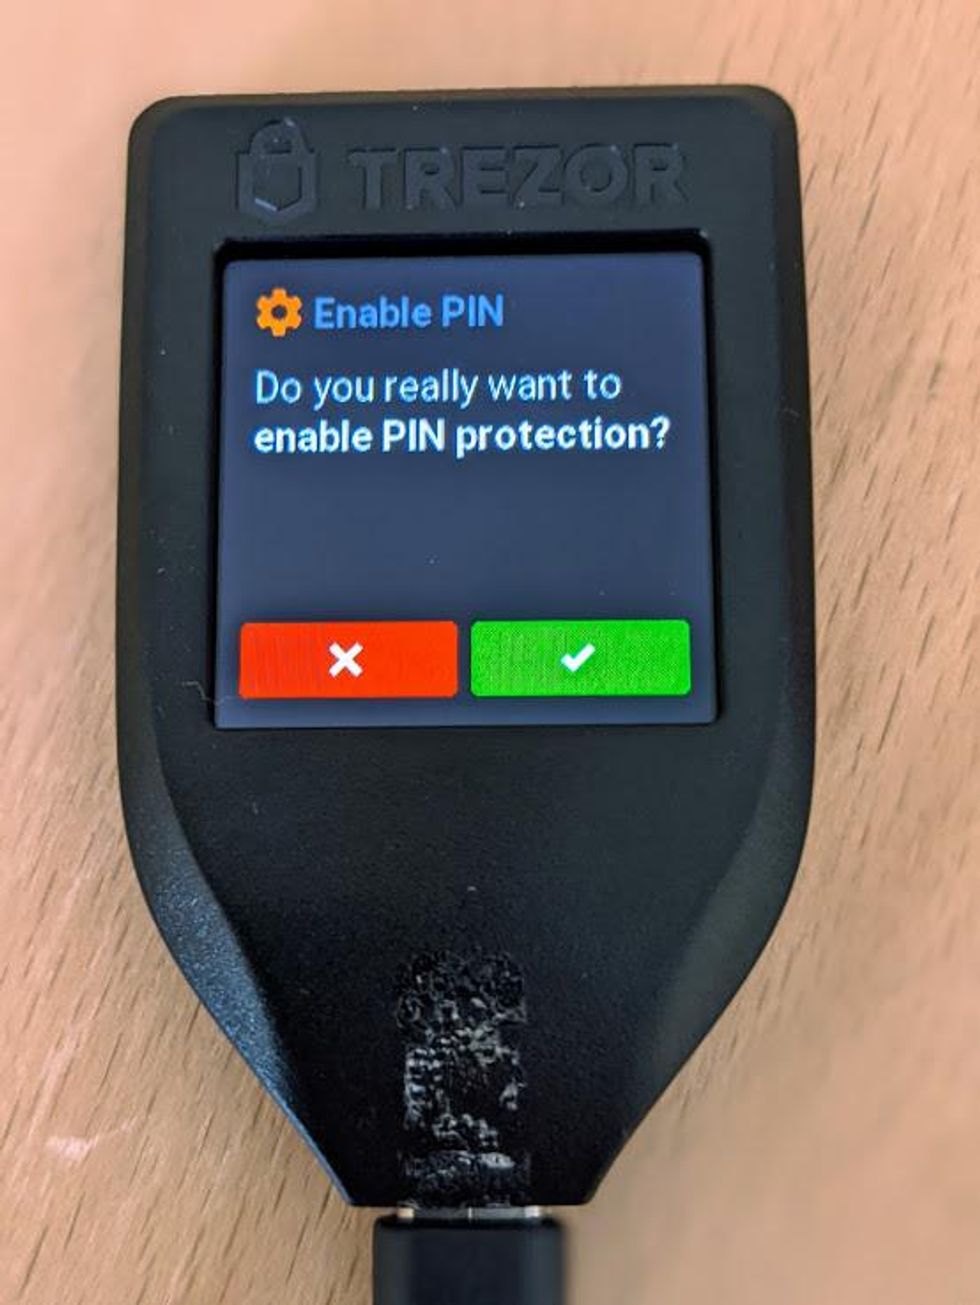
Enable PIN

Congratulations! You have set up all of the security features of your Trezor Model T, and you can safely begin using it. Notice that when you look at your Trezor Model T, there is no yellow bar across the top of the screen with a call to action.
There are, however, a few setup steps remaining in Trezor Wallet. The remaining steps are very simple and will not take long to complete.
- Focus your attention back to Trezor Wallet, and you will see a "Success" message from creating your PIN.
- Click on the green "Continue" button to proceed.
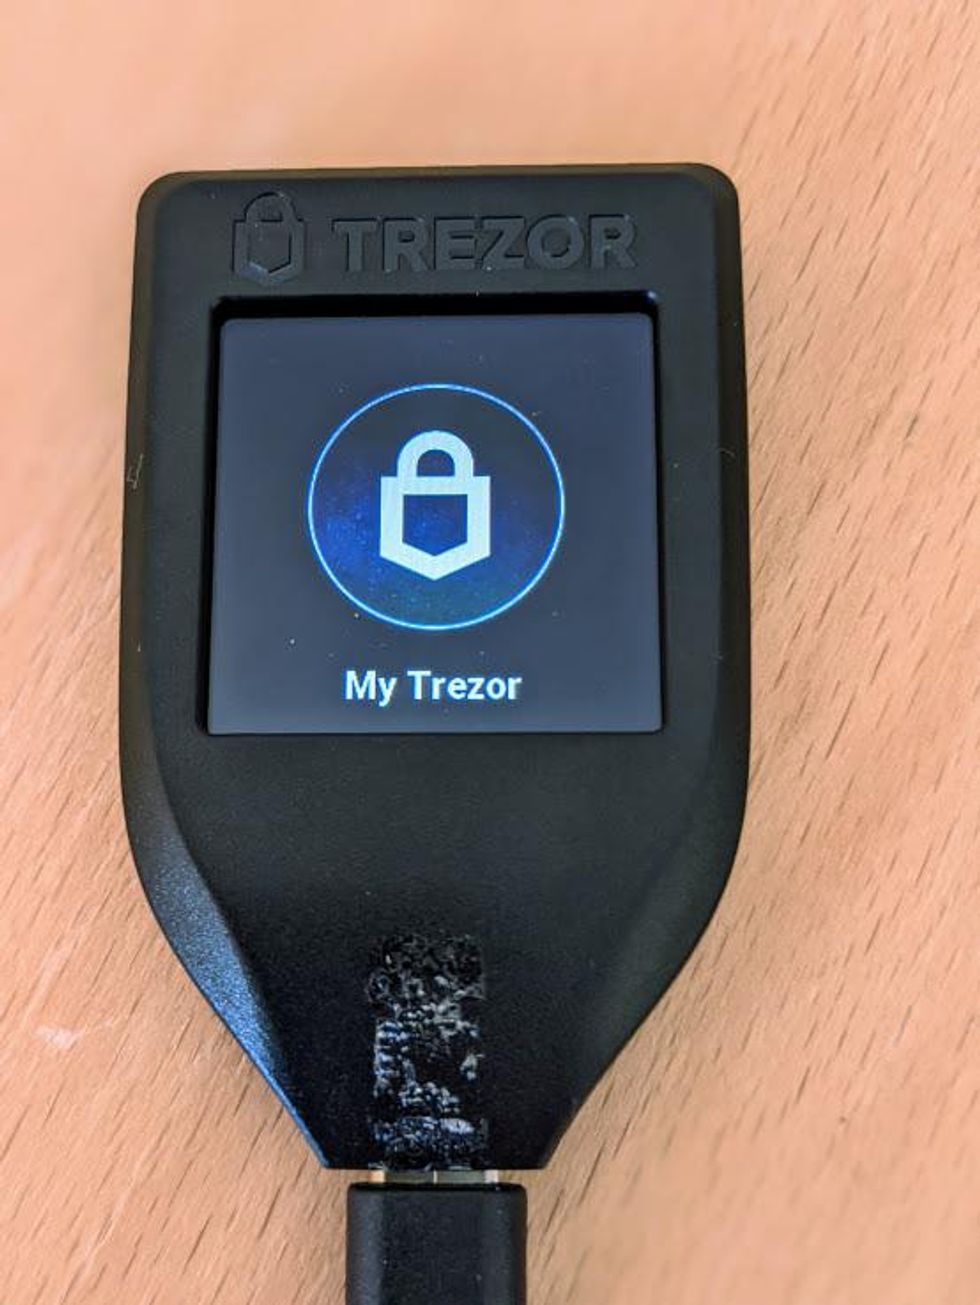
My Trezor is current name of device
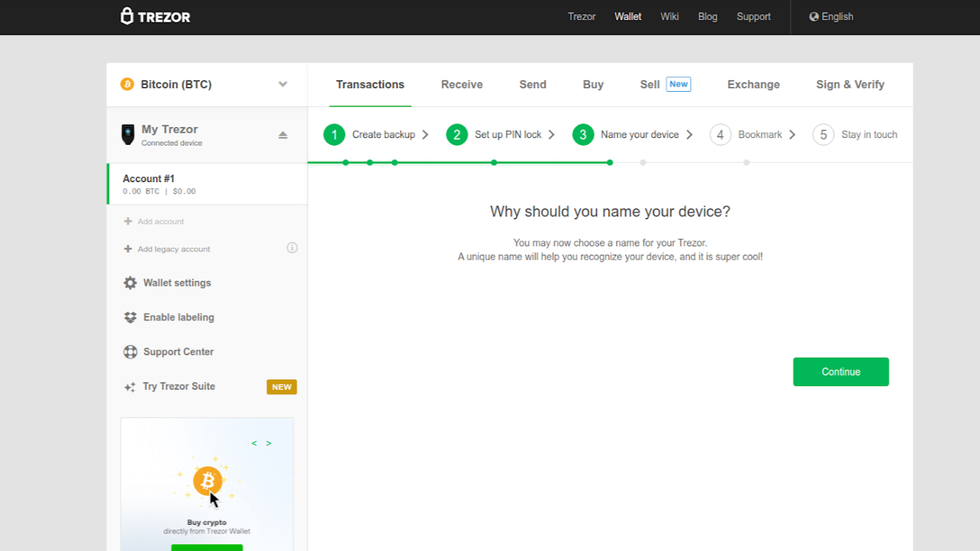
Name your device
The next step is to name your device. The name of your device will appear on your Trezor Model T display underneath the Trezor Logo. Right now, your device is named "My Trezor."
Although this step is technically optional, if you do not name your device, you will see a prompt in your wallet homepage asking you to name your device.
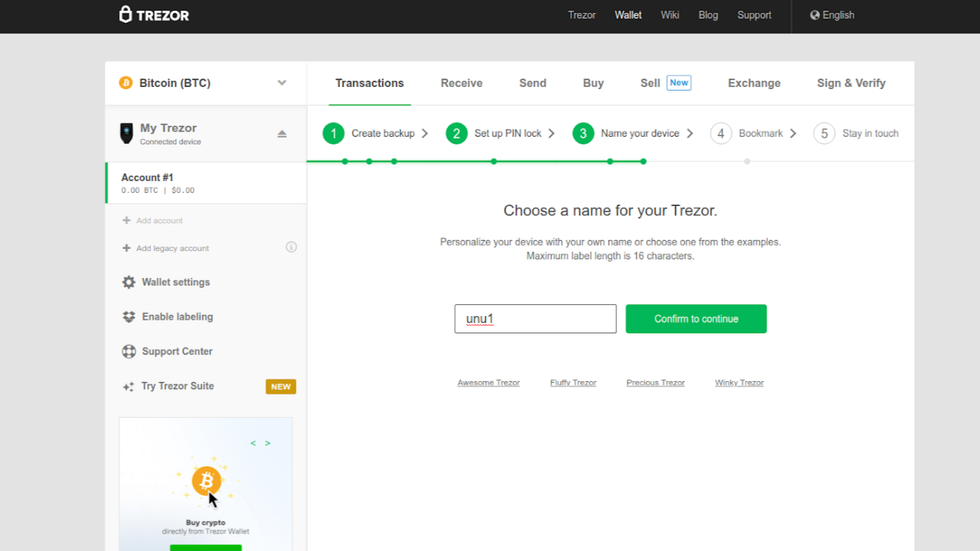
When choosing a name for your Trezor, it is best to choose something uninteresting and nondescript. For example, do NOT select a name such as "My Life Savings," or "Million Dollar Club." For example, we are going to name our Trezor Model T something inconspicuous like "unu1." (This is the initials of Trezor Model T, TMT, but shifted one letter ahead, and for good measure we added the number 1, for wallet 1.)
Why do we do this? It is part of being in a security mindset and taking care of the little things in order to prevent unnecessary risk. Devices can go missing due to loss or theft and end up in the wrong hands.
Consider a situation in which the device was lost, and found by an unethical human. This unethical human plugs in the Trezor Model T and notices a name such as "My Name's Life Savings" or "Million Dollar Club." In this case, the unethical human may decide to track you down and force you to unlock the Trezor and send all your crypto to them.
This situation can likely be avoided by simply naming your wallet something nondescript and not identifiable to you.
- To name your device, click on the green "Continue" button in Trezor Wallet.
- A text area will appear on the screen. Type your device name into the text area.
- Click on the green "Confirm to continue" button.
- Enter your device PIN.
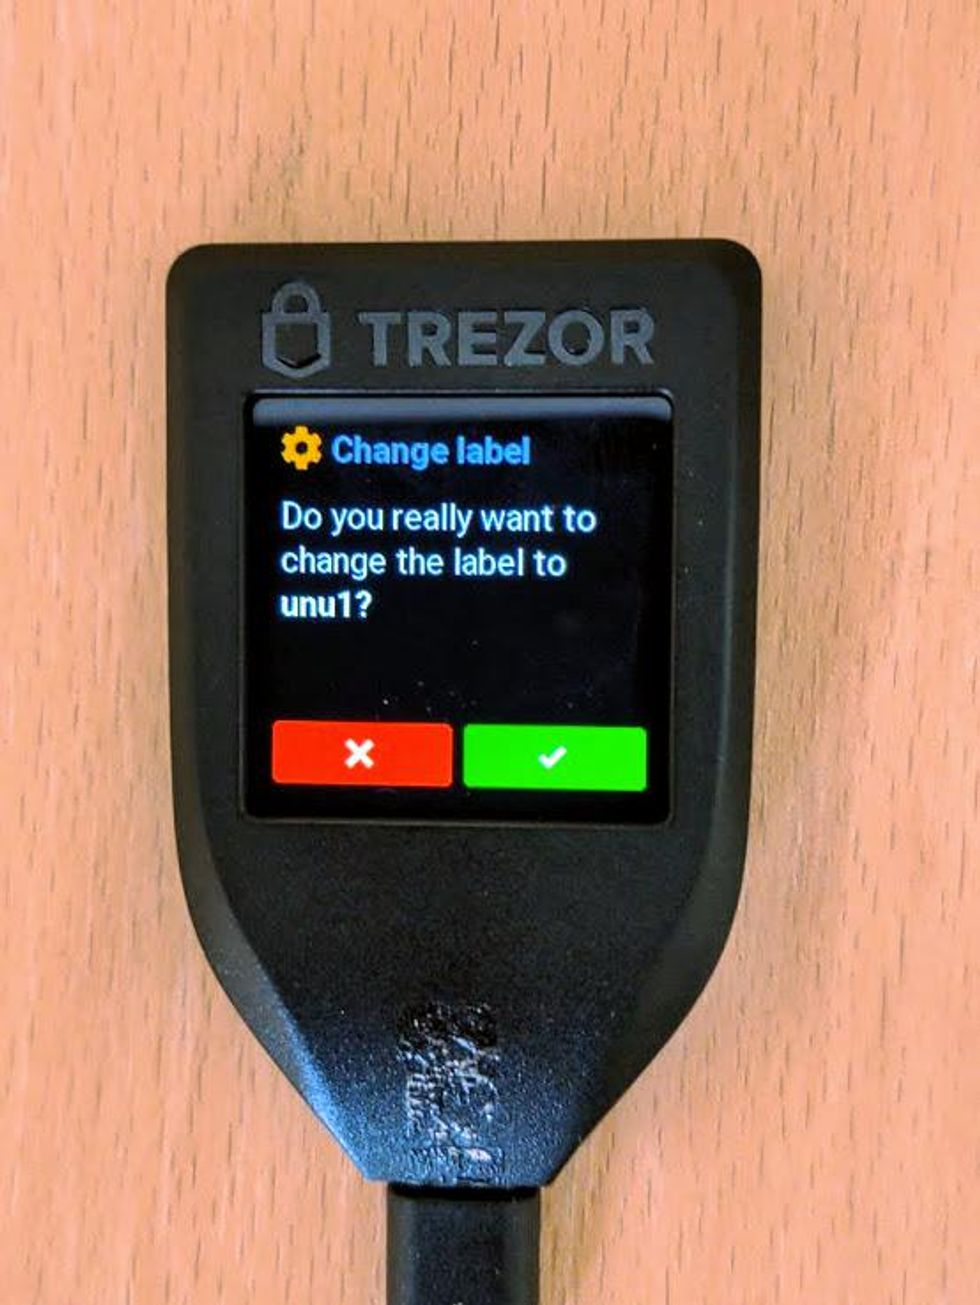
- Your Trezor Model T will ask if you really want to change the name. Tap on the green checkmark to confirm.
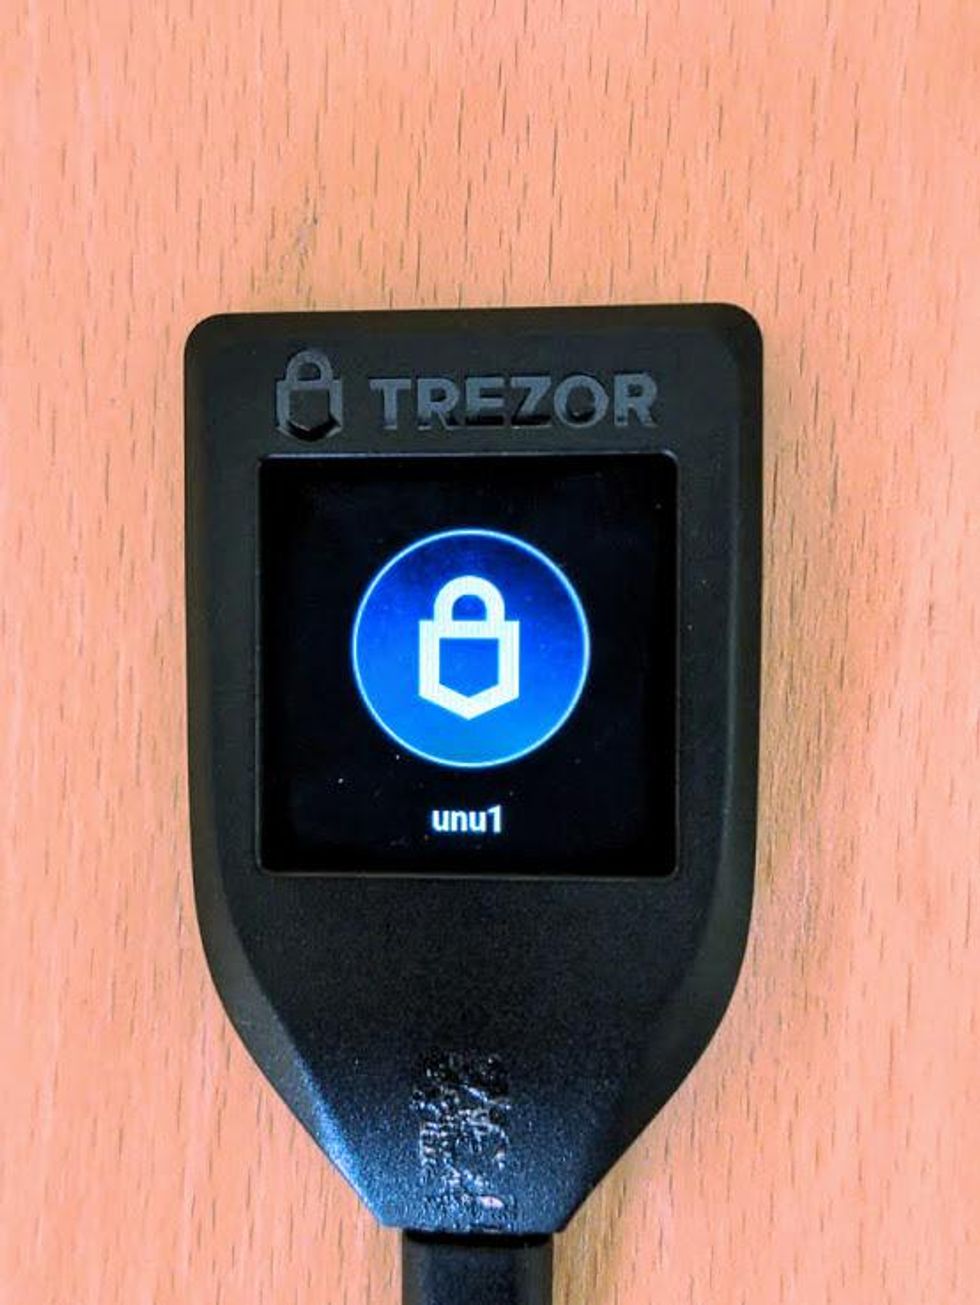
- The name you entered in the text area will now appear under the Trezor logo.
Name device
Bookmark Trezor Wallet
Next, Trezor wants you to create a bookmark in your browser to prevent phishing, since the Trezor wallet is a web-based wallet. This is a great idea. By using a bookmark, you can prevent accidental phishing by making a spelling mistake or going to the wrong URL.
- Press Control+D on your keyboard, or use your browser menu to create a bookmark. Every time you visit your wallet, make sure you use the bookmark.
- When you are finished, click on the green "Continue" button.
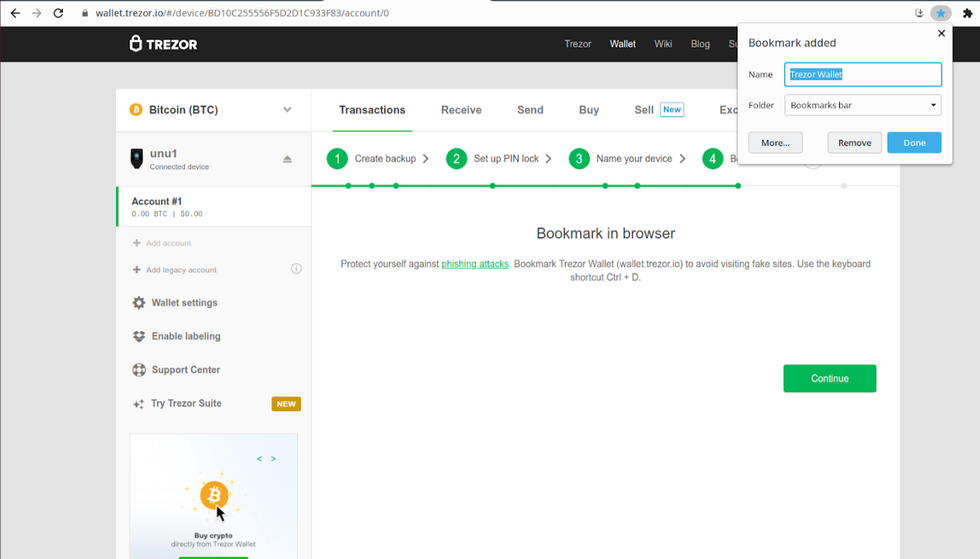
Bookmark Trezor
The last step in the setup flow is a page that lists Trezor's social media pages. To stay updated with Trezor developments, it is a good idea to bookmark these pages.
- Click on the green "Continue" button.
The final page asks you to keep in touch, and reminds you to keep your recovery seed safe. You can view our detailed instructions on backing up your recovery phrase if you want to learn about your available options.
- Click on the green "Finish" button to complete the setup flow.
After you click on the green "Finish" button, Trezor Wallet will prompt you to enter your email information to receive updates from the Trezor team.
This step is up to you if you feel comfortable sharing this information. For privacy protection, it is worth considering the potential impact to you if Trezor's customer contact database ever had a breach and the email list were to get out. If your email address includes your name, then you would have just let the world know that you own a Trezor. This could put you at risk of receiving phishing attacks via email, or advanced social engineering attacks.
If you want to sign up for email, consider creating a secondary email specific for your Trezor with a non-descript name.
Otherwise, skip this step.
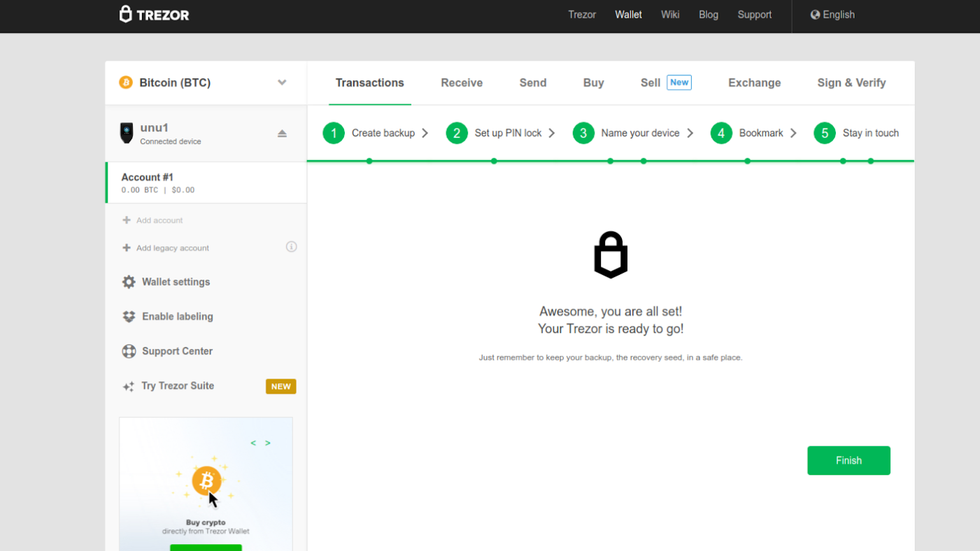
Trezor is set up
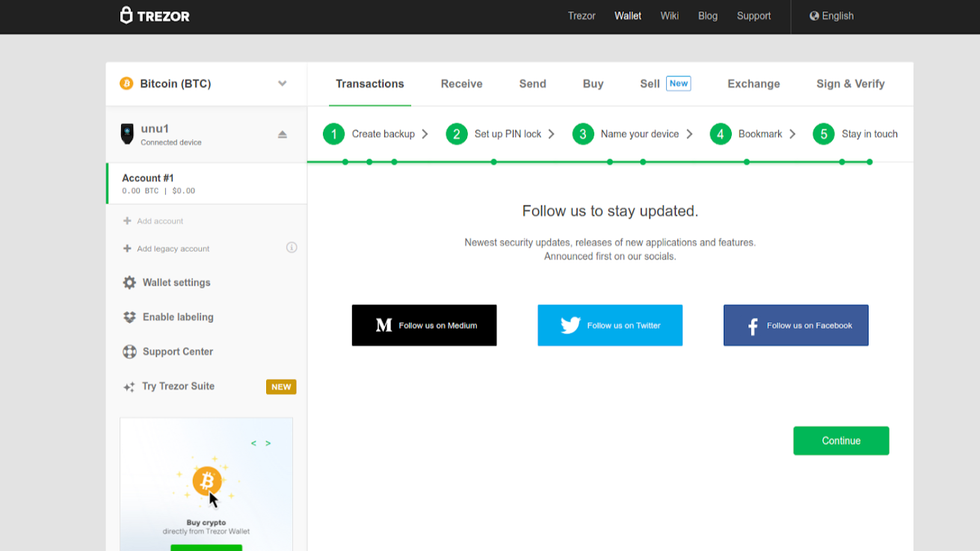
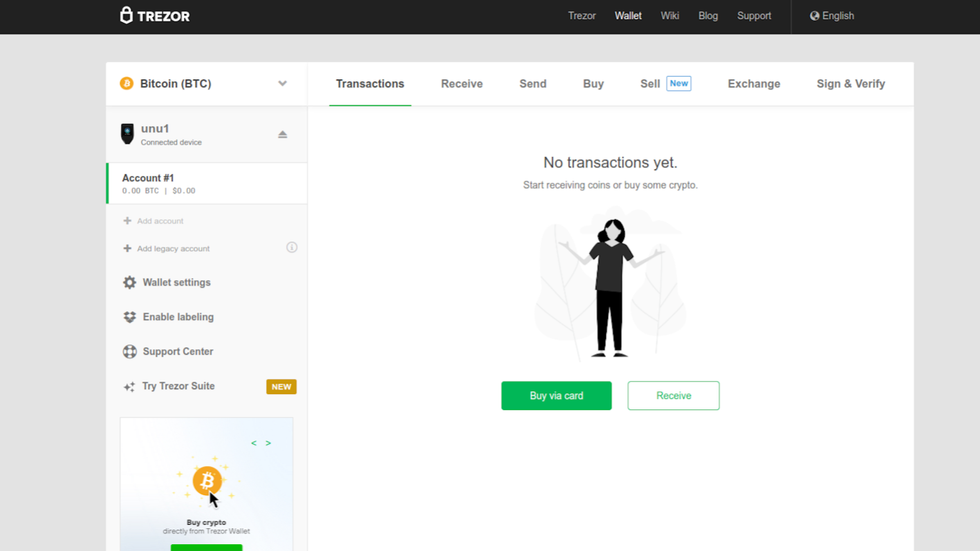
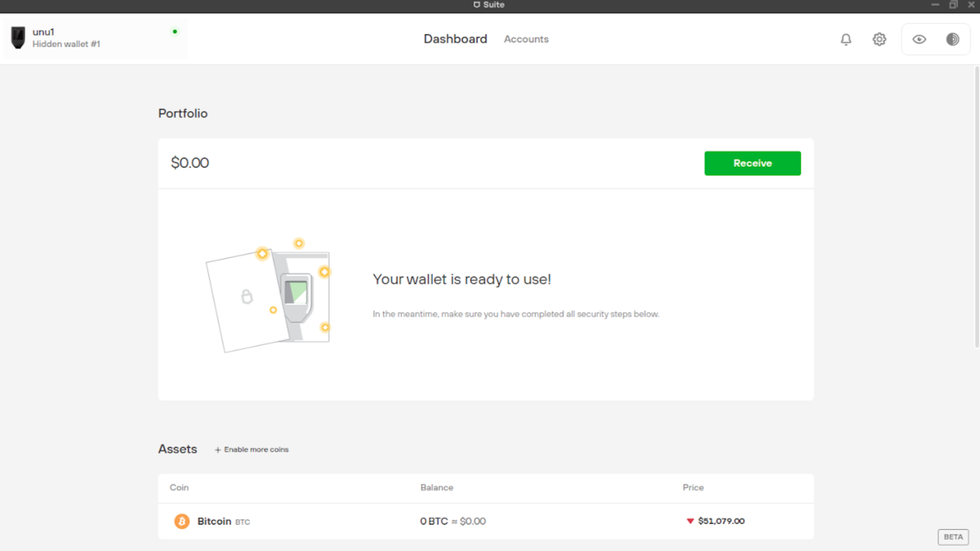
Finished Setting Up Trezor Wallet
You are now on the wallet homepage, your device is fully configured, and you are ready to use your new Trezor!
Before you start trading crypto, you might notice "Trezor Suite" in the side menu. Trezor Suite is the future wallet of Ledger (as of this writing, it is still in beta mode), and the setup process that you just completed has positioned you to use the Trezor Suite product soon.
You could choose to download the Trezor Suite beta version now to be prepared, as the current Trezor wallet will be merged with Trezor Suite.
Learn how to download Trezor Suite below (after the section describing how to import an existing recovery seed), or just bookmark the Trezor page for future reference.
Import an existing Recovery Seed
This section is for those who already have a Recovery Seed phrase, whether manually generated or recovered from backup, and are initializing a wallet with it.
The Trezor Model T follows all common industry-standard protocols for blockchain networks, including BIP32, BIP39, and BIP44. If you have an existing BIP39 recovery phrase, you can use it to initialize your wallet with the Trezor Model T.
In addition, the Trezor Model T also supports recovering a wallet using SLIP-0039, which is Satoshi Lab's implementation of Shamir's Shared Secrets.
- To begin, navigate to https://wallet.trezor.io.
- Verify that you are connected over TLS/SSL (using https), and that there are no typos in the URL.
- Select "Recover Wallet" from the Start screen.

Recover wallet
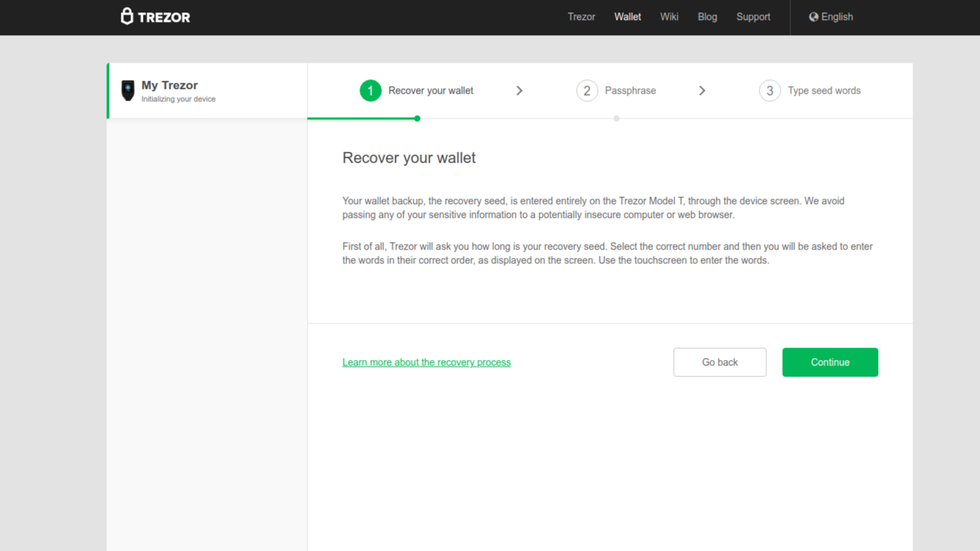
Trezor Wallet is now going to display some information about initializing a wallet from a recovery seed. To protect against insecure computers, your recovery seed will be entered directly into your Trezor Model T, and will not be accessible to the computer.
- Click on the green "Continue" button.
Click on continue
Next, Trezor Wallet wants to know if you are going to be using a passphrase with your wallet. The passphrase refers to a BIP39 passphrase, an advanced feature which not only adds another layer of security, but also creates additional hidden wallets for each passphrase used. This is a feature that can be activated at any time from the wallet settings, so you can safely leave the box unchecked during setup, even if you are using a passphrase.
- Leave the checkbox unchecked, and click on the green "Continue" button.
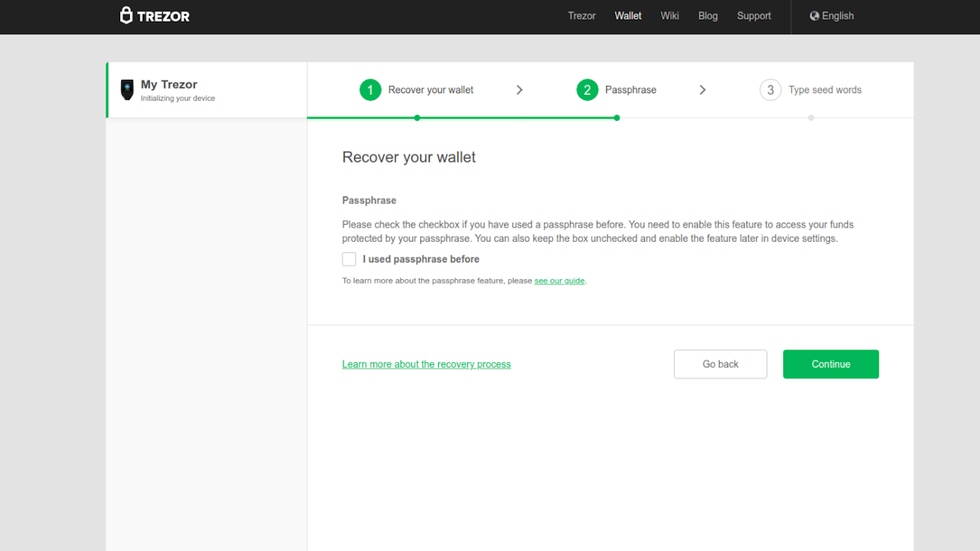
If you used a BIP39 passphrase check box
The rest of the process happens on your Trezor Model T.
The Trezor Wallet displays a prompt asking you to accept its Terms of Service.
Tap on the green checkmark to accept the Terms of Service.
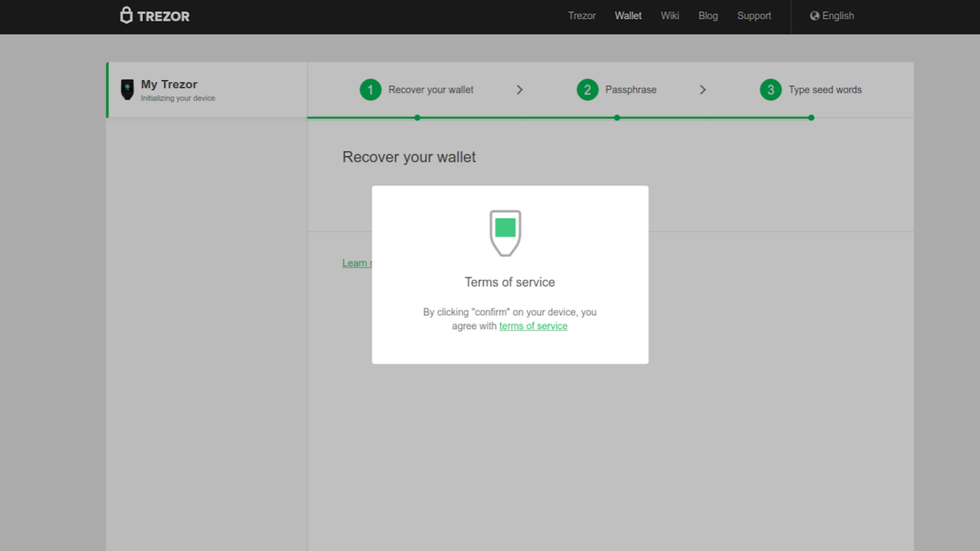
Terms of Service
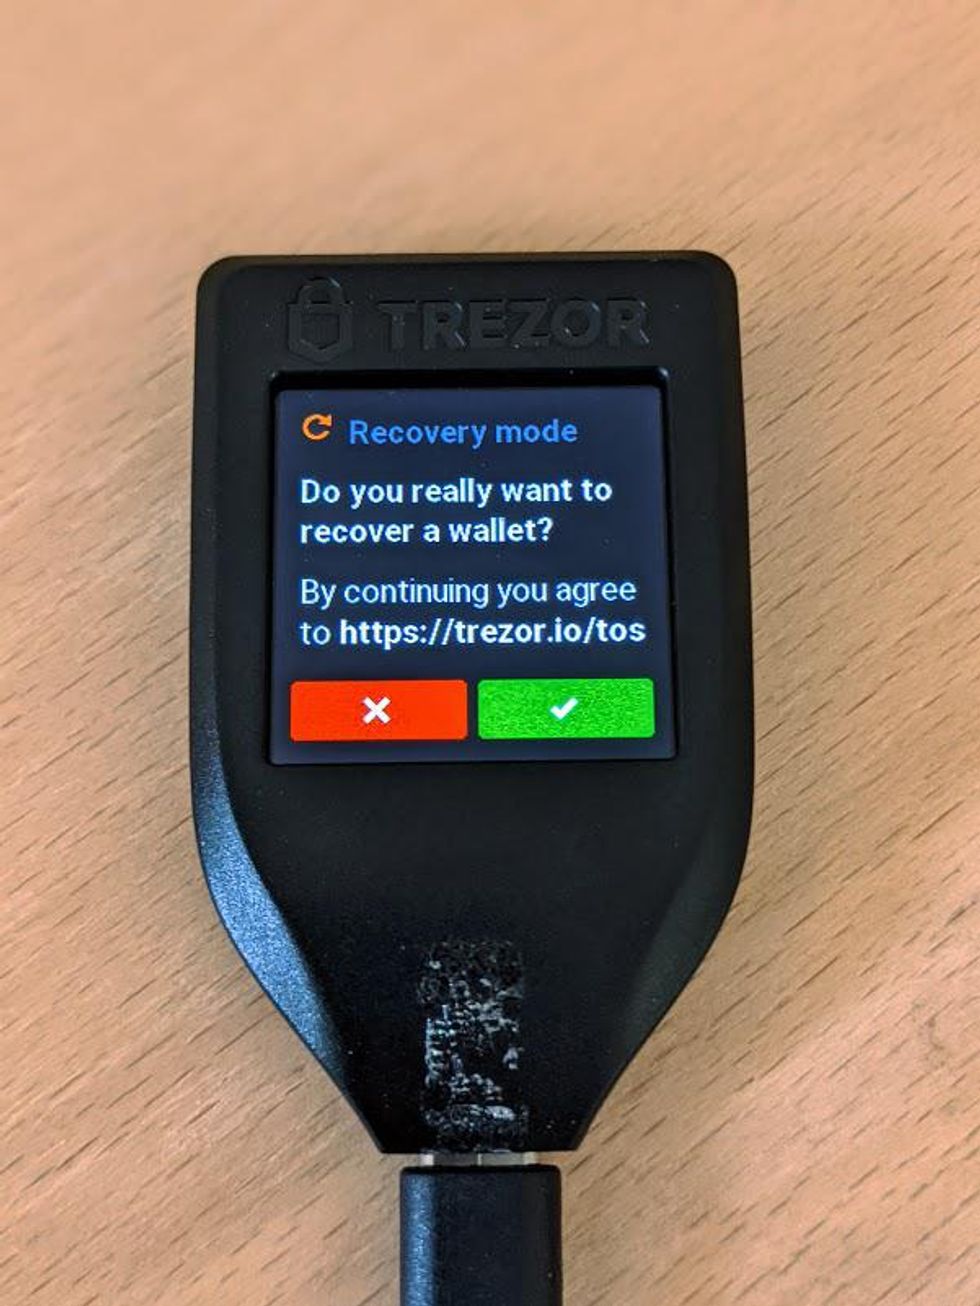
We have officially entered what is called "Recovery Mode" on the Trezor Model T. At the top of the display, a yellow bar appears with the text "RECOVERY MODE," and the message that it is safe to eject the Trezor from your computer. This is because in recovery mode, the Trezor Model T remembers your progress, so you can stop and start as you please without having to start over.
Recovery mode is designed for importing existing wallets. Since the entire process happens on your Trezor Model T, it does not have to be connected to a computer to be functional. The Trezor Model T does need a power source over USB. If you have a USB power bank, you can use that instead of a computer and gain a little more security by being completely disconnected from any other computer.
The first step in Recovery Mode is to let your Trezor Model T know how many words are in your recovery seed.
- Tap on the green "Select" button to let your Trezor know how many words are in your recovery seed.
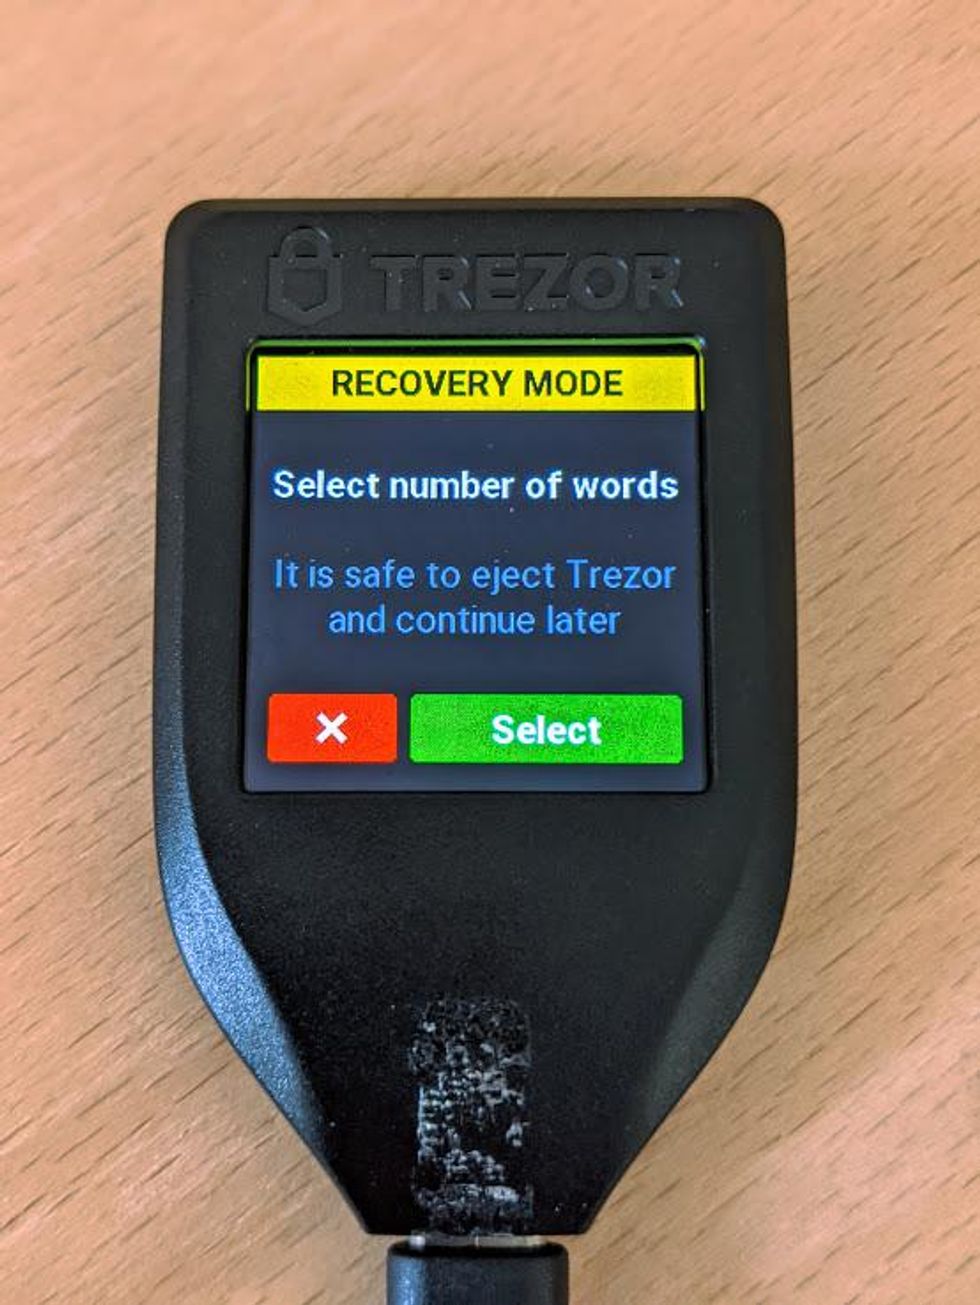
Tap on green button
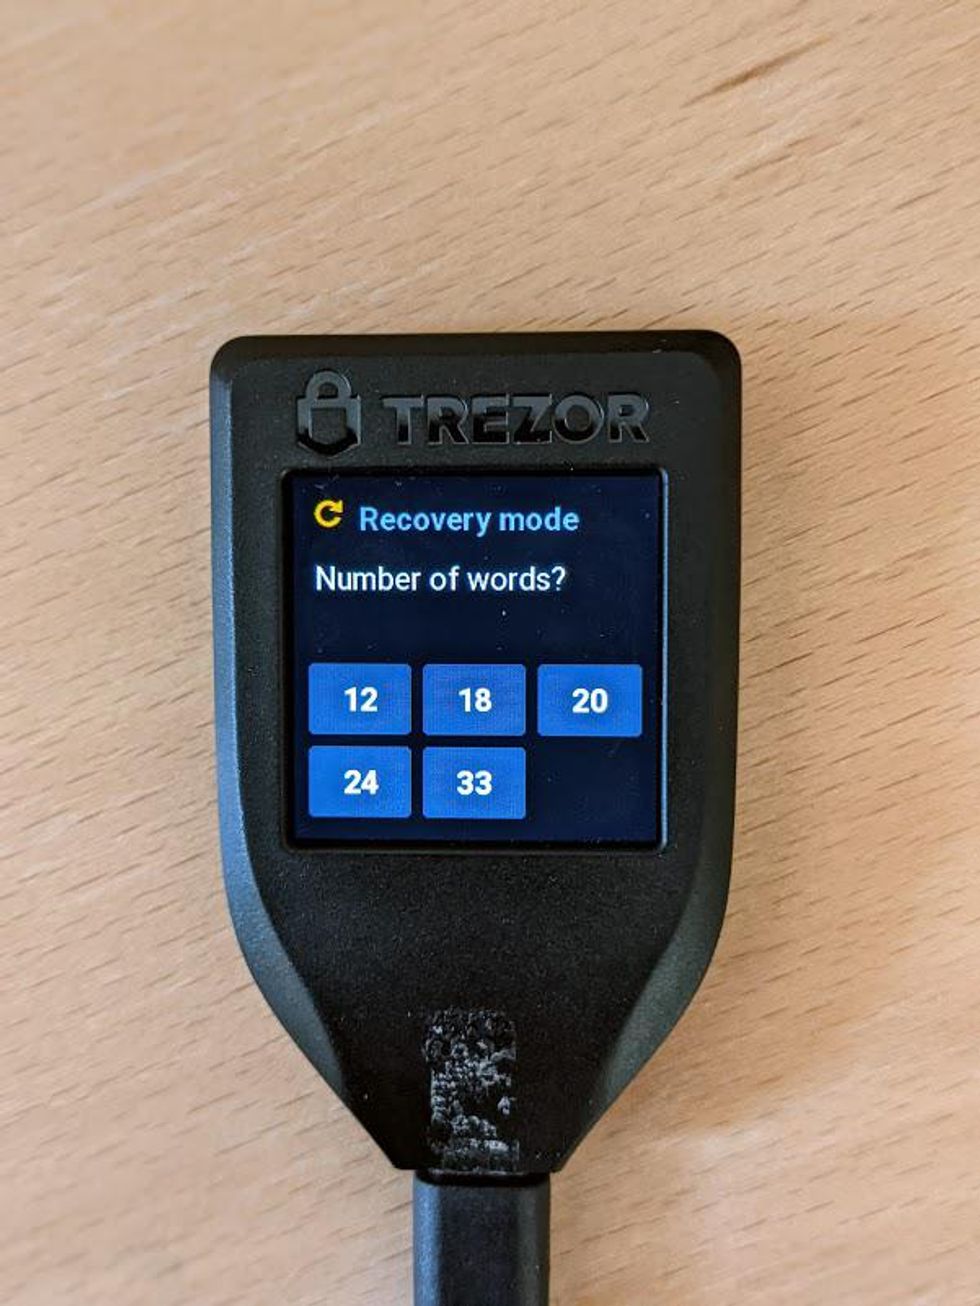
- Select the number of words that are in your recovery seed.
- The available options are: 12, 18, 20, 24, 33.
- For standard BIP39 recovery seeds: choose 12, 18, or 24.
- For Shamir's Secret Sharing select: choose 20 or 33.
- If you select 20 or 33, the Trezor Model T will automatically recognize you are importing via Shamir's Secret Sharing.
Select number of words
Recover BIP39 Wallet
The following instructions are for recreating BIP39 wallets. If your recovery seed is 12, 18, or 24 words, this is the section for you.
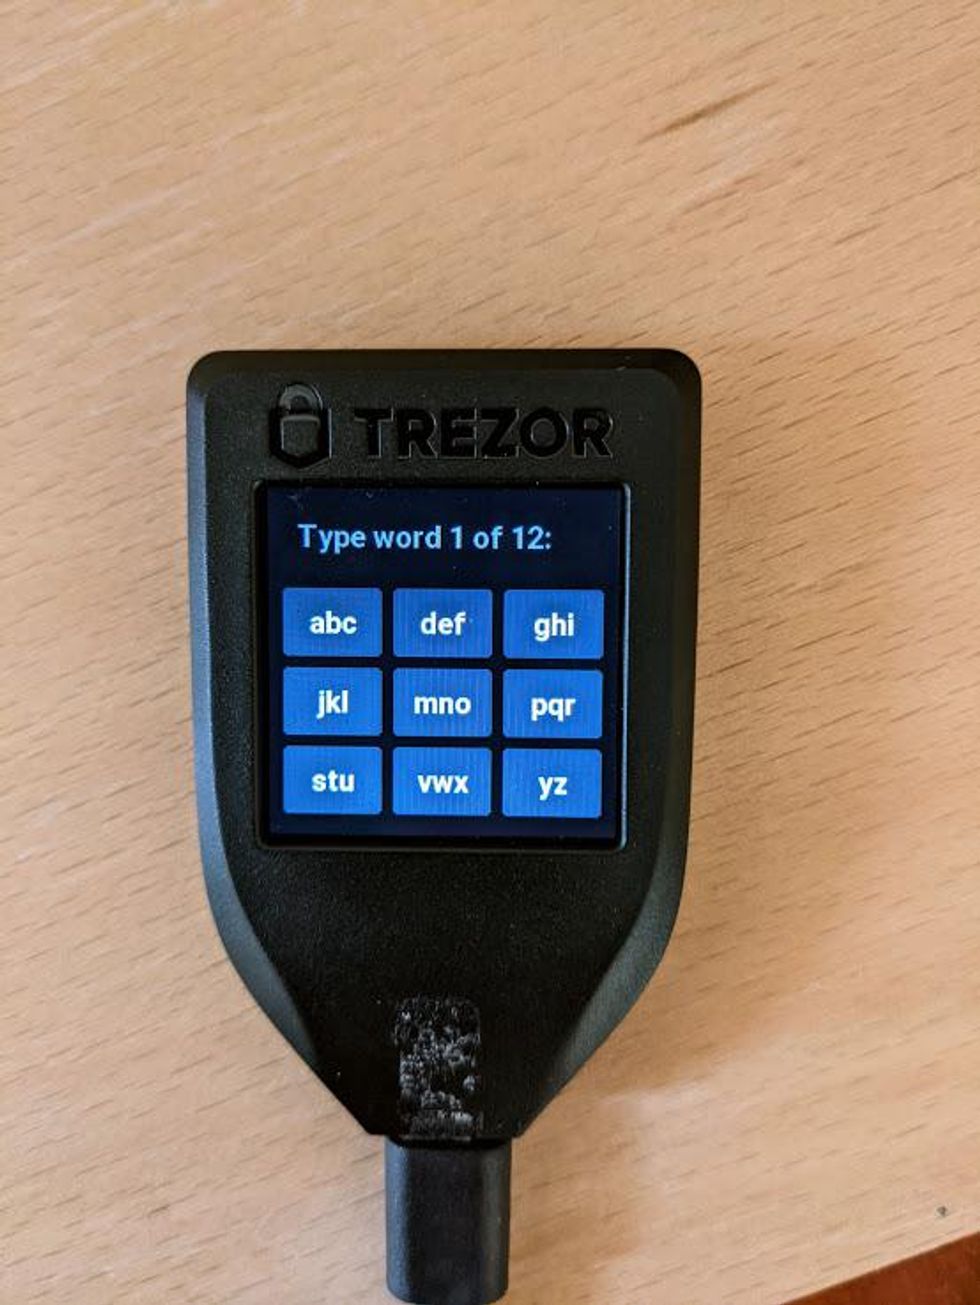
Now it is time to enter your BIP39 recovery seed into your Trezor Model T. To begin, tap on the green "Enter seed" button on the display.
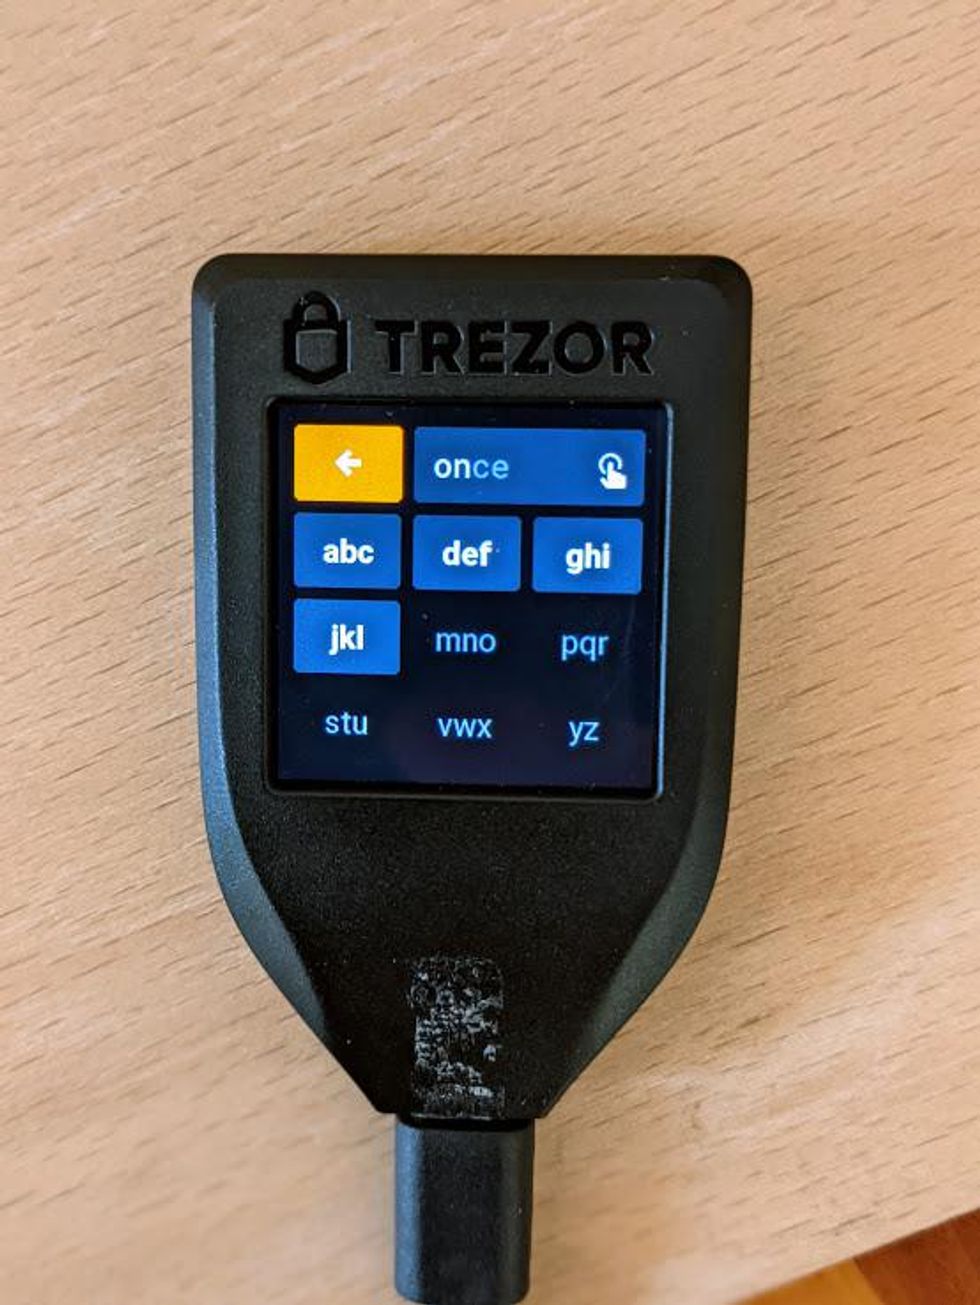
- On the display of your Trezor Model T, letters are in groups of 3. For example, you will see "ABC" and "DEF".
- To select letter "A", tap the "ABC" group 1 time.
- To select letter "B," tap the "ABC" group 2 times.
- To select letter "C," tap the "ABC" group 3 times.
- As you input the letters, the most likely word will appear at the top of the display.
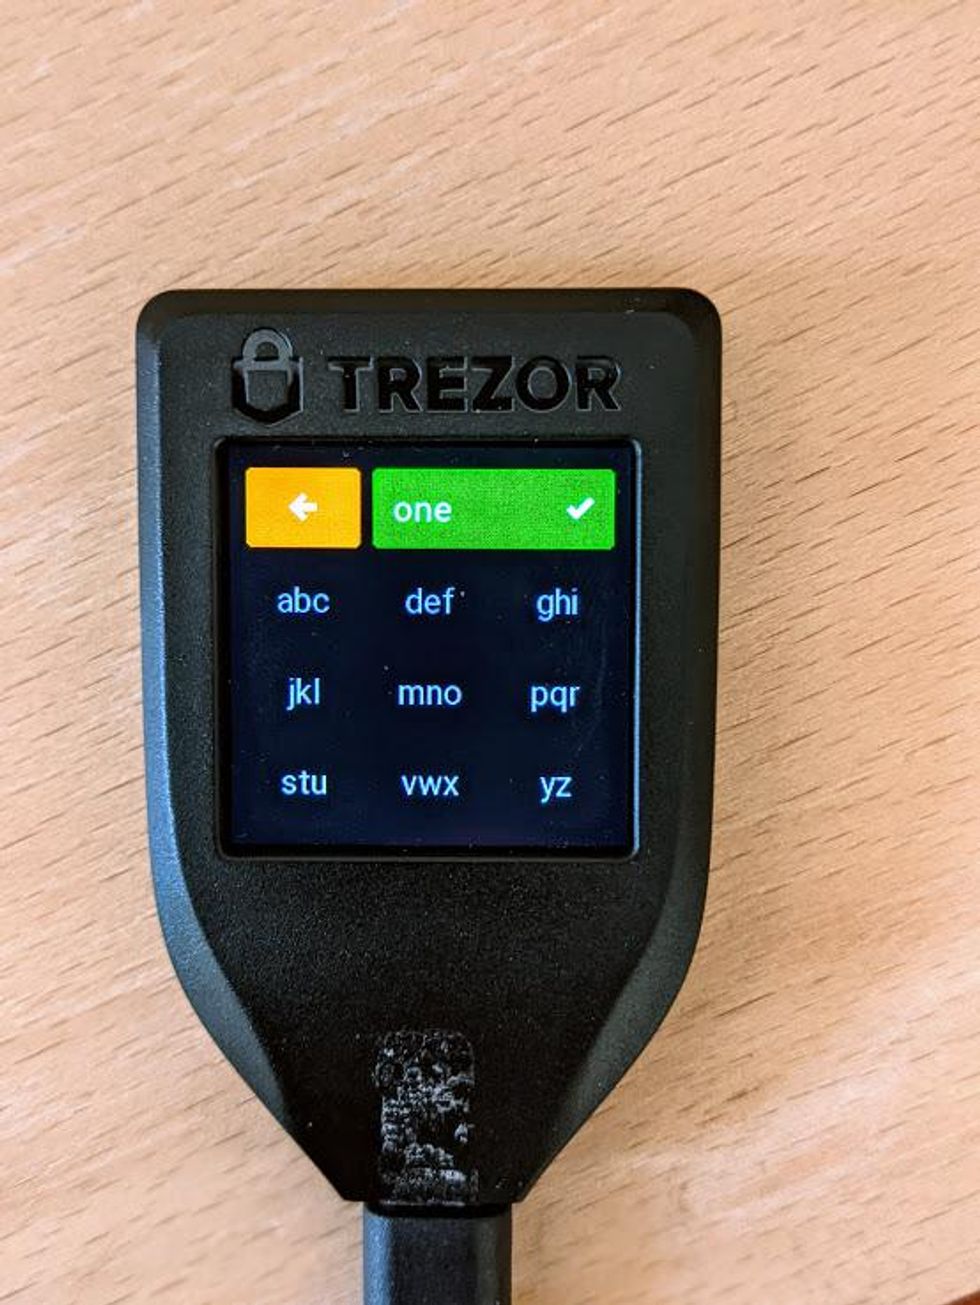
- If the word at the top of the display is correct, you can select it by tapping on it twice. After the first tap, the word will turn green. A second tap confirms your selection.
- Because of how BIP39 works, you will only have to enter the first 3 letters of each word. After entering the first 3 letters, the correct word should appear at the top of the display.
- If you want to backspace, press the yellow Backspace button on the top left of the display.
- When you have finished typing your word, the color of the word will turn green. Tap on it to confirm your word.
- Repeat this process for all of your words.
Type recovery seed
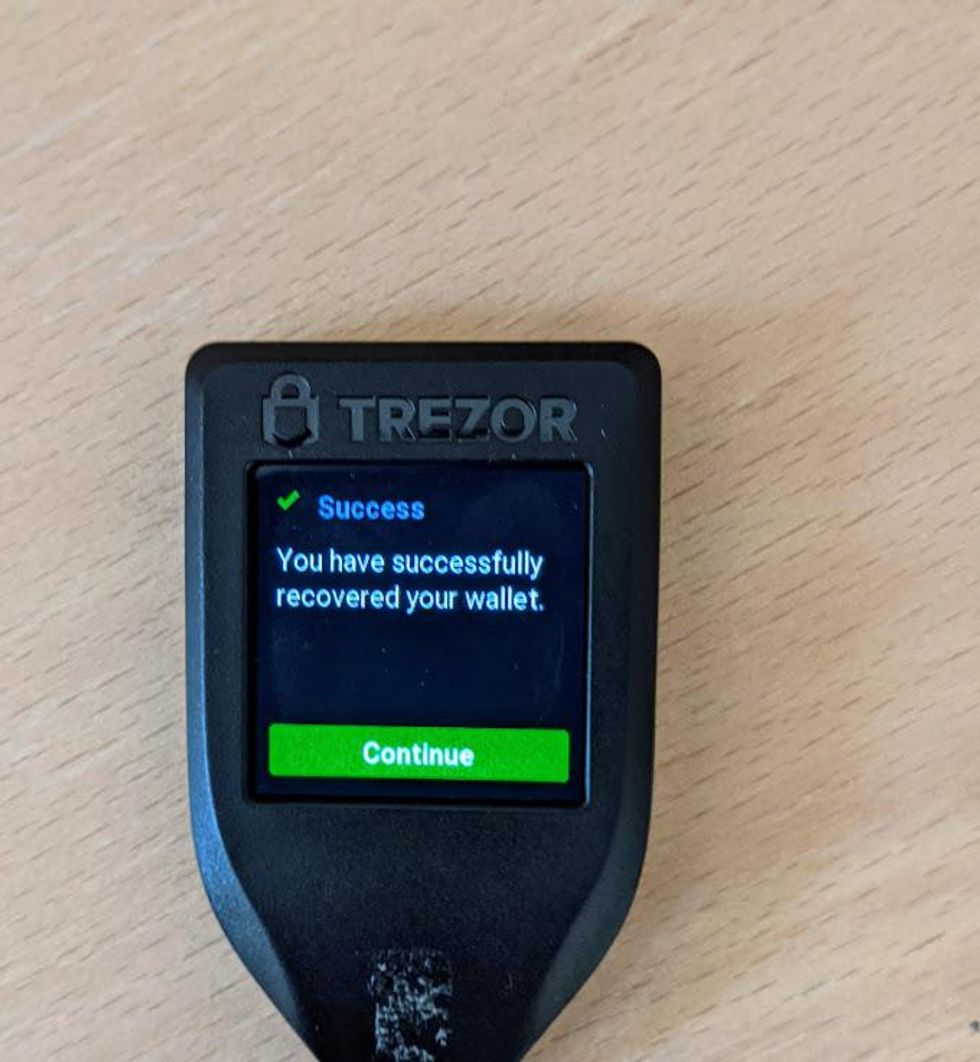
- When you finish entering your last word, you will see a Success message.
- Tap the green button to continue.
Congratulations! You have just initialized a wallet using your BIP39 recovery seed. If your Trezor is not connected to your computer, connect it now and navigate to https://wallet.trezor.io to load your wallet.
Satoshi Labs is in the process of a big upgrade to the wallet experience in Trezor, called Trezor Suite. You can continue to use Trezor Wallet, if you want to learn more about Trezor Suite, go to the next section.
Set up Trezor Suite
Trezor Suite is available as a desktop app available for Mac OS, Windows, and Linux, as well as a Progressive Web App. The easiest way to get familiar with Trezor Suite is to visit the web wallet. However, it is recommended to only use the desktop app for enhanced security.
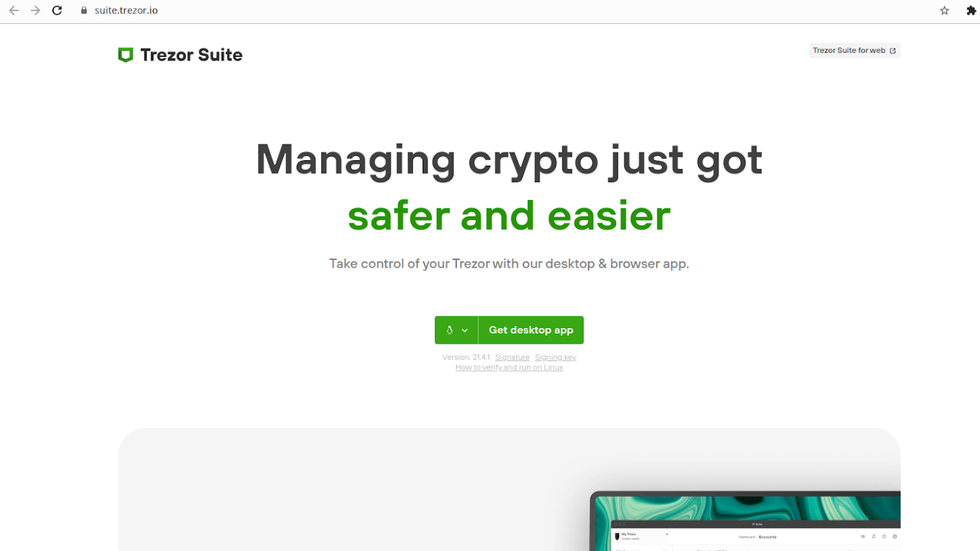
- To access Trezor Suite, click on the link in the menu in Trezor Wallet, or visit https://suite.trezor.io
This will bring you to Trezor Suite's homepage. From here, you can download Trezor Suite or visit the web wallet. Notice how the green download button for the desktop is front and center, while the button to access the web wallet is up in the top-right corner.
Trezor Suite link is on left-side menu
Download Trezor Suite Desktop
For this guide, we are going to download the desktop app. However, if you want to use the web wallet, the user interface and the steps involved are exactly the same - simply open the web wallet and skip to the next section.
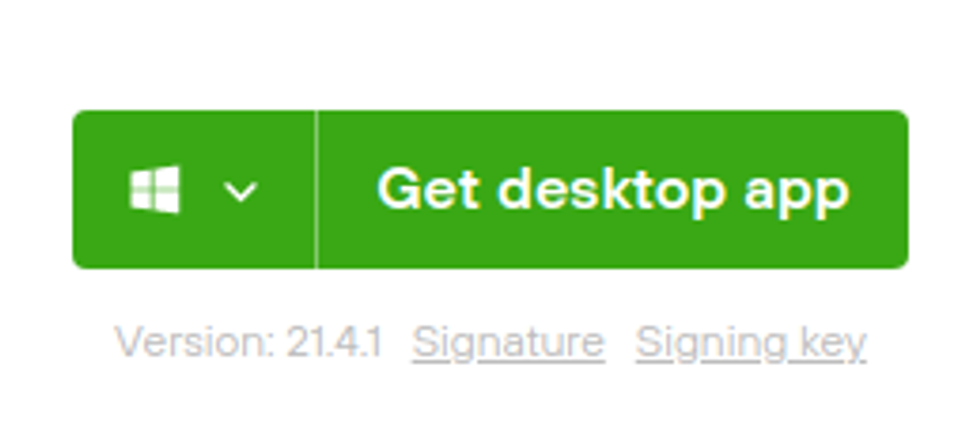
- To download Trezor Suite, use the green "Get Desktop App" button and select your operating system. Trezor Suite supports Mac OS, Windows, and Linux.
- Notice underneath the green "Get Desktop App" button, there are two additional links: "Signature" and "Signing key."
- Download both the "Signature" and the "Signing key." These are used to verify that the download is authentic.
Download Trezor Suite
Verify your Trezor Suite download
Now that you have downloaded your Trezor Suite desktop app and the matching signature and signing key, it is time to verify that the signature matches the expected value. Trezor Suite is signed with the GPG key of the developers. This operation will perform a check to make sure the signature included with Trezor Suite matches the signing key from Satoshi Labs.
Satoshi Labs signs all of their downloads with their company PGP key. The key rotates every year, and can be found at the following link:
https://trezor.io/security/satoshilabs-2021-signing-key.asc
- Download the key, and make sure it is saved as a .asc file.
Next, we have to verify the signatures of Trezor Suite and make sure they match.
Verify Trezor Suite Signature Windows
- Download Gpg4win (https://gpg4win.org) - this is a Windows utility that installs GPG, a GPG key manager, and configures it all to work across many apps on your Windows.
- For this guide, you do not need to create your own GPG keypair. However, GPG is used a lot, and it is good to be familiar with it.
- Verify your download by using the "check integrity" page provided by Gpg4win. The "check integrity" page is where Gpg4win lists its code signatures for each release.
- Open Gpg4win (https://gpg4win.org) and look for the Download button. Below the Download button you will find the check integrity link. You should now be on the URL https://www.gpg4win.org/package-integrity.html.
- In the File Explorer, navigate to the Downloads folder, and right-click on the gpg4win installer. Follow the path Properties -> Digital Signatures -> Details of Signatures - this will open the signature information.
- Compare the signature data on Gpg4win's check integrity link and the signature data on your Windows device. They should be identical.
- Run the Gpg4win installer. If you have Windows Universal Access Control enabled (it's enabled unless you disabled it) you will be asked to confirm that you want to run Gpg4win. Check the publisher data: the publisher should be "Gpg4win Initiative."
- During installation, you will be asked which packages you want to install. To complete this guide, you will only need GnuPG and a key manager.
- When installation is complete, your key manager, Kleopatra, should start automatically. If it hasn't, open Kleopatra from the start menu.
- In Kleopatra, click on "Import" in the top menu. Select the Satoshi Labs 2021 signing key that you just downloaded (satoshilabs-2021-signing-key.asc) and import it. After importing, you will be able to see the key listed in your keychain.
- In Kleopatra, right click on Decrypt/Verify in the top menu.
- Select the signature file and click "Open."
- A pop up will appear with the results. Look for "Good signature from "SatoshiLabs 2021 Signing Key."". This indicates a good, valid signature!
- You might see the text "Undefined trust," or a warning that the key that signed the file is not trusted. This is likely because you have not signed Pavol Rusnak's GPG key with your own GPG key, which lets GPG know that you trust this key.
Good job! You have verified your Trezor Suite download. Install Trezor Suite by running .exe file
Verify Trezor Suite Mac OS
- Download and install GPG Suite (https://gpgtools.org) - this is a mac utility that installs GPG, a GPG key manager, and configures it all to work across many apps on your Mac.
- For this guide, you do not need to create your own GPG keypair. However, GPG is used a lot, and it is good to be familiar with it.
- Verify your download by using the checksum. Checksums are not as secure as GPG signatures, but we don't have GPG yet! So checksum it is.
- On the download page for GPG Suite (https://gpgtools.org) - hover your mouse over "SHA256." SHA256 is the hashing algorithm used to generate the checksum.
- Open the terminal app, found in Applications -> Utilities -> Terminal and run this command, don't hit ENTER yet!
- $ shasum -a 256
- Open the folder containing GPG Suite, and drag and drop the application in the terminal, this will automatically fill in the rest. Now hit Enter!
- Your terminal will generate the SHA256 checksum. Compare the result to the result on https://gpgtools.org when hovering over SHA256
- Now that you confirmed GPGTools is secure, Open GPG Keychain and import Satoshi Lab's 2021 signing key.
- Open your downloads folder, and right click on the Trezor Suite OSX executable file (.dmg).
- Look for services -> OpenPGP: Verify signature of File and click on it.
- A pop up will appear with the results. Look for "Good signature from SatoshiLabs 2021 Signing Key" This indicates a good, valid signature!
- You might see the text "Undefined trust," or a warning that the key that signed the file is not trusted. This is likely because you have not signed Satoshi Lab's GPG key with your own GPG key, which lets GPG know that you trust this key.
Verify Trezor Suite Linux
- Open a terminal and $ cd into your Downloads folder, or whatever folder contains the Trezor Suite download and GPG signature file.
- Import the SatoshiLabs 2021 Signing key (satoshilabs-2021-signing-key.asc) by running the following commands:
- gpg --import keyname.asc # the name of the saved file
- Verify the Trezor Suite download by running the following command:
- $ gpg --verify Trezor-Suite*.AppImage.asc
- You should see a verification of good signature from the SatoshiLabs 2021 Signing Key.
- Now you can install Trezor Suite. The Linux App is an AppImage, so we have to mark it as executable before it can run. (AppImages are programs contained within a single file.)
- Using the graphical interface:
- Right-click the AppImage file and click on Properties.
- Check the "Allow executing file as a program" box.
- Using the terminal:
- Navigate to the folder containing the AppImage (usually the Downloads folder).
- $ cd Downloads
- Change the permissions on the AppImage file to make it executable.
- $ chmod u+x Trezor-Suite*.AppImage
- Navigate to the folder containing the AppImage (usually the Downloads folder).
- Using the graphical interface:
Open Trezor Suite
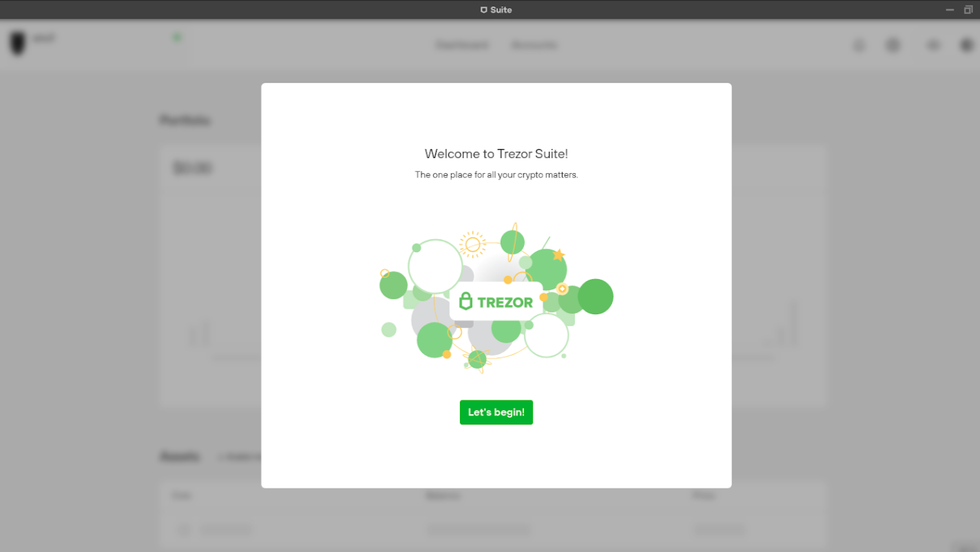
Now that we have verified our Trezor Suite download, it is time to open Trezor Suite. When you open Trezor Suite for the first time, you will be greeted with a welcome message.
- Click on the green "Let's begin!" button to start the process of setting up Trezor Suite.
Welcome to Trezor Suite
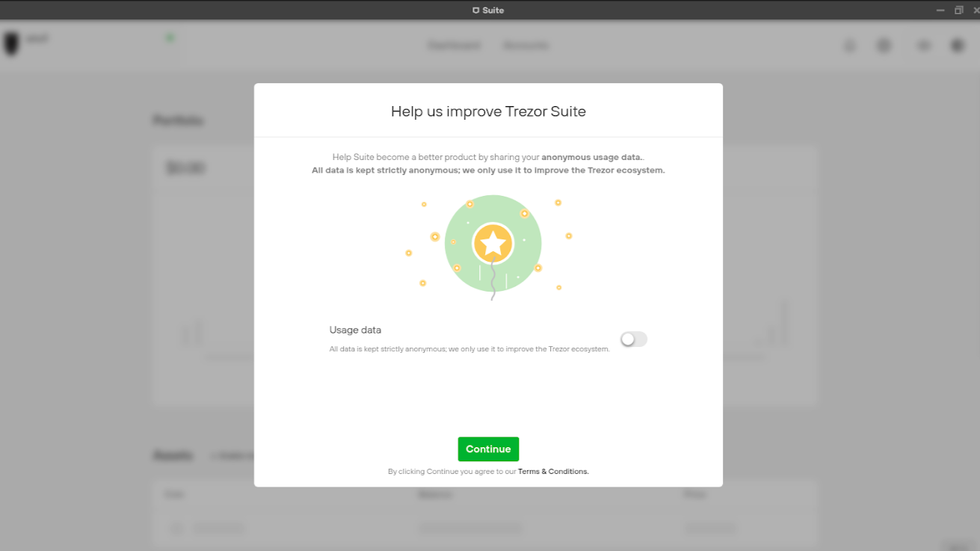
Next, Trezor Suite will ask you if want to opt in to anonymous data collection, which will help to improve the app. This is a personal decision that only you can make. Ask yourself if you are comfortable with your data being sent to Satoshi Labs, the company that develops Trezor, and if you are okay with not being certain with how your data will be used.
- To opt-in to data collection, make sure the toggle is turned on. When the toggle is on, the color is green.
- To opt-out of data collection, make sure the toggle is turned off. When the toggle is turned off, the color is gray.
- To continue, click on the green "Continue" button.
Usage data opt-in
Now Trezor Suite is going to ask if you are setting up a new device, or if you already have your Trezor Model T setup. You will see two options appear on the screen:
- Begin Setup - use this option to set up your Trezor Model T as a new device.
- Access Suite - use this option if you already set up your Trezor Model T.
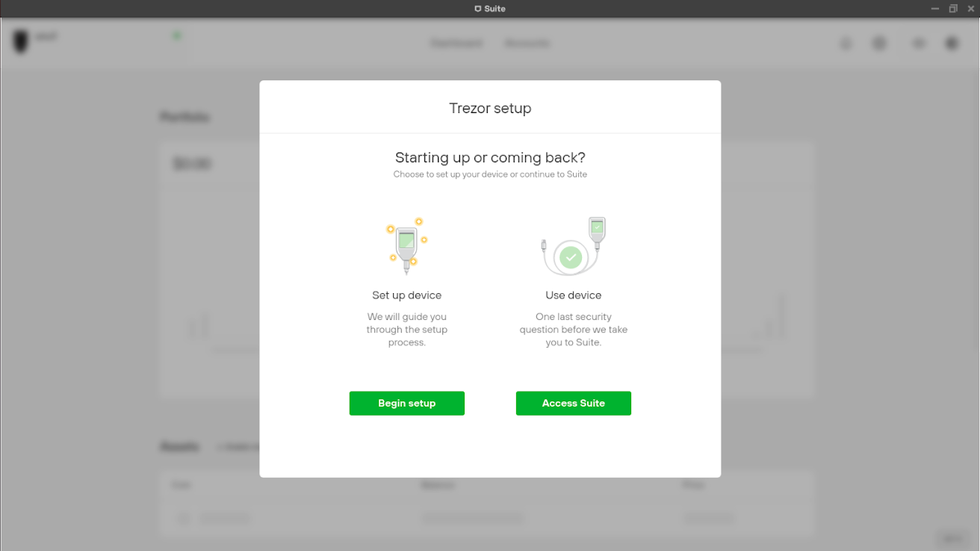
Trezor Suite setup
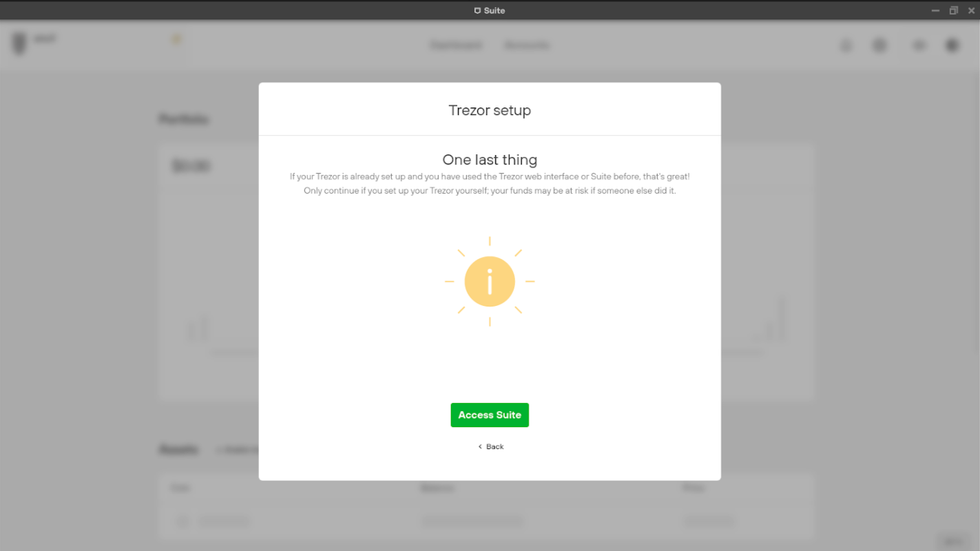
One last step before we can access Trezor Suite.
Trezor Suite is going to display a warning. In the warning, Trezor Suite states to only proceed if you set up your Trezor Model T yourself. If anyone else set up your Trezor Model T, do not proceed.
- Click on the green "Access Suite" button.
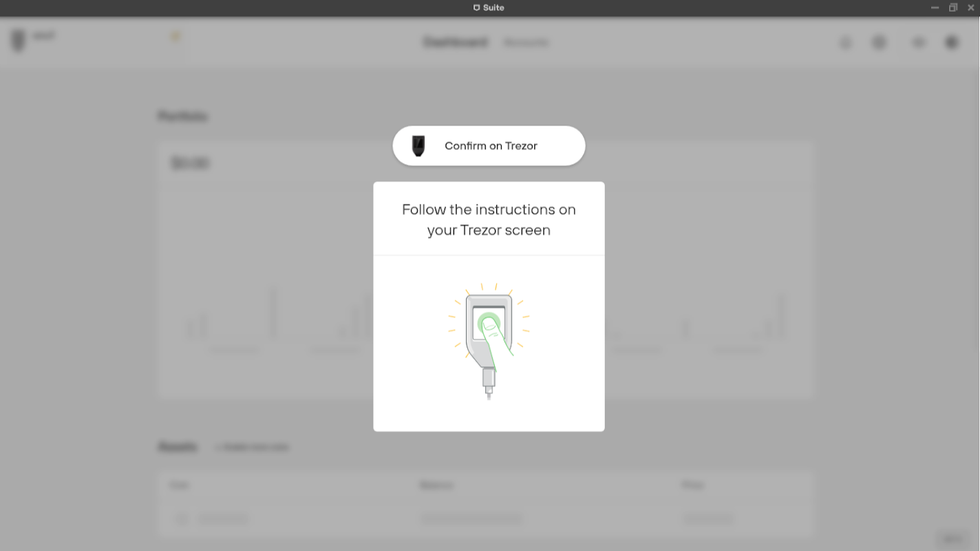
- Focus your attention on your Trezor Model T and enter your PIN.
- Anytime a wallet wants to access your Trezor Model T, you have to enter your PIN. This is a security feature, and why it is important to set a strong PIN.
click on Access Suite
How to update Trezor Suite
If you decide to use Trezor Suite instead of Trezor Wallet, you will want to regularly check for updates. You can check for updates by following Trezor across social media, or by checking in the app.
In the most recent update to Trezor Suite, the Trezor team has enabled in-place updates. Since Trezor Suite is still in beta, until recently when new versions were released, early adopters had to download the new version and upgrade manually. Since the most recent update, users simply have to click on "Check for update" in app Settings, and the app will update itself.
- To check for an update, access the Settings by clicking on the Settings wheel in the top-right corner.
- In the Settings, scroll to the bottom of the page and look for "Check for updates."
- "Check for updates" is located under "General > Application" in your settings.
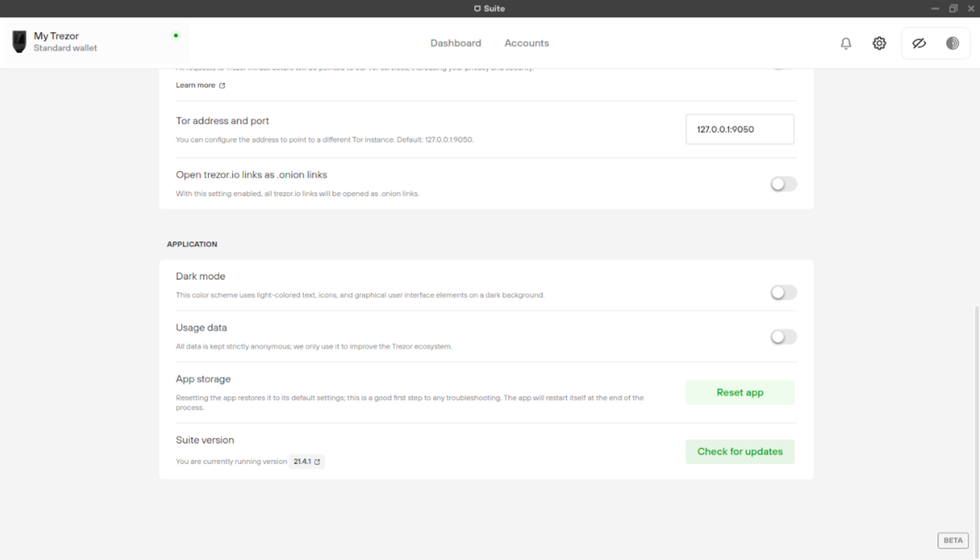
How to check for updates
Congratulations!
Congratulations! You have just set up one of the most secure methods of storing your crypto funds. There is a lot of good content around here to learn from, so check out these articles:
- How to back up a recovery phrase
- How to set up a Digital Vault
- How to buy cryptocurrency
- 11 things you need for a safer crypto environment
In crypto, knowledge is essential. The Trezor ecosystem is in very active development and constantly innovating and pushing out updates. Check out these links:

Art Krotou
Art is a crypto-security expert and researcher with serial entrepreneurship background. Having a degree in physics and experiences in multiple cutting-edge industries like fintech, secure hardware and semiconductors, and identity gave him a unique multi-faceted perspective on the problem of key management for individuals in the crypto networks and the evolution of the internet in general.
In his current work, he is specifically researching how cryptographic keys can be inherited without posing a threat to 3rd parties in edge cases. In addition, he advocates for "fault-tolerance via secrets automation". He discusses the quantitative impact of user experience factors on the uptake of non-custodial solutions.
As one of his most notable accomplishments, he co-founded and led through the early years of the company that contributed to the complex technology behind Apple's recent M-series CPUs. He is also the creator of the most friendly and aesthetically pleasing, but nonetheless super secure and fault-tolerant hardware wallet - U•HODL.
Check out his curated series of "Vault12 Learn" contributions below, and follow him on Twitter and LinkedIn for more sharp insights.

Vault12
Vault12 is the pioneer in crypto inheritance and backup. The company was founded in 2015 to provide a way to enable everyday crypto customers to add a legacy contact to their cry[to wallets. The Vault12 Guard solution is blockchain-independent, runs on any mobile device with biometric security, and is available in Apple and Google app stores.


Vault12 is NOT a financial institution, cryptocurrency exchange, or custodian. We do NOT hold, transfer, manage, or have access to any user funds, tokens, cryptocurrencies, or digital assets. Vault12 is exclusively a non-custodial information security and backup tool that helps users securely store their own wallet seed phrases and private keys for the purpose of inheritance. We provide no legal or financial services, asset management, transaction capabilities, or investment advice. Users maintain complete control of their assets at all times.
Vault12 Product Demo
Get The Vault12 App Onto Your Phone