Contents
Welcome to this guide on safely setting up a Coinbase wallet. This guide focuses on the security choices you can make when setting up your wallet; if you are looking for the official setup guide, please click here.
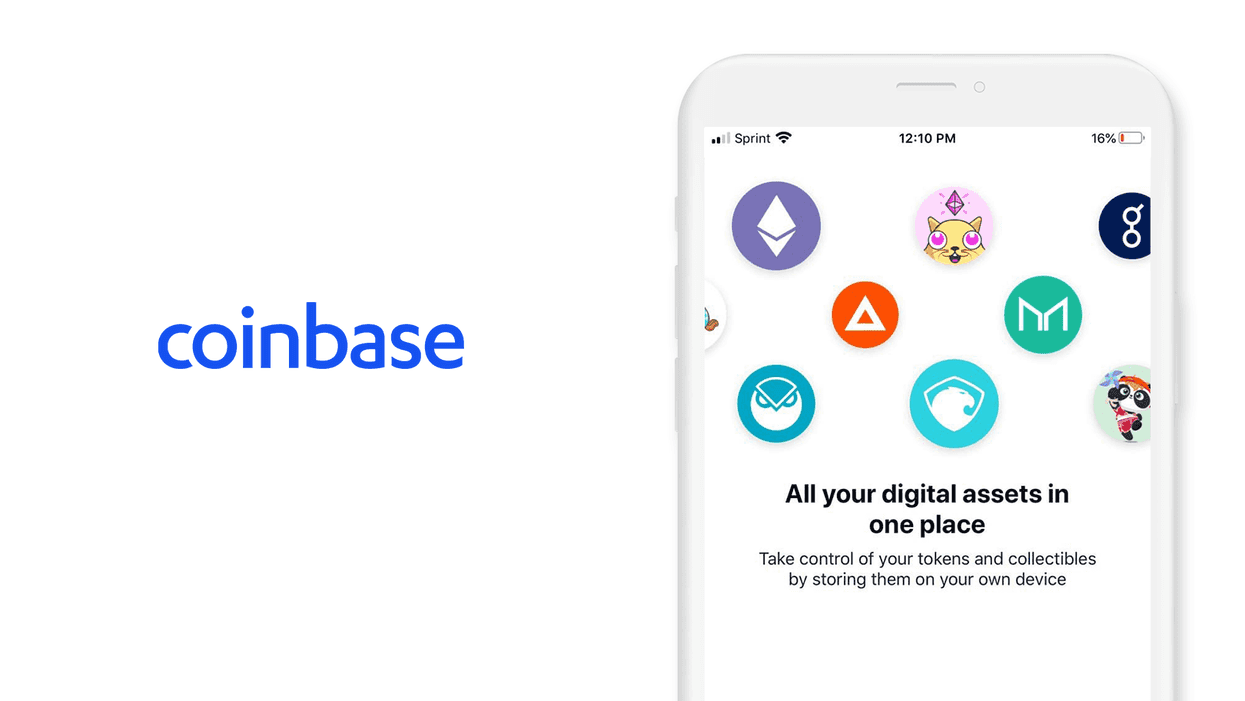
Coinbase is one of the most recognizable names in the crypto industry, offering a secure fiat on-ramp to the crypto markets since 2012. This guide is about the stand-alone, self-hosted wallet offered by Coinbase, not the Coinbase-hosted wallet that is their flagship product.
In this guide, you will learn all about the Coinbase wallet, how to securely configure the wallet, and how you can get started using cryptocurrency in just a few minutes. This guide is focused on how to set up Coinbase Wallet on iOS securely if you are using Android, check out our Android wallet guide.
1. Introduction
Coinbase Wallet, formerly known as Toshi Wallet, is a native BIP39, non-custodial, multi-cryptocurrency wallet. The wallet is actively developed, and was the first mobile-wallet to include a dapp browser - a feature now common among wallets. Coinbase Wallet was also the first mobile-wallet to integrate non-fungible-tokens, better known as crypto collectibles.
This guide is focused on Coinbase Wallet. Coinbase Wallet is different from the Coinbase.com app. You will see both apps referred to as "Coinbase wallet" on the internet. The main difference is who has custody of the private keys. On Coinbase.com, Coinbase holds custody of the private keys. On Coinbase Wallet, the user holds custody of the private key.
Coinbase Wallet was released in 2017 as Toshi Wallet, before rebranding to Coinbase Wallet in 2018. The wallet provides standard wallet functionality plus a built-in dapp browser. There is a heavy focus in the wallet on ease of use - the user interface is beginner-friendly, and aims to allow an easy transition for new users of crypto into decentralized apps.
If you plan to stay within the Coinbase.com ecosystem, the self-hosted wallet offering from Coinbase is a good choice for you. Benefits of using Coinbase Wallet include:
- Integration with your Coinbase.com account, including the ability to transfer funds and buy Crypto
- Multi-coin support for Bitcoin, Bitcoin Cash, Ethereum, Ethereum Classic, Stellar Lumens, Ripple, Litecoin, and all Ethereum based tokens
- Built-in dapp browser giving you access to all available dapps
- Maintain control over your private keys
2. Download and install
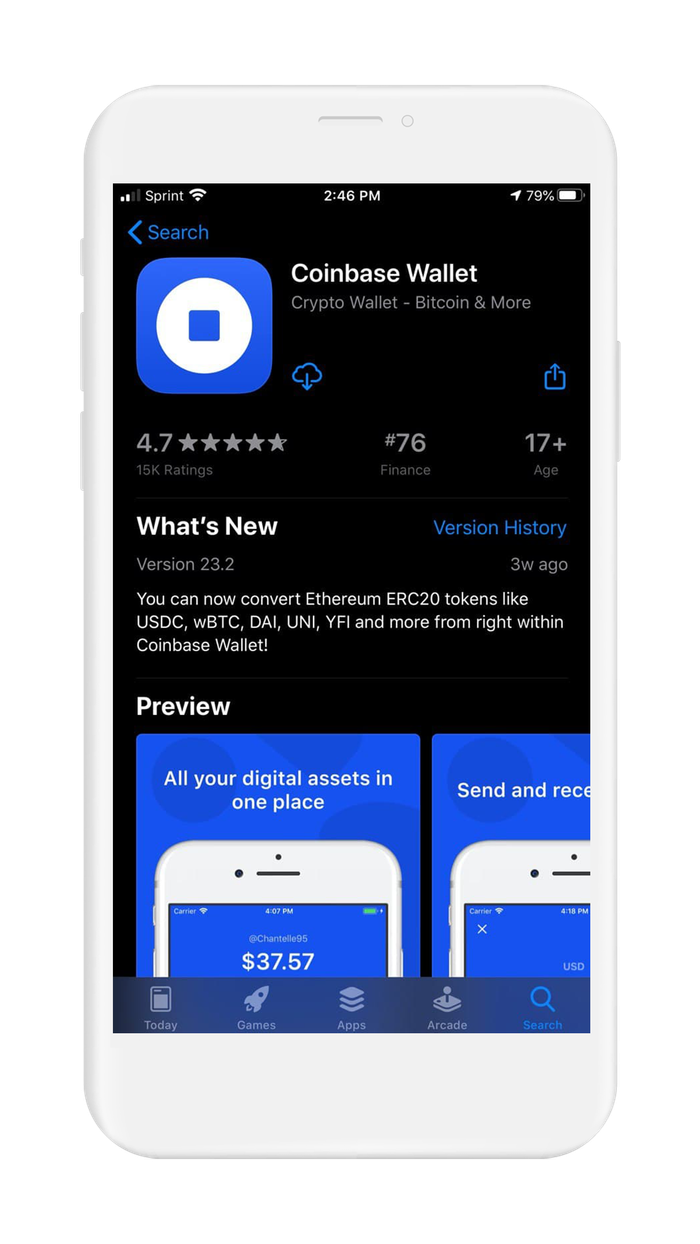
- From your mobile device, open the 'App Store' and search for 'Coinbase Wallet' or click this link: Coinbase Wallet — Crypto Wallet -Bitcoin & More - Apps on iOS App Store.

- Trust, but verify. When using any cryptocurrency wallet, it is important to make sure you are downloading the correct version.
Version: 23.5 as of February 8, 2021
Offered by: Coinbase Wallet
- The `Version` number will change as the app is updated over time. The important part to verify is the `Offered by` field.
Remember the phrase trust, but verify. Taking the extra step to verify can prevent loss of funds. Trust, but verify is an important concept in having a security mindset.
3. Create and setup
Coinbase Wallet is a multi-blockchain, native BIP39, non-custodial wallet. This means that Coinbase wallet supports multiple different blockchains within one wallet instance. Under the hood, Coinbase generates your wallet with the use of a recovery phrase. The recovery phrase can be used to restore your Coinbase wallet or can be imported into another wallet that supports BIP39.
You can think of your recovery phrase as a master backup of all your cryptocurrency in this wallet. It will unlock every single address created by your wallet. Backing up the seed phrase ensures access to your wallet using any BIP-39 compliant wallet. It is important to highlight, your seed phrase only ensures you will have access to your cryptocurrency inside your wallet. If someone steals your phrase, you will still be able to access the wallet, but the funds may be gone - since whoever knows your seed phrase can spend all of that cryptocurrency.
When creating a new Coinbase Wallet, the default method is to create your wallet within the app. The more advanced method is to generate your own recovery phrase. We created detailed guides on generating your own recovery phrase.
By following the right directions, you can generate a recovery phrase that is more secure than the default method used by wallets.
In this section, you are going to create a new Coinbase Wallet using the wallet's default method. Let's get started.
If you already have a recovery phrase, proceed to Section 6. Initialize or import recovery phrase.
To create a new wallet with a new recovery phrase in Coinbase Wallet:
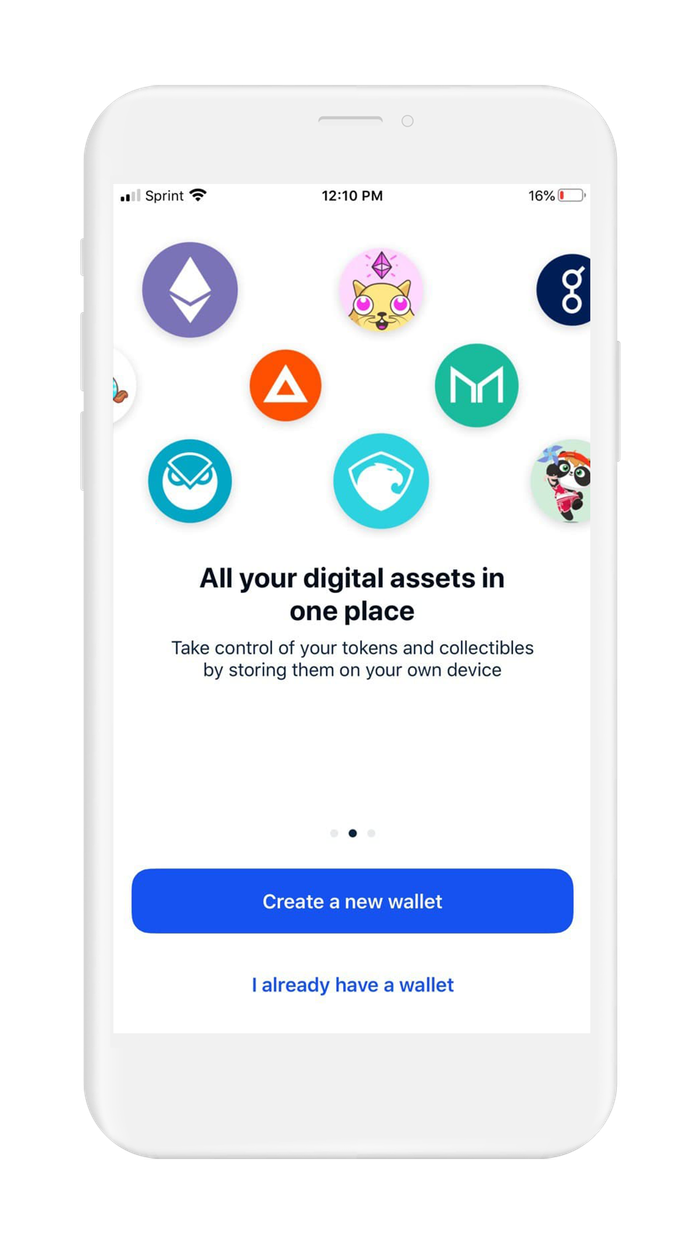
- Open the Coinbase Wallet app
- The default screen will show 2 options: "Create a new wallet" and "I already have a wallet"
- Select the option "Create a new wallet"
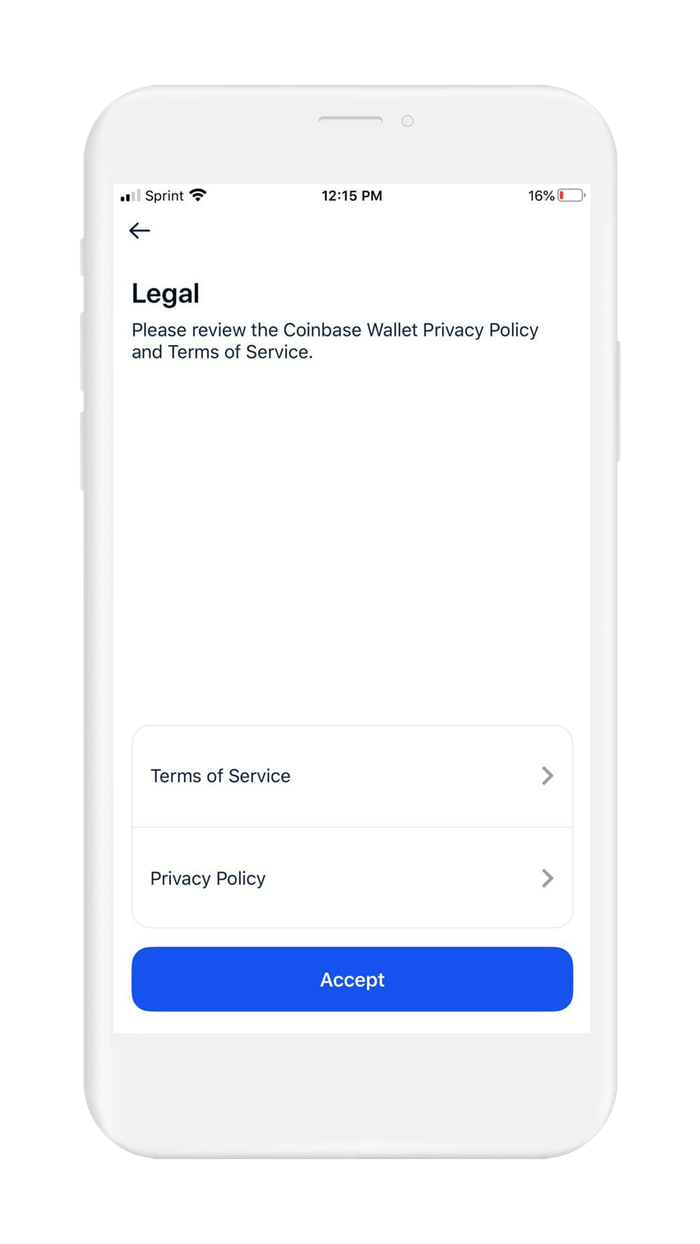
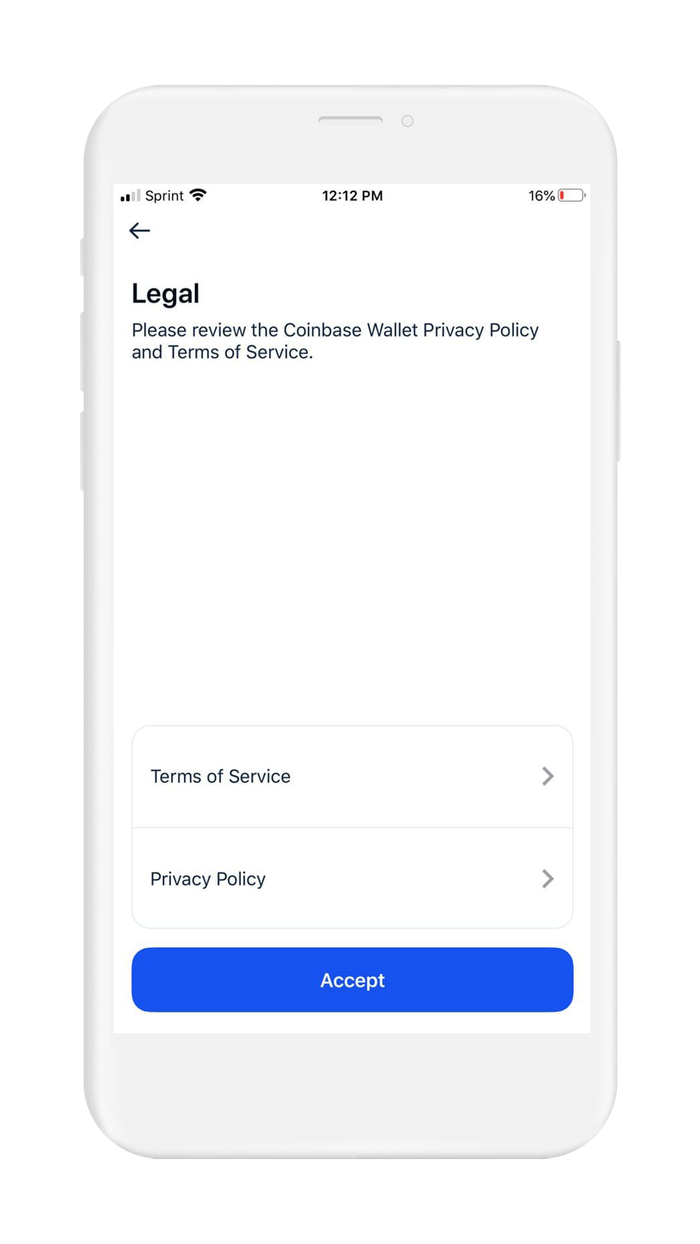
- Before proceeding, you have to cover the legal stuff. Check the box to agree to the Privacy Policies and the Terms and Conditions.

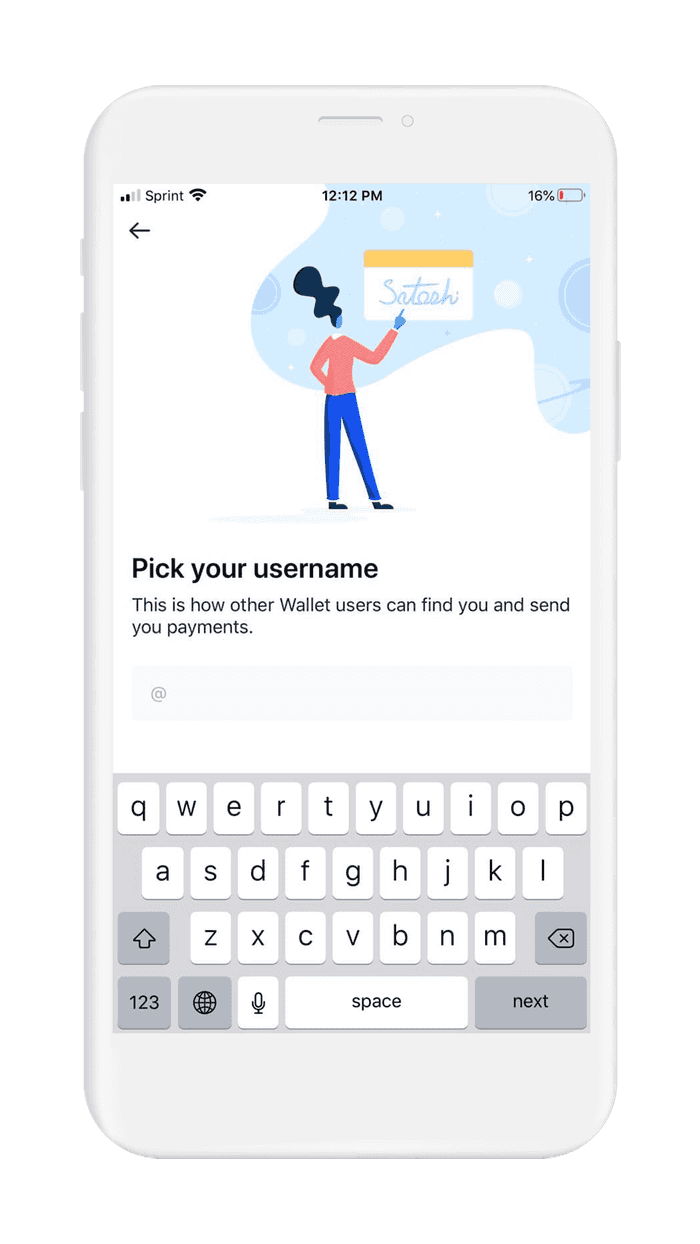
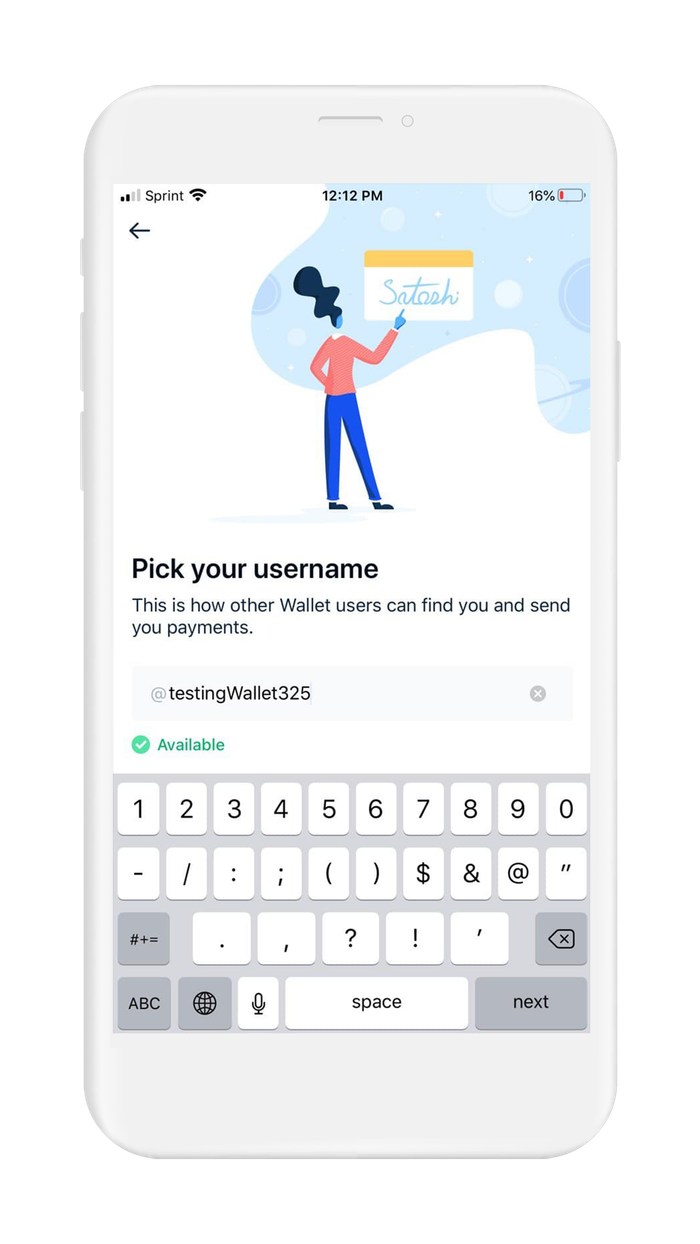
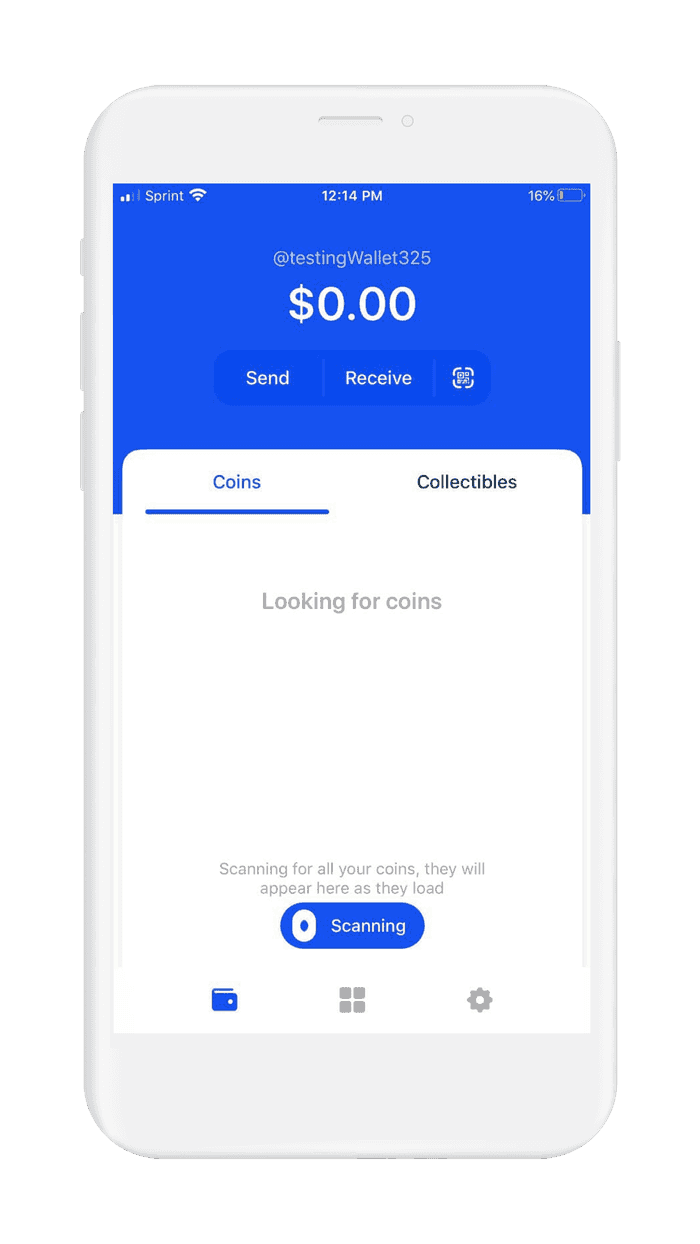
- Coinbase wallet uses an ID system to make it easier for users of the wallet to send funds to each other. Instead of sending crypto to an alpha-numeric address, users of Coinbase wallet can send crypto to your @username. In this step, input the user ID you want to use
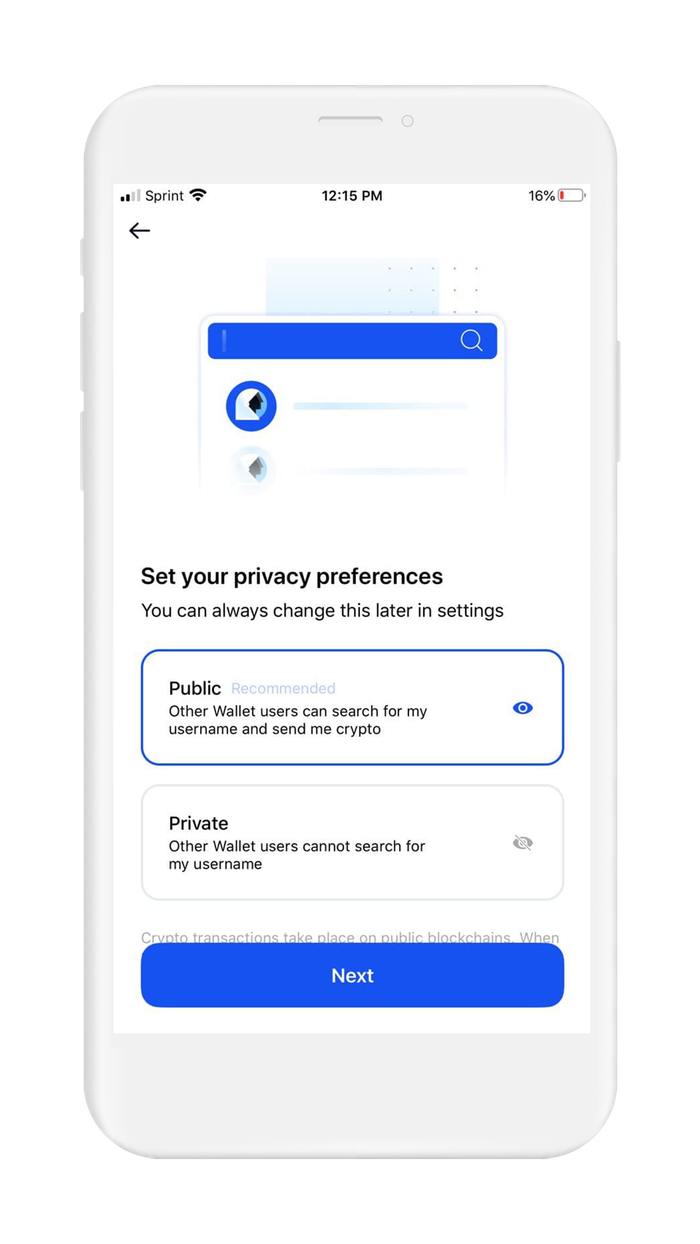
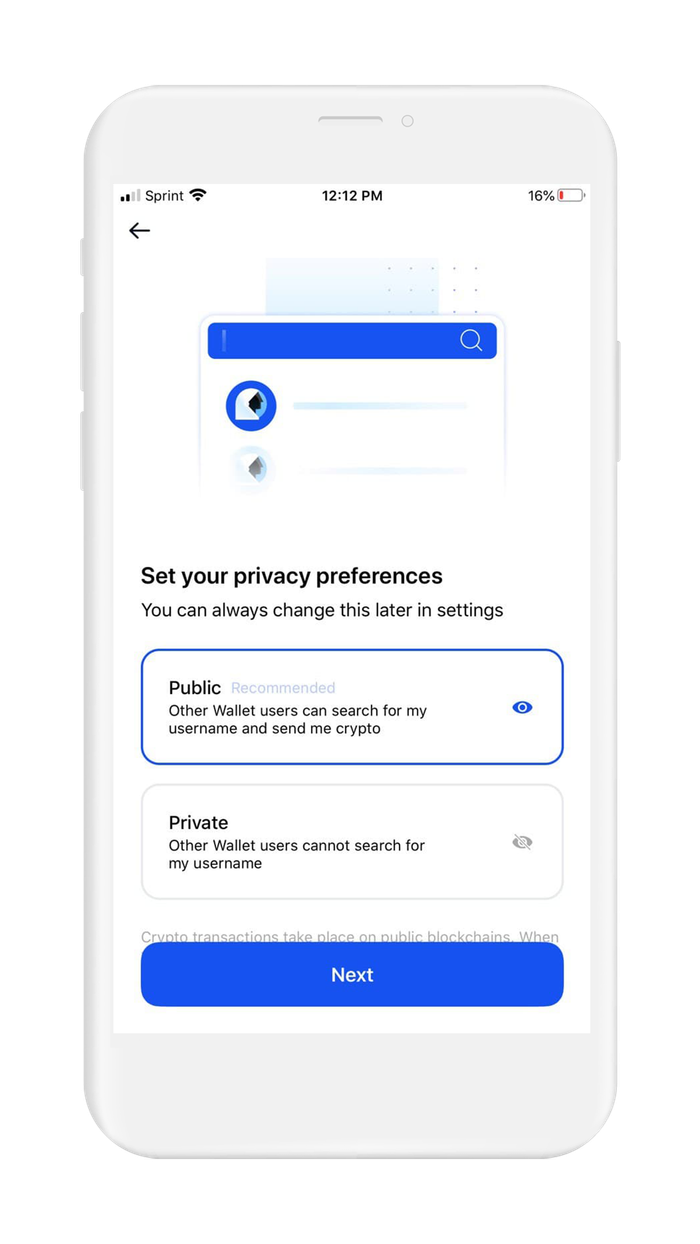
- Next, you will be asked if you want your user ID to be public or private
- Public user ID means users of Coinbase wallet can use your user ID to send funds to you. If you choose public user ID, be advised that your transaction history and address balances can be found through your user ID.
- Private user ID means users cannot look up your user ID to send funds to you
- Coinbase Wallet also supports ENS, so if you want to use this feature, but prefer to use an open standard, you can get a "yourname.eth" name using Ethereum Name Service. Keep in mind, the same privacy concerns regarding blockchain analysis still apply

- It is always a good idea to put the maximum amount of security as possible on your wallet. Coinbase Wallet supports passcodes and biometric authentication. Configure this now.
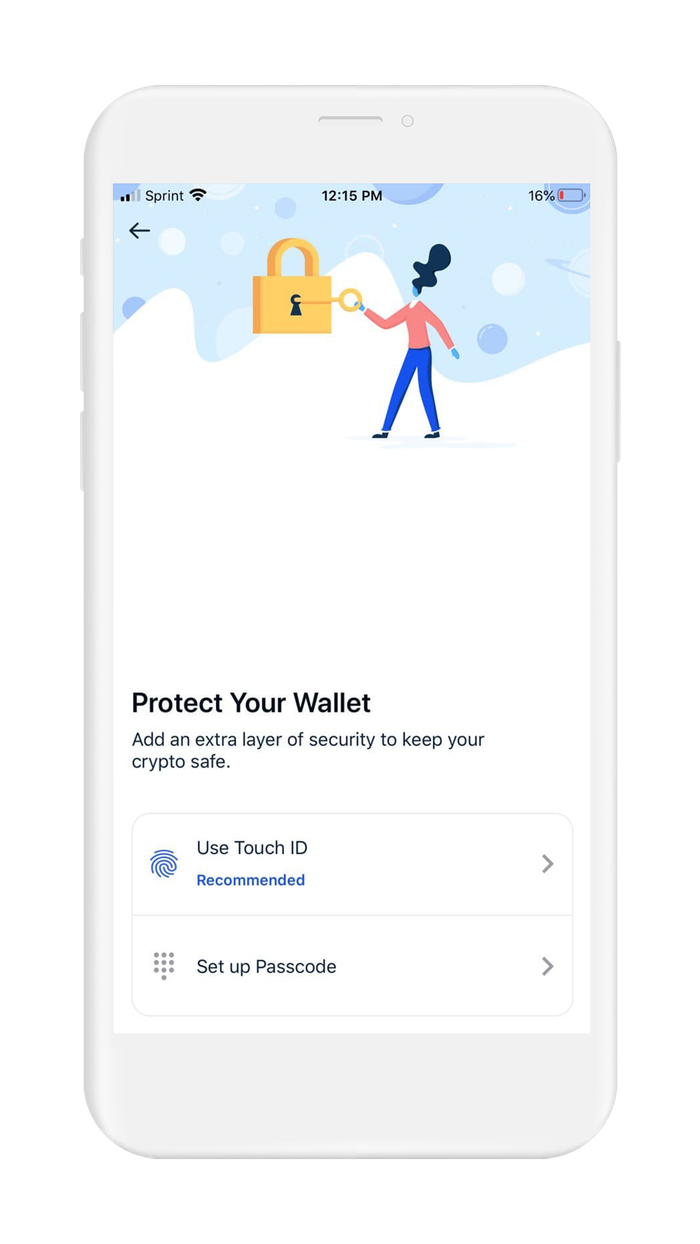
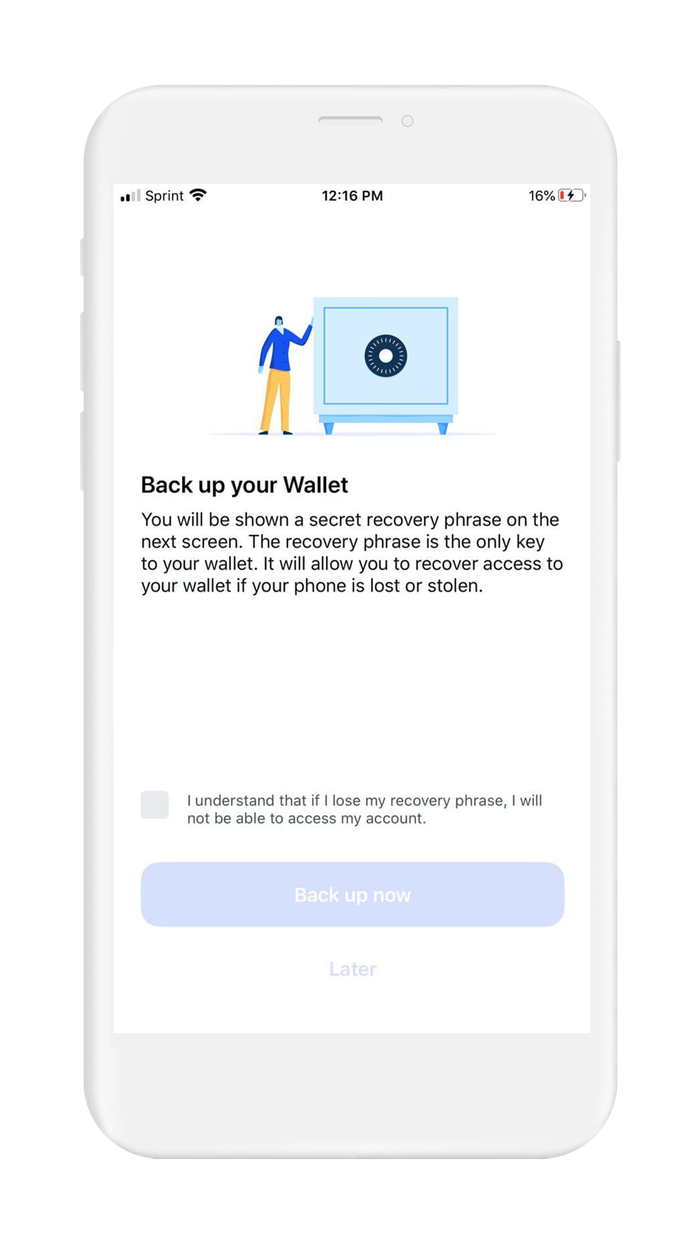
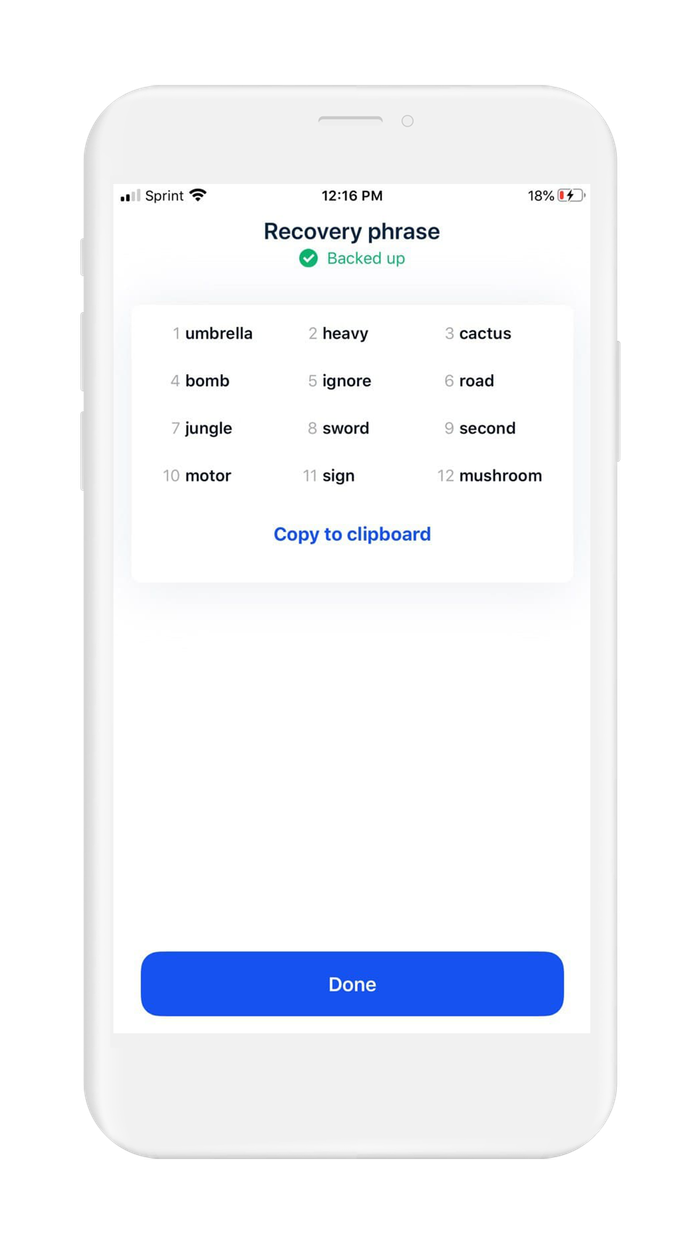
Next, you will be shown your recovery phrase. In order to see your recovery phrase, you will need to check a box acknowledging that if you lose your recovery phrase, you will not be able to gain access to your account if you get locked out. This is why it is so important to backup your recovery phrase.
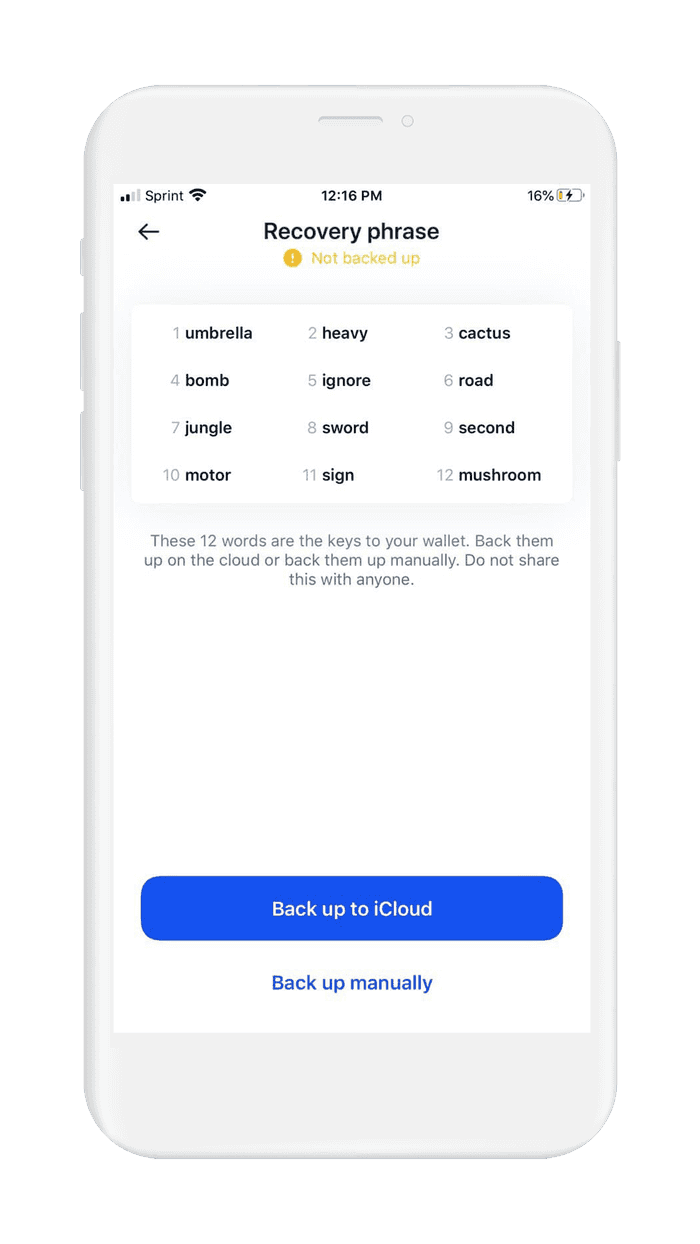
Coinbase Wallet gives you two options to back up the recovery phrase:
- Backup to the cloud - Google Drive
This backup solution encrypts your 12 word recovery phrase using AES-256-GCM encryption, and the encryption key is a password that you set while setting it up. It is important to highlight that Coinbase still recommends performing a manual backup in addition to backing up in the cloud. This is because you should not rely on a cloud backup as the only backup. For better backup methods, see backing up your recovery phrase.
- Manual backup
Manually backing up your recovery phrase provides you the option to choose an approach that is right for you, and gives you more security compared to a cloud backup. Coinbase, along with many other wallets, recommend writing down your seed phrase. This is the first step, and writing it down allows you to transfer it to a secure medium for backup.Once you have transferred your seed phrase to paper, or another secure medium, it is time to verify your seed phrase. Remember, paper backup is for temporary use - only acceptable while in transit to the final backup destination.
4. Verify your recovery phrase
Backing up your recovery phrase for most wallets, including Coinbase wallet, is a 4 step process:
- The wallet will display your recovery phrase on the screen, and ask you to create a backup.
- Next, you will write down your seed phrase using paper and pencil, this is to prepare it to be transferred to a more secure medium*
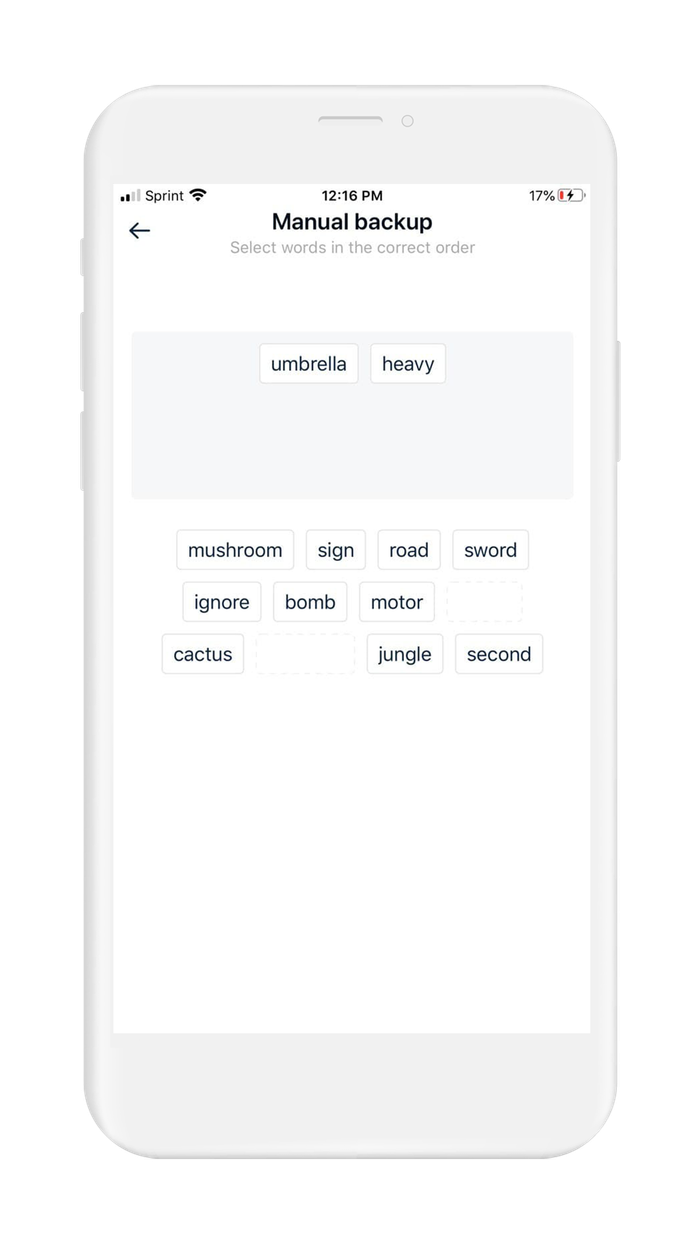
- Returning to your wallet, the wallet will ask you to input your recovery phrase. This step is done to verify that you have copied your recovery phrase accurately.
- After completing the setup of your wallet, and before adding any funds to your wallet, backup your recovery phrase.
At this point, you are at step 3 in the above process. In the next section of this guide, you will learn how to create a secure backup of your recovery phrase.
*WARNING: When you follow the steps to find your recovery phrase, you will be writing the recovery phrase on a piece of paper. It is very important that you backup the recovery phrase on a more reliable medium, and then destroy that piece of paper. Paper is vulnerable to accidental loss, theft, and damage. It is not the safest method of backing up your recovery phrase.
- Coinbase Wallet will now be displaying the words of your recovery phrase on the screen in a scrambled order. To verify your recovery phrase, tap on each word in the proper order. Selecting the wrong word in the wrong order will invalidate the process.
Congrats, you have just generated a recovery phrase using Coinbase Wallet and your wallet is activated. However, before you deposit any funds into this wallet you will want to back up your recovery phrase. Proceed to the next section to learn about all the different options available to you.
5. Securely back up your recovery phrase
If you used Vault12 to pre-generate your seed phrase, your seed phrase is already securely backed up in your digital vault.
Your recovery phrase is the master key to all of your cryptocurrency funds. Coinbase Wallet uses BIP39, which is the current industry best practice for generating recovery phrases. The majority of modern wallets today use BIP39. This means your Coinbase recovery phrase can be used to access your funds across many different wallets.
Securely backing up your recovery phrase is the most important step in creating a new wallet. To emphasize how important this is, consider how someone with your recovery phrase could access your funds without you knowing.
Imagine a bad actor has your recovery phrase, and you have your Coinbase Wallet locked down with biometric authentication on an encrypted device.The attacker could simply open any wallet application, and import your recovery phrase. The attacker now has access to all of your funds.
We want you to have a secure backup, so this never happens to you.
Nine out of ten wallet providers only mention one way to backup your recovery phrase - by writing the recovery phrase on paper. Wallet providers only mention this paper backup method because it is easy for beginners to do. Paper backups are simply not that secure.
We did extensive research and compiled the best ways to back up your recovery phrase.
We cover all the most well-known options, including next-generation options like How to back up your recovery phrase in Vault12.
Once you have safely backed up your recovery phrase, you can initialize your wallet using any BIP39 compatible wallet. In the next section, you will learn how you can initialize your wallet using your recovery phrase.
6. Initialize or import recovery phrase
If you are following this guide from the beginning, and you created your wallet using the default approach, using the app to `Create a Wallet`, then congratulations! You are ready to start using your wallet.
However, be careful about storing large amounts of funds secured only by a wallet-generated recovery phrase.
If you followed one of our guides for generating a more secure recovery phrase, and you want to use that recovery phrase in the Coinbase Wallet - this section is for you!
In this section, you will learn how to initialize your wallet using only your recovery phrase. There are 3 main reasons to generate your wallet using this method:
- You lost access to your wallet, and you need to regain access to your wallet and your funds.
- You want to access your wallet and funds using a different wallet app.
- You want the best security, and you generated a recovery phrase using an advanced method.
To initialize a wallet with your recovery phrase in Coinbase Wallet:
- Open the Coinbase Wallet app
- The default screen will show 2 options: "Create a new wallet" and "I already have a wallet"
- Select the option "I already have a wallet"
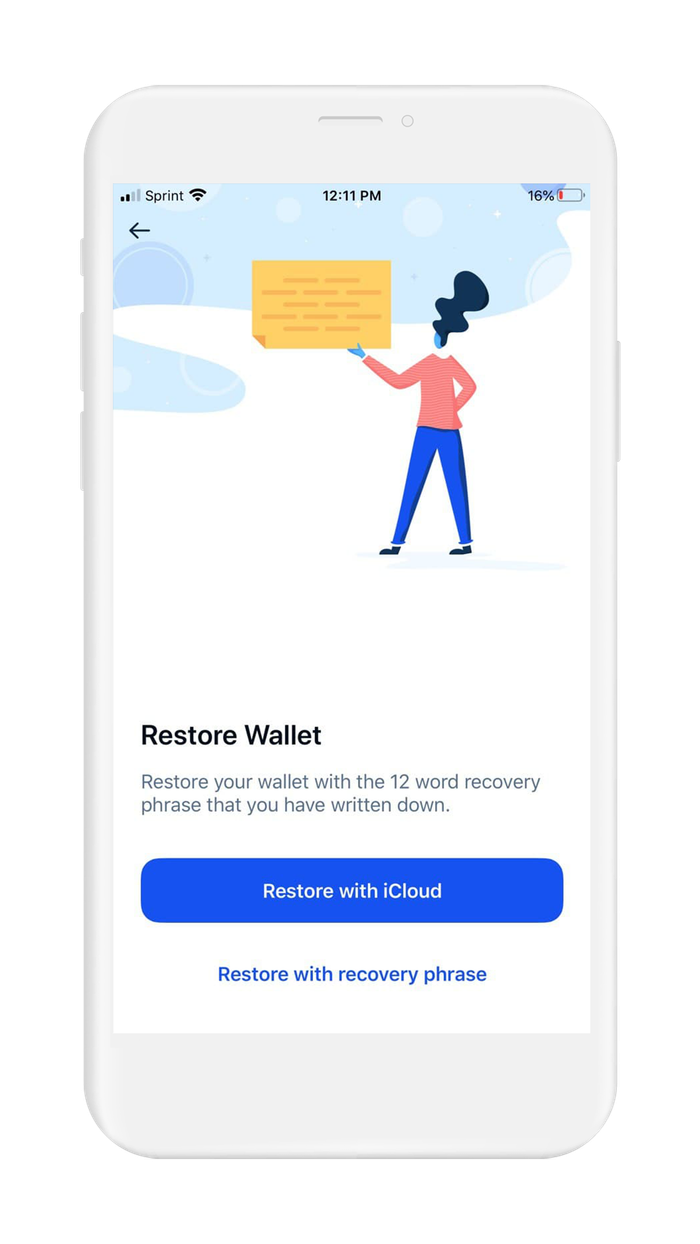
- Next, you will be at the "Restore Wallet" screen
- You will see 2 options: "Restore with iCloud" and "Restore with Recovery Phrase"
- Select the option "Restore with Recovery Phrase"

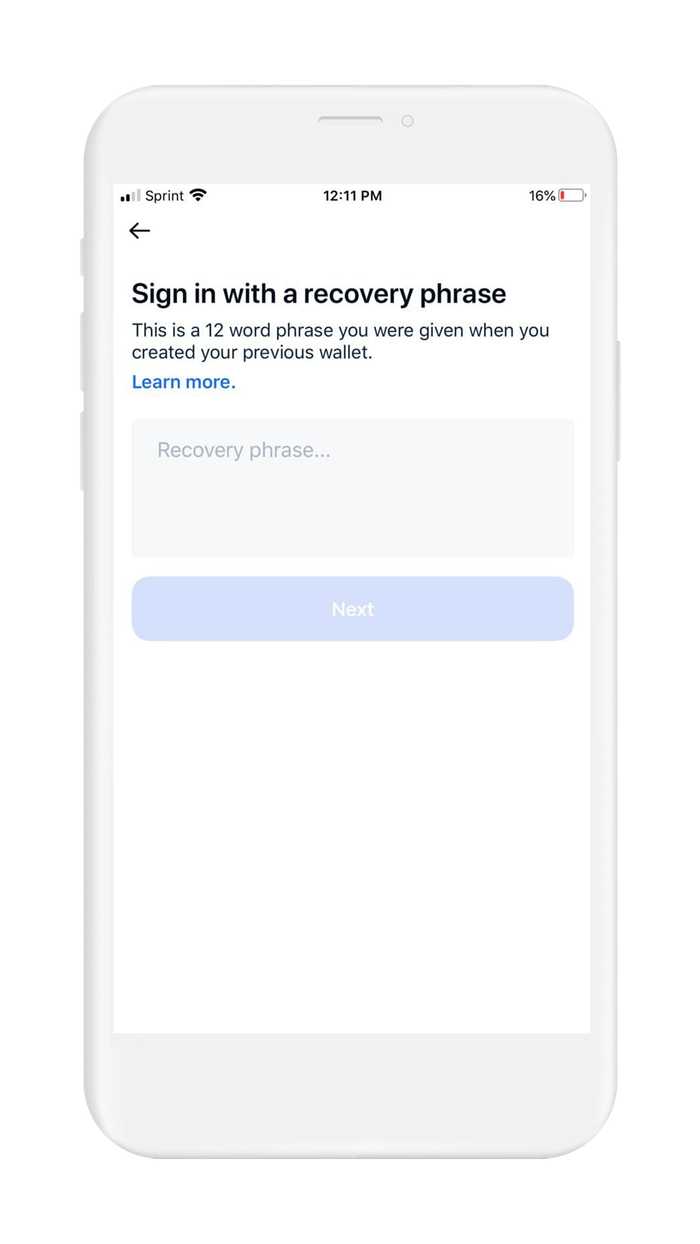
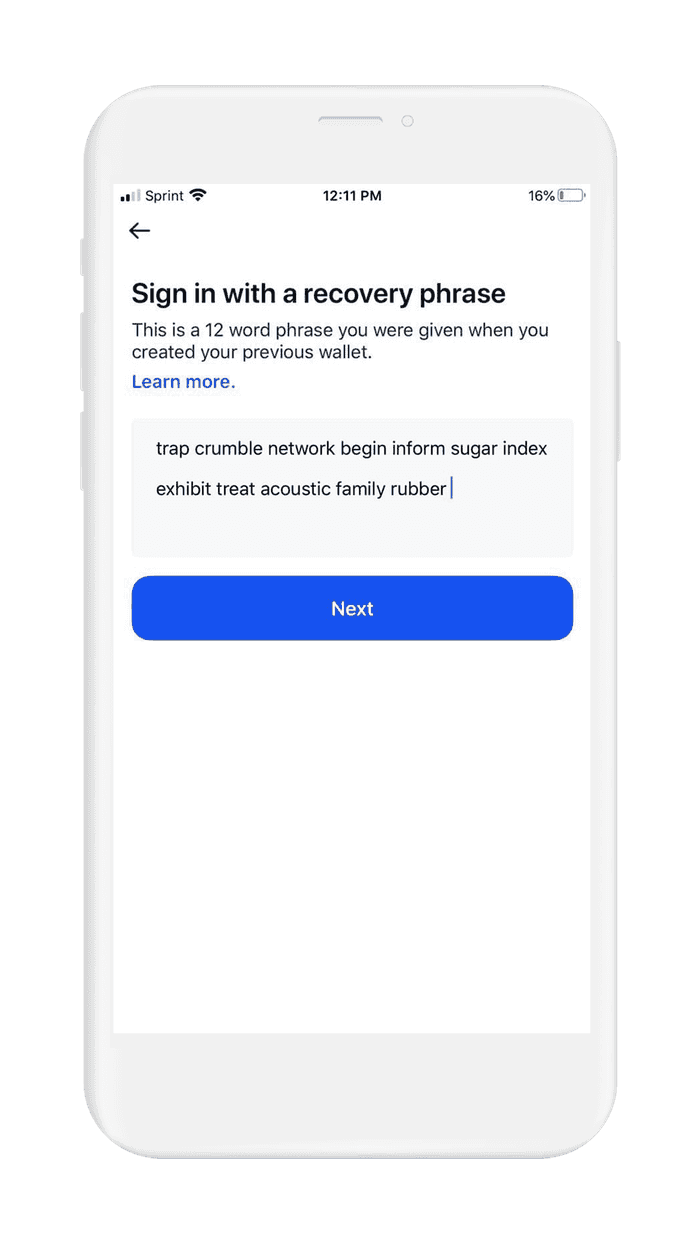
- Coinbase Wallet will now ask you to sign in with a recovery phrase.
- In the text box, carefully input your recovery phrase. If anything is misspelled or entered incorrectly, you will have to start over.
- When you finish, tap on "next"
- Before proceeding, you have to cover the legal stuff. Check the box to agree to the Privacy Policies and the Terms and Conditions.
- Coinbase wallet uses an ID system to make it easier for users of the wallet to send funds to each other. Instead of sending crypto to an alpha-numeric address, users of Coinbase wallet can send crypto to your @username. In this step, input the user ID you want to use
- Next, you will be asked if you want your user ID to be public or private
- Public user ID means users of Coinbase wallet can use your user ID to send funds to you. If you choose public user ID, be advised that your transaction history and address balances can be found through your user ID.
- Private user ID means users cannot look up your user ID to send funds to you
- Coinbase Wallet also supports ENS, so if you want to use this feature, but prefer to use an open standard, you can get a "yourname.eth" name using Ethereum Name Service. Keep in mind, the same privacy concerns regarding blockchain analysis still apply
- It is always a good idea to put the maximum amount of security as possible on your wallet. Coinbase Wallet supports passcodes and biometric authentication. Configure this now.

Congratulations, you have just initialized a wallet by importing your recovery phrase. Your Coinbase wallet is setup and ready to use.
If you don't already have a secure backup, or if you want to learn more about backing up your recovery phrase, check out the previous section of this guide, Section 5.
In the next section, we cover useful links for users of Coinbase Wallet.
7. Further Reading
In the world of cryptocurrency, knowledge is your best friend.
Digital Wallet providers will almost always have their own user documentation, and sometimes they may even have a user community where you can ask questions.
Check out these resources about Coinbase Wallets:
Information about best practices on the topic of security can be scattered all over the internet. We work hard to distill the best practices into one place for you.
Check out these resources about securing crypto wallets:

Vault12
Vault12 is the pioneer in crypto inheritance and backup. The company was founded in 2015 to provide a way to enable everyday crypto customers to add a legacy contact to their cry[to wallets. The Vault12 Guard solution is blockchain-independent, runs on any mobile device with biometric security, and is available in Apple and Google app stores.


Vault12 is NOT a financial institution, cryptocurrency exchange, or custodian. We do NOT hold, transfer, manage, or have access to any user funds, tokens, cryptocurrencies, or digital assets. Vault12 is exclusively a non-custodial information security and backup tool that helps users securely store their own wallet seed phrases and private keys for the purpose of inheritance. We provide no legal or financial services, asset management, transaction capabilities, or investment advice. Users maintain complete control of their assets at all times.
Vault12 Product Demo
Get The Vault12 App Onto Your Phone