
This two-part article explains how to run your own Zax relay node on the Digital Ocean platform to achieve completely private and dedicated communications among your Vault Guardians. Custom URL Relay hosting is an optional, advanced Guard feature.
If you're just learning what Zax secure messaging is, we have another article explaining that.
PART 1: Installing and verifying a test Relay Node
1. Start a new Droplet with the pre-installed Ruby
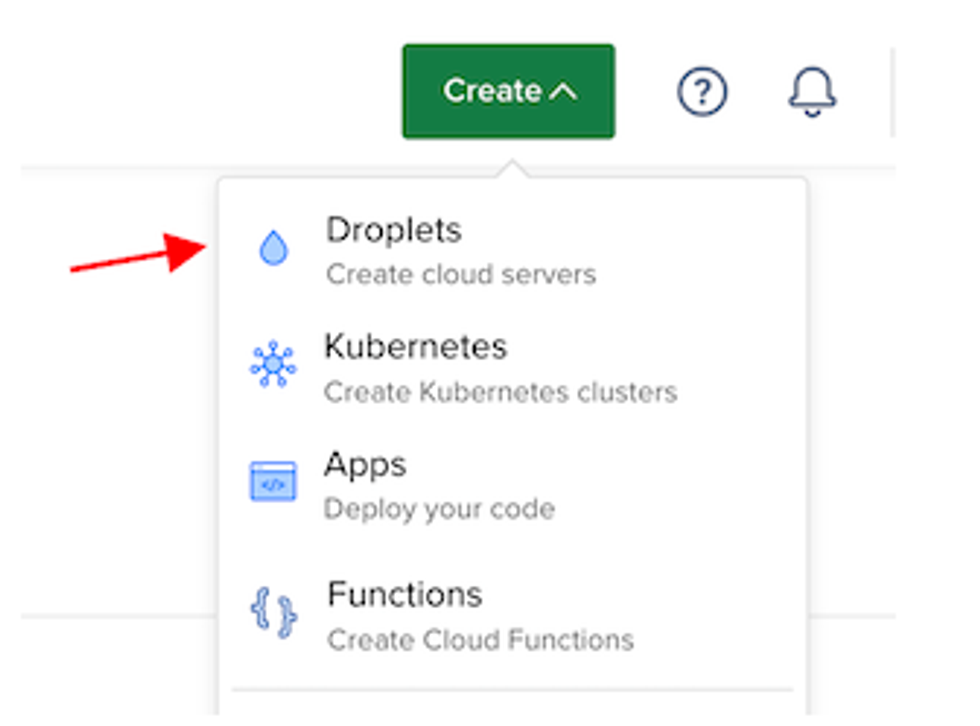
- Navigate to the Digital Ocean Control Panel Dashboard and choose the appropriate project from the left menu.
- Click on Create > Droplets to initiate the setup process.
- Choose region and/or datacenter according to Droplet recommendations (closest region), or according to your preferences.
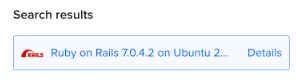
- Under Choose an Image, select Marketplace and then opt for the Ruby On Rails image.
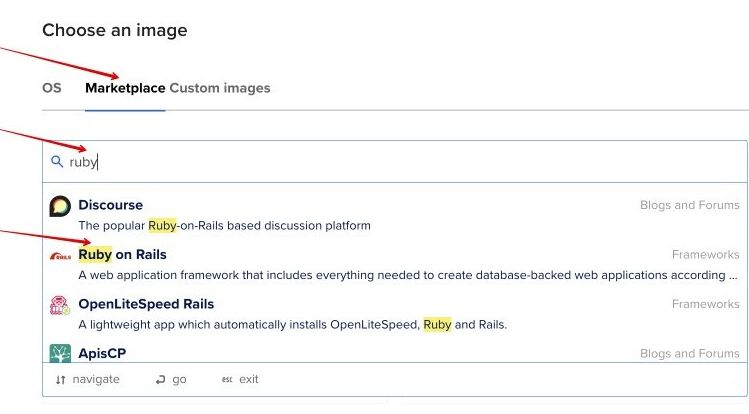
- Ensure that it's the appropriate version (e.g., Version 7.0.4.2 or newer, OS Ubuntu 22.04).
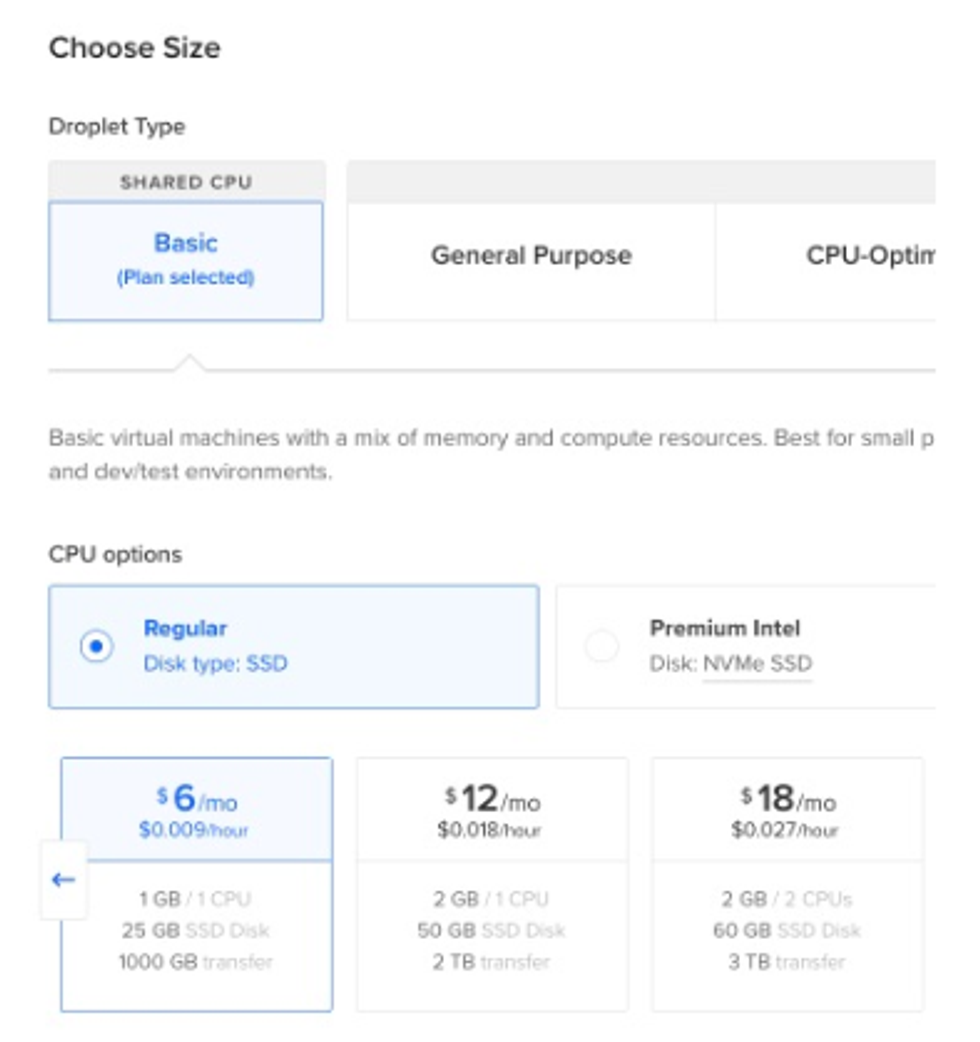
- The minimal options are fine for individual use:
- For authentication, choose the SSH Key option and select your preferred SSH key. You can backup your SSH keys to the Vault12 Guard app.
- Click Create Droplet, and wait for the Droplet to be provisioned and started.
2. SSH into the Droplet
Once the Droplet is ready:
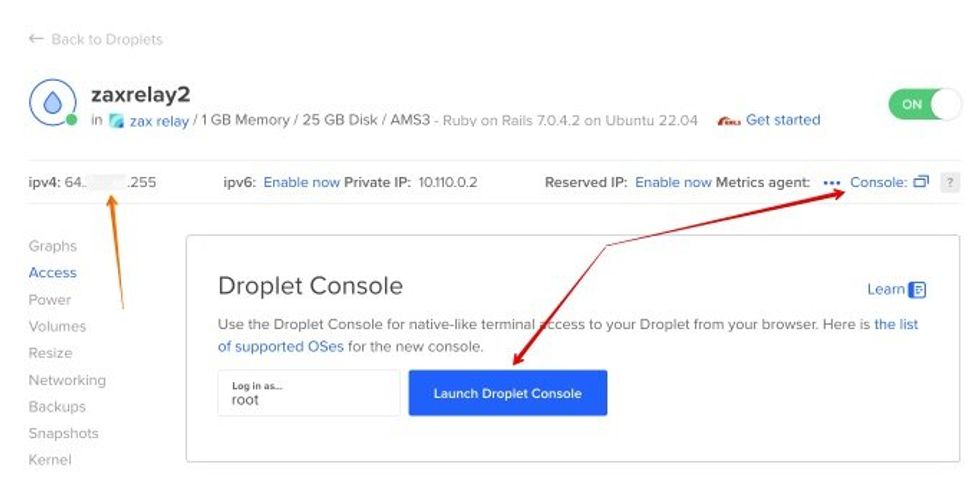
- Check the Droplet's public IPv4 address (orange arrow).
- Access it via SSH by launching Droplet Console (red arrows), or by using any other SSH client with the following command:
ssh root@your_droplet_ipv4
3. Install Redis
Install Redis on the Droplet by following steps below, or the original guide by Digital Ocean:
- To install Redis package run:
apt install redis-server
- To update Redis configuration edit /etc/redis/redis.conf and set the supervised directive (approximate line number 236) to supervised systemd. For example, by means of nano editor:
nano -l /etc/redis/redis.conf
- Restart Redis service to apply the changes:
systemctl restart redis.service
4. Install and configure Zax
- In the SSH console, sign in as the predefined rails user:
su - rails
- Clone Zax repository, navigate into the directory and run the script to install dependencies:
git clone https://github.com/vault12/zax.git
cd zax
./install_dependencies.sh
- Whitelist your hostname for production use
By default, Rails 6 applications reject all requests that are not made to the configured host. So you need to uncomment and modify the production configuration file config/environments/production.rb.
Uncomment the line (approximate line number 11) containing the following text:
11 | # config.hosts << "zax.example.com"
and insert your own IP address (IPv4) or hostname, so that it looks similar to this:
11 | config.hosts << "64.1.1.255" # use your Droplet's IP address (ipv4) or hostname.
Exit from the rails user session by entering exit.
5. Modify Rails service to serve Zax
Open rails service config:
/etc/systemd/system/rails.service
and update the WorkingDirectory and ExecStart directives as follows:
WorkingDirectory=/home/rails/zax/
ExecStart=/bin/bash -lc 'rails s --binding=localhost --environment production'
Save the changes and exit the editor.
6. Configure Nginx
- Edit the following Nginx configuration file:
/etc/nginx/sites-available/rails
and replace the server_name _; with the correct address (IPv4) or host name (e.g., server_name 64.1.1.255;).
- Allow Nginx Full through the firewall and delete the rule for Nginx HTTP:
ufw allow 'Nginx Full'
- Reload the systemd daemon and restart the Rails service to apply the changes:
systemctl daemon-reload
systemctl restart rails.service
7. Verify the installation
Open in a browser the IPv4 IP address you used above, like http://64.1.1.255. (At this step you will use http instead of https, since you have not yet configured your Nginx and DNS domain name with an SSL certificate to be used for secure HTTPS connections).
You should be able to see the dashboard of your own Zax relay, similar to this dashboard:
8. Add the URL of your relay to the Vault12 Guard app
Now you are ready to verify that your newly created Zax relay can connect to your Vault12 Guard app:
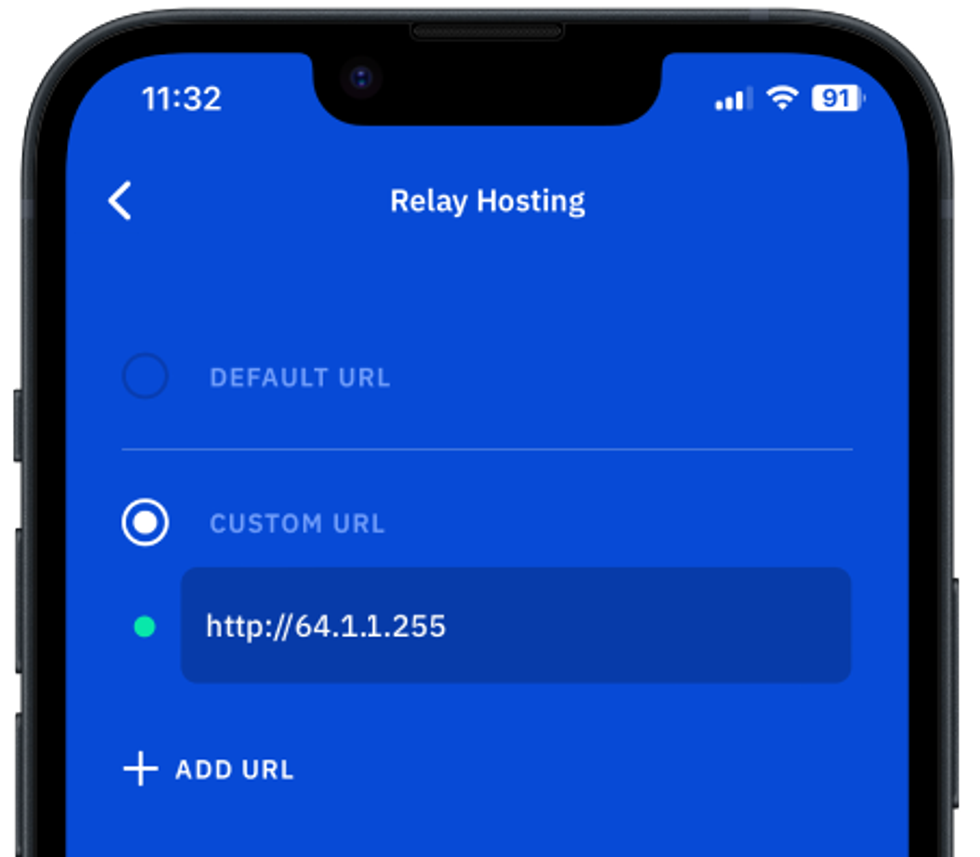
- In Guard, go to Settings / Advanced / Relay hosting.
- Select Custom URL and enter the Droplet's IPv4 address URL (like http://64.1.1.255). Again, remember to choose http instead of https at this step until you have secured your Nginx and DNS domain name with an SSL certificate.
The green indicator should indicate that the app is connected to your relay. Note that when you leave this screen, the app might request to restart.
At this point, the Zax relay is functional. However, for security purposes it is necessary to add some standard layers of network defense to your Droplet. Please continue on to Part 2, below, for important additional steps needed to secure your Zax relay and run it in a production environment.
-------------
PART 2: Running Zax securely (Production Use)
1. Disable the Zax Dashboard frontend
For safety and privacy reasons, you may prefer to disable access to the Zax Dashboard of your private relay. To do this:
- Sign in as the predefined rails user:
su - rails
- Set the public_file_server variable to false on line 64 in the production configuration file:
config/environments/production.rb
This action will prevent the Ruby server from serving files from the public/ directory.
- Exit from the rails user session by entering exit.
2. Add a DNS record for your domain with your registrar
To configure DNS for your domain, log in to your domain registrar's website and access the DNS management section. Add a DNS A record by specifying your domain name and your Droplet's IP address. Save the changes and wait for DNS propagation, which may take some time.
3. Secure Nginx with Let's Encrypt
- Follow the instructions in the Digital Ocean tutorial How To Secure Nginx with Let's Encrypt on Ubuntu 22.04 to obtain and install SSL/TLS certificates for your domain. Here are the summarized steps:
1. Obtain SSL certificate using Certbot with Nginx plugin:
certbot --nginx -d zax.example.com
2. Delete the rule for Nginx HTTP:
ufw delete allow 'Nginx HTTP'
3. Reload the systemd daemon and restart the Rails service to apply the changes:
systemctl daemon-reload
systemctl restart rails.service
4. Put an URL address of your relay to Vault12 Guard app
Now you are all set to switch your Vault12 Guard app to work with your secure Zax relay:
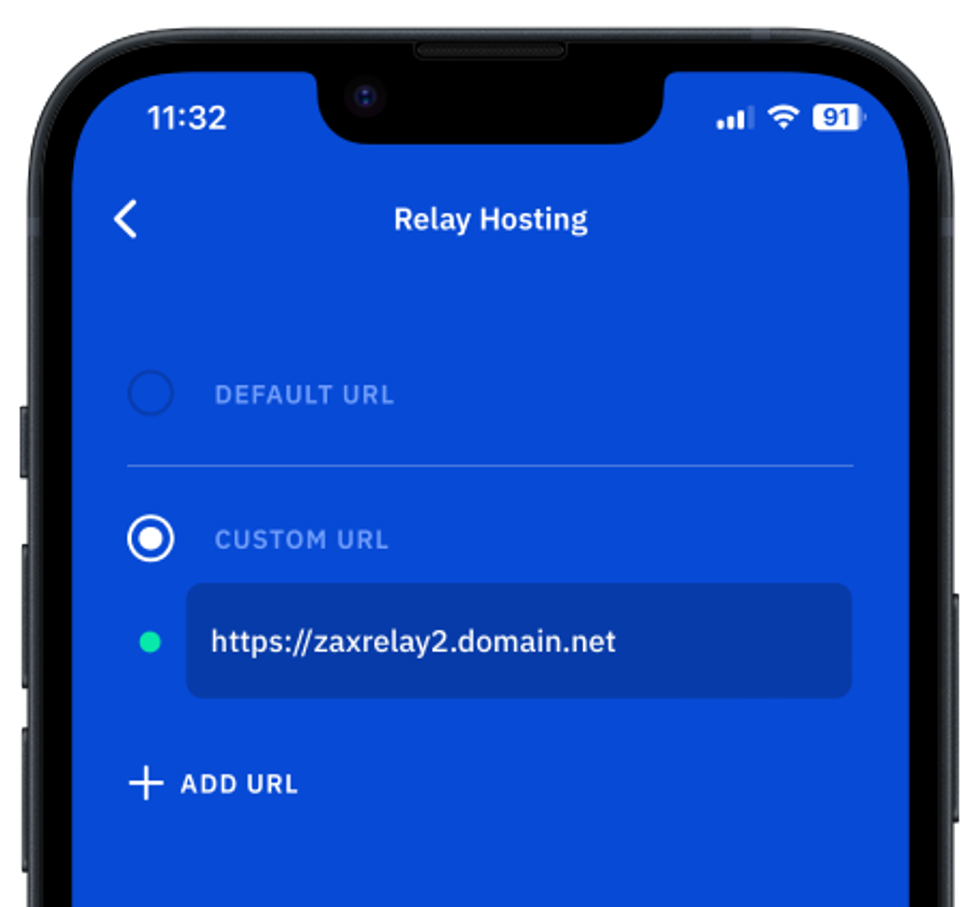
- In Guard, go to Settings / Advanced / Relay hosting
The previous custom URL (using http) should now be red, since you have disabled unencrypted HTTP access to Nginx.
- Update Custom URL to use your Droplet's new HTTPS URL.
The green indicator should now indicate that Guard is connected to your secure custom relay. Note that when you leave this screen, the app might request to restart.
- You may also need to delete any default public relay URLs shown in order to keep your network of Guardians running fully privately.
- Now that your custom relay is working, all of your Guardians should configure the Guard app on their devices to connect only to your custom relay to keep all communications within your private Guardianship circle. (They would make this change in Settings / Advanced / Relay hosting in the same way that you did.)