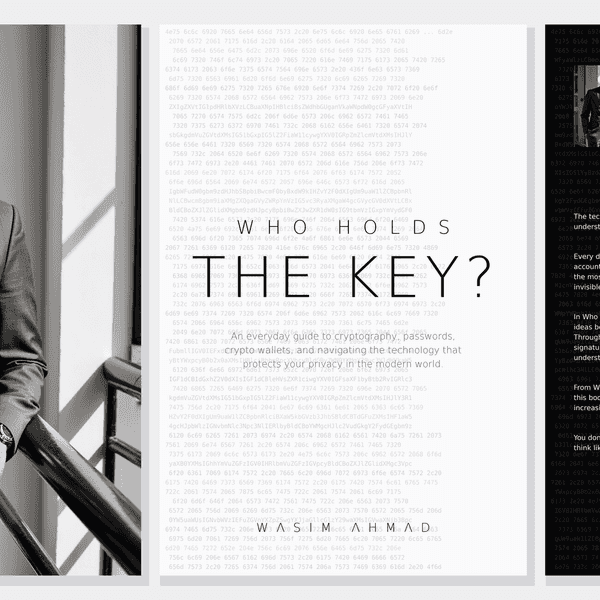
Who Holds The Key?
You Used cryptography fifty times before breakfast
You unlocked your phone with your face. Paid for coffee with a tap. Sent a message that promised it was “end-to-end encrypted.” Every one of those moments ran on cryptography — the technology that protects your digital life, and the technology most people understand the least.
In Who Holds the Key?, technologist Wasim Ahmad explains, in plain English, the simple ideas behind the locks your life runs on. Through true stories and real-world examples — including the $1.5 billion theft where nobody stole the keys: the screen lied — he shows how encryption, digital signatures, passkeys, secure hardware, and cryptographic keys work, and why understanding them has become an essential life skill.
Built on four plain ideas and one master question — the one on the cover — the book runs from WhatsApp and Apple Pay to Bitcoin, AI, and quantum computing. No math. No jargon. No paranoia.
You don’t need to become a cryptographer. But by the time you finish this book, you’ll think like one.
QUESTIONS IT ANSWERS
- Can WhatsApp really not read my messages?
- Where does my Face ID data go — and is it safe?
- Isn’t keeping every password in one app insane?
- What am I agreeing to when my wallet says “Sign”?
- Will quantum computers break everything?
- What happens to my crypto and photos when I die?
Every chapter opens with a question ordinary people ask — and closes with an answer you can act on the same afternoon.
INSIDE THE BOOK
PART I
LIVING IN A MATERIAL WORLD: THE SINGLE IDEA THAT GOVERNS YOUR DIGITAL LIFE
An ordinary morning, seen clearly for the first time — and the key: the one idea everything else hangs from.
PART II
DEMYSTIFYING THREE KEY ELEMENTS
What “end-to-end encrypted” really means, what the Sign button really does, and where your keys actually live.
PART III
STAKES AND THREATS
Your passwords, your front door, your money and your crypto: who can freeze them, who can steal them, and who inherits them when you’re gone.
PART IV
THREATS FROM BEYOND
Quantum computers and governments — the two forces powerful enough to threaten the locks themselves, and exactly how worried to be.
PART V
AGENCY AND RESOLUTION
How to judge what deserves your trust, size up your own risks, and build a defense you’ll actually keep — Good, Better, or Paranoid.
PART VI
EVOLUTION OF PERSONAL PRIVACY
Cryptography’s turn from hiding to enabling — and why the same mathematics the powerful want weakened puts control back in your hands.
ABOUT THE AUTHOR

Wasim Ahmad has spent decades where this book lives: at the exact point where deep, difficult technology meets everyday people.
It started early. As a schoolboy in Britain in the 1970s, he was among the first children to learn Prolog, the artificial intelligence language. He went on to the University of Sussex to study Mathematical Physics, then switched to Physics and French so he could spend a year in Paris — an early sign of a career that would keep crossing between the technical and the human. After university, he was an astronaut candidate with the Juno Project, but was too young to be allowed into space.
In the 1990s he joined Synon, the British startup whose software-based code generation won the Queen’s Award for Technology, moving with the company to Marin County, California. Then came the chapter that runs through the heart of Who Holds the Key?: as a founding member of Voltage Security, a Stanford University spinout, he launched the first commercial email encryption built on Identity-Based Encryption — the first genuine breakthrough in public-key cryptography in thirty years — working alongside some of the world’s most renowned cryptographers, including Stanford’s Dan Boneh. When catastrophic breaches hit the payments industry, he helped launch end-to-end protection for the world’s payment systems using format-preserving encryption, the elegant technique readers meet in Chapter 4.
His crypto journey began with AlphaPoint, working with the founding team that launched some of the world’s first cryptocurrency trading exchanges. He then joined Vault12, the pioneer of crypto inheritance, where the mathematics of Adi Shamir’s Secret Sharing — the scheme at the center of this book’s chapters on backup and inheritance — became a product that lets people pass their digital assets safely to the ones they love.
Most recently, he has been lobbying hard in both the United States and the United Kingdom — engaging with the SEC, CFTC and the FCA — to evolve the laws and regulations governing crypto, so that everyday people can access these technologies safely and confidently.
The pattern across all of it is the same one that drives this book: taking complex technology and formidable algorithms, and shaping them into solutions that ordinary people can trust, understand, and use.
Wasim lives in London and New York.
Which is a better wallet: Ledger Nano X or Exodus?
When choosing crypto wallets, many users base their decisions on day-to-day asset management needs and perceived wallet or device security. However, savvy crypto users first consider a wallet's ability to handle long-term security scenarios.
Long-term security includes expected essentials like backup and recovery tools, and often-overlooked features related to secure and fault-proof third-party recovery. Wait, what's third-party recovery? You can think of third-party recovery as your ability to allow crypto assets to be inherited by successors. All crypto investors should have a comprehensive security strategy for the full life cycle of their crypto assets.
Let's begin by helping you understand the pros and cons of the Ledger Nano X hardware wallet and the Exodus software wallet for day-to-day activities, as well as considering their ability to safeguard the long-term security of your assets.
Overview
The Ledger Nano X and Exodus wallets both provide a wide variety of features and support a broad spectrum of cryptocurrencies, making them suitable for diverse crypto portfolios.
At a high level, several differences are clear:
Ledger Nano X
- Form: A hardware wallet, with mobile-centric usability via Bluetooth.
- General Usability: User-friendly (with necessary trade-offs due to its more-robust security features).
- Design: Compact and durable. The de facto standard for securing transactions on desktops.
- Price Point: It's not free, like software wallets are.
Exodus
- Form: A software wallet, available in both mobile and desktop versions.
- General Usability: Easy to use, and has particularly well-reviewed customer support.
- Design: Built-in exchange features and a moderate number of integrations.
- Price Point: The wallet software is free; the company makes money on exchange services provided through the wallet.
The decision between the two will likely hinge on individual preferences for target security requirements, preferred platforms (mobile or desktop), and should take into account the planned frequency of use.
Approach to comparison
Now, let's have a closer look.
When choosing the best hardware wallet for cryptocurrency security, you may wonder not only which is better, the Ledger Nano X or the Exodus, but also:
- What happens if your wallet is lost or stolen? (How well can these wallets recover from user errors?)
- How do these wallets handle more advanced scenarios like inheritance of crypto assets?
- How easy to use are these wallets?
- How do their security features compare?
This article compares important characteristics for these two popular wallets. We’ll break down the strengths and weaknesses of each, focusing on security, ease of use, and backup and recovery methods. By the end of this comparison, you’ll clearly understand which wallet is right for you, as well as how to recover your crypto assets in case of accidents.
What happens if your wallet is lost or stolen?
Wise wallet owners recognize the critical importance of crypto recovery before they find themselves in an unexpected bind! That's why it's important to understand the fundamental topic of crypto asset longevity, including features such as backup, recovery, and inheritance for crypto assets. These considerations are central to long-term planning.
Technical security is essential, but in the world of crypto, the degree to which backup and recovery solutions are foolproof for users is at least equally important. Here are the backup and recovery options for these two wallets:
How do these wallets handle Crypto Inheritance?
Crypto Inheritance Features
Currently, most crypto wallets, including the Ledger Nano X and Exodus, lack any features for establishing and managing crypto inheritance. This gap presents a challenge for users who want to be sure that their crypto assets can be transferred to their heirs.
Backup and recovery differentiators
Ledger Nano X Recover service Disadvantages:
- The optional Ledger Recover backup service is a paid service provided by three corporations that each hold parts of the user’s seed phrase in a cloud. This introduces risks, as the seed phrase could potentially be accessed via subpoena; or business partners could terminate agreements or become involved in lawsuits that result in locked data or resources (like, for example, Gemini and Genesis). These scenarios contain multiple potential points of failure.
- Very important detail: The terms of the optional Ledger Recover service do not mention support for inheritance, meaning any unfortunate accident related to the user could make crypto assets unrecoverable for his or her successors. Ledger itself suggests using 3rd-party crypto inheritance services for those purposes.
Ledger Nano X Recover service Advantages:
- People have different preferences. If a user is comfortable trusting a bank with their assets, they might also feel confident using Ledger Recover for securing their seed phrase backup (even though Ledger is not providing the entire cloud backup solution).
Exodus backup Disadvantages:
- Exodus has a cloud backup feature that comes with similar security assumptions and risks as all other passwords stored in your cloud provider. It is not recommended to rely on cloud backups for significant crypto balances.
Exodus backup Advantages:
- Exodus does offer a one-click solution for backup for insignificant balances of crypto.
How easy are these crypto wallets to use?
Let's compare the key aspects of both wallets side by side, and then summarize what really stands out for user convenience:
Crypto wallet user experience (UX) differences
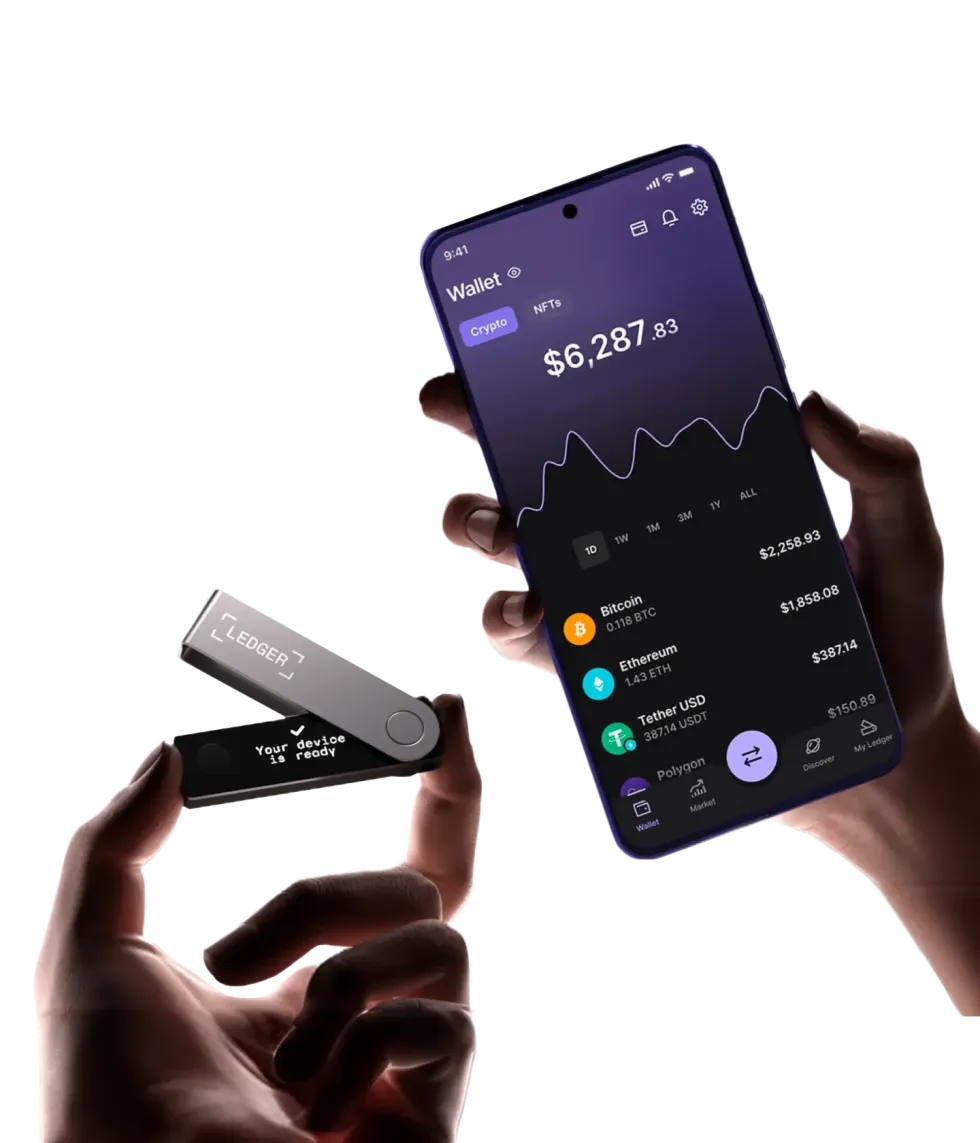
Ledger Nano X with Smartphone UX
Ledger Nano X Disadvantages:
- The display is literally the size of a coin: very uncomfortable to use.
- Requires two-handed operation, making it difficult to use with a phone simultaneously — contrary to some misleading ads.
- The buttons are stiff, making operations cumbersome.
Ledger Nano X Advantages:
- Offers Bluetooth connectivity — works with or without a cable, at least with smartphones.
- Wide support for third-party wallets and dapps, allowing the Ledger Nano X to sign transactions directly in MetaMask, Uniswap, and other platforms without relying on Ledger Live software. This is a huge advantage for DeFi users.
Exodus UX Disadvantages:
- As a product that prioritizes ease of use, Exodus does not offer a full suite of advanced features such as fiat currency on/off ramps or advanced Web3 / DeFi integrations.
- The desktop version of Exodus offers more features than the mobile version (e.g., portfolio management tools, Trezor hardware integration, and a broader set of supported cryptocurrencies).
Exodus UX Advantages:
- Exodus is generally more user-friendly than the Ledger Nano X (and other hardware wallets).
How do these wallets' security features compare?
Now, we dive deeper into the core specification of every hardware wallet: security features.
| Ledger Nano X | Exodus | |
| PIN-code | 4 - 8 digits | up to 6 digits |
| BIP39 Passphrase | Yes | No |
| Open-source | Partial | Partial |
| Secure Element | Yes | No |
| Multisignature | Yes | No |
Crypto wallet security feature differentiators
Ledger Nano X security Disadvantages:
- Some critical components are closed-source. This raises concerns, especially after the controversial introduction of the Ledger Recover backup service, which challenged the previous assumption that the Secure Element could never transmit the recovery seed phrase outside the hardware wallet.
Ledger Nano X security Advantages:
- Includes a Secure Element, giving Ledger devices a strong reputation for withstanding physical attacks. This is important for users who prefer not to complicate their security with BIP39 passphrases, prioritizing ease of use.
Exodus security Disadvantages:
- Portions of the Exodus wallet are closed-source, preventing full transparency of its code security.
- Exodus, like all software wallets, operates in an inherently less-secure operating environment than a hardware wallet.
- As a software wallet, Exodus lacks a Secure Element.
- Exodus lacks support for some common security extensions such as 2-factor authentication, creation of multisignature transactions, and entry of a wallet "extra word" passphrase.
Exodus security Advantages:
- Some of Exodus's security disadvantages could be mitigated by using Exodus together (integrated) with Ledger Nano X (they are compatible with each other).
Summary of Ledger Nano X and Exodus Comparison
The Ledger Nano X and Exodus both provide a respectable set of features, and support a broad spectrum of cryptocurrencies, making them suitable for diverse crypto portfolios.
The Ledger Nano X is a mobile-friendly, security-oriented solution, and offers a balance of security and convenience features. It provides a small display and uncomfortable input, but with the advantages of a Secure Element and wireless connectivity options like Bluetooth.
On the other hand, Exodus is free and simple, but provides fewer security capabilities. It's great for beginning users and suitable for relatively small amounts of crypto.
The decision between the two will likely hinge on individual preferences for the target use case and balance, and should take into account the planned frequency of use.
Given their convenient integration, the best of all worlds could be to use both wallets, holding larger amounts of crypto in your Ledger Nano X wallet while keeping a small, ready-to-transact "petty cash" stash in your Exodus wallet.
Whichever you choose, remember to add crypto inheritance to your choice of wallet to ensure the long-term safety of your digital assets.
Vault12 Guard: a decentralized solution for Crypto Inheritance
Vault12 is the pioneer in Crypto Inheritance Management, and delivers an easy-to-use and secure method for assigning a legacy contact to your crypto wallets. This enables you to pass on your wallet seed phrases and private keys for all types of digital assets to future generations. Vault12 Guard is designed for everyday people, yet strong enough for Crypto OGs.
Vault12 Guard has a uniquely-secure design. Utilizing advanced encryption and decentralized storage, it ensures that crypto assets are not only safe but also transferable under predefined conditions, filling a critical need unmet by most traditional hardware wallets. Vault12 Guard applies a hybrid approach of software fused with the hardware-based Secure Element of phone devices (The Secure Enclave for iOS devices, and Strongbox for Google devices). Vault12 Guard's decentralized design reduces possible points of failure. Nothing is stored on cloud servers or Vault12 servers, and no assets are stored on local devices, making them less of a target.
From a user perspective, the Vault12 Guard app asks users to appoint one or more people (or mobile devices) as Guardians. The designated Guardians are entrusted to protect the user's comprehensive collection of wallet seed phrases and private keys, which are safely stored within a decentralized digital Vault. Its simple, user-friendly workflow removes the necessity for regularly revising wallet inventories or modifying instructions for your lawyers — a process that otherwise could lead to privacy breaches.
Both the Ledger Nano X and Exodus are compatible with Vault12 Guard Inheritance. This addresses the seed phrase backup dilemma for any hardware wallet. It also makes less-secure backup methods, such as paper or steel plates, unnecessary.
Stablecoins' momentum builds in bridging traditional and digital assets
There is a lot of buzz about stablecoins. So what are they, should you have some, and how should you protect them if you do have some?
First, let's review what they are: stablecoins are blockchain-based tokens that are designed to act as stable forms of value. Their prices are synchronized to predictable external assets, such as stable currencies. But unlike currency, which can be slow to deploy or move (whether physically or via a bank electronic transaction), stablecoins instantly can be transferred or exchanged for a huge array of digital assets.
Given their stable value, stablecoins have a unique place in the crypto world: unlike more-volatile cryptocurrencies, they act as low-risk intermediaries between digital assets and other traditional forms of value.
And even though their role is intermediary, they could be held for short periods of time, or long ones. Let’s consider why so many people and institutions buy stablecoins — and sometimes hold them for long periods of time.
What are the most common use cases for stablecoins?
There are many ways that people and institutions use stablecoins:
As a mechanism for exchange between other forms of value: Some people buy stablecoins for just a short period of time to support making another transactions: for example, it may be necessary to buy stablecoins when moving fiat currency to or from a centralized exchange, or converting between two different types of cryptocurrencies if there is no direct exchange possible between them. A huge market that uses stablecoins as a medium of exchange is International remittences.
As a store of wealth: Stablecoins offer a more stable form of wealth preservation than holding cash in a country with high inflation or an otherwise-volatile currency (e.g., Argentina and Turkey).
As liquidity: Stablecoins provide ready-to-deploy financial liquidity that can be used to quickly participate in DeFi opportunities or trade for other cryptocurrencies when time is of the essence (without needing to slog through slow fiat on-ramps).
As loan collateral to avoid a taxable crypto sale: By borrowing stablecoins against their crypto assets on DeFi, holders can utilize their capital or spend some proceeds without selling crypto assets — thereby avoiding the tax consequences of a sale.
As an investment that bears yields: Stablecoins can be used to earn yield (this typically requires allowing an exchange or DeFi platform to “lock” them).
As a low-risk hedge relative to other investments: Stablecoins can be used to reduce risk as part of a balanced digital portfolio.
Stablecoins and investment risk
If you are considering investing in stablecoins, remember that:
- If you let a centralized exchange hold the keys to your coins, you are subject to third-party risks related to trusting the company, their security, and their financial health. (Remember, "Not your keys, not your coins.") Understand how to manage your keys.
- If you hold your own keys and invest via DeFi, you are subject to the risks of associated smart contracts having bugs, vulnerabilities, or otherwise behaving in unexpected ways.
Nothing is risk-free in life, especially in investing. Choose the levels and forms of risks that you are comfortable with as appropriate for your situation.
How did stablecoins evolve?
When cryptocurrencies like Bitcoin, Ethereum, and altcoins first joined the financial scene, their extreme volatility made them high-risk, speculative investments. Most coins have rollercoaster price periods! Stablecoins were introduced as a way to buffer that volatility.
But a few kinks had to be worked out first: some early attempts to build stablecoins failed because their price was not as stable as the issuers had planned. Specifically, algorithmic stablecoins, which were meant to hold a stable value based on mathematical algorithms, smart contracts, and modeled market behaviors, did not always perform as expected.
For example, the algorithmic stablecoin TerraUSD spectacularly failed in May 2022 due to faulty assumptions in the design of the algorithm about market behavior in response to unexpected events. As a result of several failed algorithmic stablecoins, these days, algorithmic stablecoins have lost much of their initial popularity.
Modern stablecoins
Most stablecoins today are backed by real-world assets (collateral), such as currency, government treasury bonds, cryptocurrencies (sufficiently over-collateralized to buffer against volatility), or baskets of commodities. Confidence is improved when tangible assets back up digital coins, not just trust in the behavior of a "pegging" algorithm.
Transparency, maturity, and regulatory acceptance all lead to increased use of stablecoins. Today's largest stablecoins have made leaps and bounds towards achieving each of those ends. Reflecting this evolution, stablecoins have been making up an increasing share of on-chain transactions — more than half of all crypto transactions — as the following chart demonstrates.
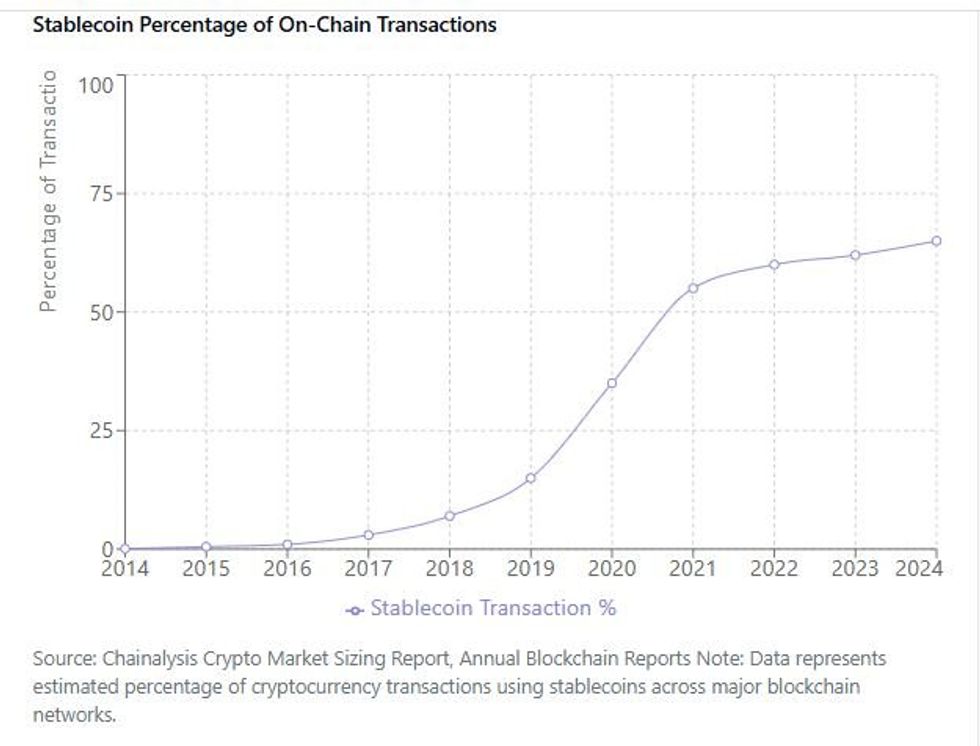
Chainalysis via Claude.ai
Stablecoin successes
Several collateralized U.S. Dollar stablecoins from private corporate issuers have matured and gained popular acceptance. Among them, descending by market capitalization:
- USDT ("Tether"), from Tether
- USDC ("USDC Coin"), from Circle (until 2023, issued by the Centre Consortium, founded by both Circle and Coinbase)
- PYUSD ("PayPalUSD"), from Paxos Trust Company
- RLUSD ("Ripple USD"), from Ripple
According to the "State of Stablecoins in 2025" report by Dune and Artemis, Tether shows stablecoin leadership in volume and market penetration with a $146 billion market cap, while USDC Coin, with a $56-60 billion market cap, excels in institutional adoption and DeFi usage, driven by its regulatory compliance and on-chain activity.
If you'd like a deep dive into the differences between USDT and USDC, we recommend Coin Bureau's insightful comparison.
What financial institutions issue or transact in stablecoins?
Crypto exchanges and stablecoin issuers necessarily hold large quantities of stablecoins, but did you know that many other major financial institutions are moving into the use of stablecoins as well? Institutions like Visa, Bank of America, and Revolut are using or piloting projects to issue and accept selected stablecoins as part of their service packages and partnerships. Even Fidelity Investments is testing their own stablecoin.
How is the United States handling stablecoins?
The United States is undergoing a sea change in its stablecoin appetite, having issued new guidance in March 2025 permitting banks to engage in both crypto custody and certain stablecoin activities. And the Guiding and Establishing National Innovation for U.S. Stablecoins Act of 2025 (“GENIUS Act”), which describes a broader range of stablecoin guidance, is quickly approaching finalization as law. Further, the U.S. Treasury Secretary Scott Bessent has even announced plans to leverage stablecoins backed by U.S. Treasury bills to bolster the dollar's position as the world's dominant reserve currency.
Regulatory clarity for stablecoins is happening fast, which reduces risks for all users.
How can you protect the stablecoins in your digital wallet?
If you hold stablecoins in a digital wallet, you should include them in a secure wallet backup and an inheritance plan just as you would for your other digital assets. Don’t put off thinking about the possibility of wallet access disruptions, or about your digital inheritance.
- Back up your wallet seed phrase so that you can restore your wallet if you ever lose access to it. A decentralized Digital Vault is the most effective place to safeguard your digital assets.
- Think about who your digital asset beneficiary or beneficiaries should be, and plan your digital inheritance.
- You could also choose to keep your Centralized Exchange passwords in your Vault12 Digital Vault, as well as any other related passwords. A Digital Vault is more secure than a standard password manager.
"Failing to plan is planning to fail."— Benjamin Franklin
Vault12 Guard can protect all of the digital assets that you hold
The Vault12 Guard Digital Vault can protect the stablecoins and all other digital assets in your wallets. See how easy it can be for you to protect your digital wealth in a decentralized way using your personal choice of Vault Guardians. Simply and conveniently protect all of your digital assets today in your own Digital Vault. When you’re ready, take it a step further to secure the future of your digital wealth with Vault12 Digital Inheritance.

Vault12 is NOT a financial institution, cryptocurrency exchange, or custodian. We do NOT hold, transfer, manage, or have access to any user funds, tokens, cryptocurrencies, or digital assets. Vault12 is exclusively a non-custodial information security and backup tool that helps users securely store their own wallet seed phrases and private keys for the purpose of inheritance. We provide no legal or financial services, asset management, transaction capabilities, or investment advice. Users maintain complete control of their assets at all times.
Basics
Learn about how the risks of holding cryptocurrency are different than those of traditional investments, and how to move ahead with confidence and safety.
View all articlesWho Holds The Key?
You Used cryptography fifty times before breakfast
You unlocked your phone with your face. Paid for coffee with a tap. Sent a message that promised it was “end-to-end encrypted.” Every one of those moments ran on cryptography — the technology that protects your digital life, and the technology most people understand the least.
In Who Holds the Key?, technologist Wasim Ahmad explains, in plain English, the simple ideas behind the locks your life runs on. Through true stories and real-world examples — including the $1.5 billion theft where nobody stole the keys: the screen lied — he shows how encryption, digital signatures, passkeys, secure hardware, and cryptographic keys work, and why understanding them has become an essential life skill.
Built on four plain ideas and one master question — the one on the cover — the book runs from WhatsApp and Apple Pay to Bitcoin, AI, and quantum computing. No math. No jargon. No paranoia.
You don’t need to become a cryptographer. But by the time you finish this book, you’ll think like one.
QUESTIONS IT ANSWERS
- Can WhatsApp really not read my messages?
- Where does my Face ID data go — and is it safe?
- Isn’t keeping every password in one app insane?
- What am I agreeing to when my wallet says “Sign”?
- Will quantum computers break everything?
- What happens to my crypto and photos when I die?
Every chapter opens with a question ordinary people ask — and closes with an answer you can act on the same afternoon.
INSIDE THE BOOK
PART I
LIVING IN A MATERIAL WORLD: THE SINGLE IDEA THAT GOVERNS YOUR DIGITAL LIFE
An ordinary morning, seen clearly for the first time — and the key: the one idea everything else hangs from.
PART II
DEMYSTIFYING THREE KEY ELEMENTS
What “end-to-end encrypted” really means, what the Sign button really does, and where your keys actually live.
PART III
STAKES AND THREATS
Your passwords, your front door, your money and your crypto: who can freeze them, who can steal them, and who inherits them when you’re gone.
PART IV
THREATS FROM BEYOND
Quantum computers and governments — the two forces powerful enough to threaten the locks themselves, and exactly how worried to be.
PART V
AGENCY AND RESOLUTION
How to judge what deserves your trust, size up your own risks, and build a defense you’ll actually keep — Good, Better, or Paranoid.
PART VI
EVOLUTION OF PERSONAL PRIVACY
Cryptography’s turn from hiding to enabling — and why the same mathematics the powerful want weakened puts control back in your hands.
ABOUT THE AUTHOR
Wasim Ahmad has spent decades where this book lives: at the exact point where deep, difficult technology meets everyday people.
It started early. As a schoolboy in Britain in the 1970s, he was among the first children to learn Prolog, the artificial intelligence language. He went on to the University of Sussex to study Mathematical Physics, then switched to Physics and French so he could spend a year in Paris — an early sign of a career that would keep crossing between the technical and the human. After university, he was an astronaut candidate with the Juno Project, but was too young to be allowed into space.
In the 1990s he joined Synon, the British startup whose software-based code generation won the Queen’s Award for Technology, moving with the company to Marin County, California. Then came the chapter that runs through the heart of Who Holds the Key?: as a founding member of Voltage Security, a Stanford University spinout, he launched the first commercial email encryption built on Identity-Based Encryption — the first genuine breakthrough in public-key cryptography in thirty years — working alongside some of the world’s most renowned cryptographers, including Stanford’s Dan Boneh. When catastrophic breaches hit the payments industry, he helped launch end-to-end protection for the world’s payment systems using format-preserving encryption, the elegant technique readers meet in Chapter 4.
His crypto journey began with AlphaPoint, working with the founding team that launched some of the world’s first cryptocurrency trading exchanges. He then joined Vault12, the pioneer of crypto inheritance, where the mathematics of Adi Shamir’s Secret Sharing — the scheme at the center of this book’s chapters on backup and inheritance — became a product that lets people pass their digital assets safely to the ones they love.
Most recently, he has been lobbying hard in both the United States and the United Kingdom — engaging with the SEC, CFTC and the FCA — to evolve the laws and regulations governing crypto, so that everyday people can access these technologies safely and confidently.
The pattern across all of it is the same one that drives this book: taking complex technology and formidable algorithms, and shaping them into solutions that ordinary people can trust, understand, and use.
Wasim lives in London and New York.
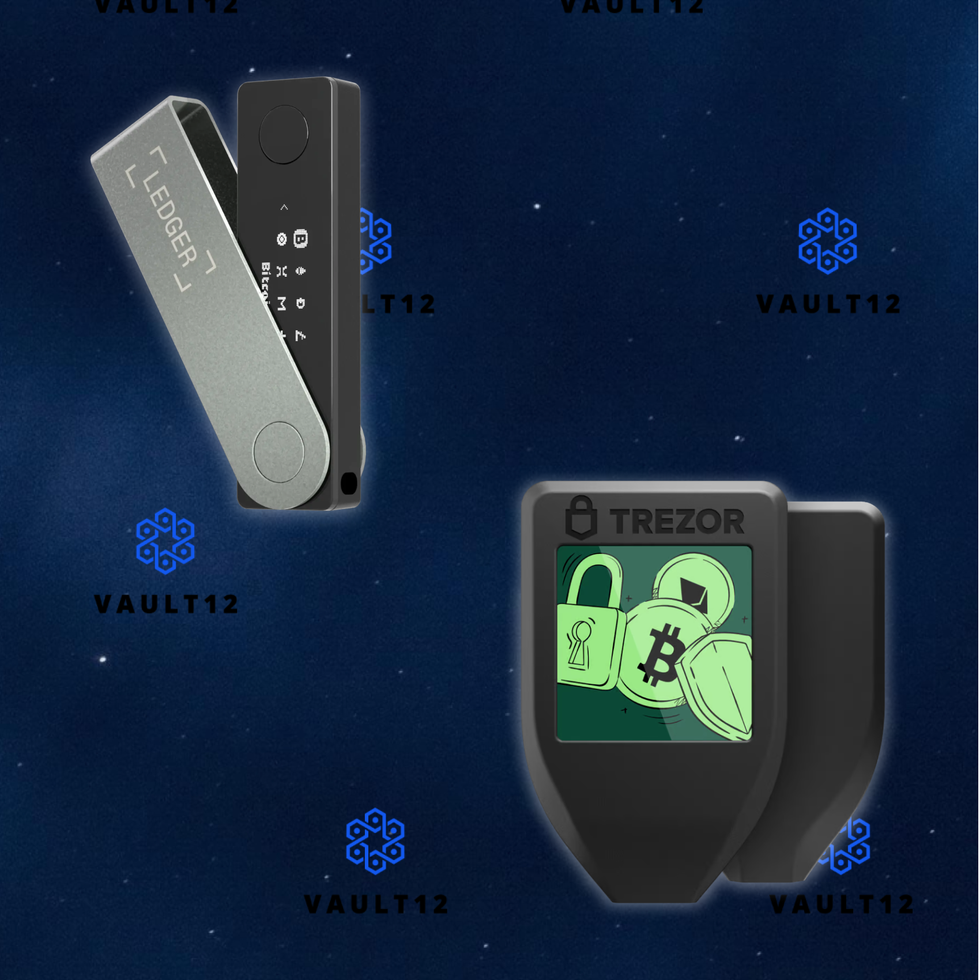
Ledger vs Trezor: Which Hardware Wallet is Best in 2025?
Ledger Nano X
- Bluetooth connectivity — works with or without a cable (at least with smartphones).
- Wider interoperability with wallets, coins, and apps.
- Compact. User input is via buttons, not touchscreen.
- Has Secure Element.
- Price Point: Reasonable.
Trezor Model T
- No Bluetooth connectivity. iOS app is view-only.
- Smaller set of wallets, coins, and apps.
- The touchscreen and input are very well-thought-out experiences.
- Missing Secure Element.
- Price Point: About the same.
Ledger Nano X vs Trezor Model T
Ledger Nano X
- Bluetooth connectivity — works with or without a cable (at least with smartphones).
- Wider interoperability with wallets, coins, and apps.
- Compact. User input is via buttons, not touchscreen.
- Has Secure Element.
- Price Point: Reasonable.
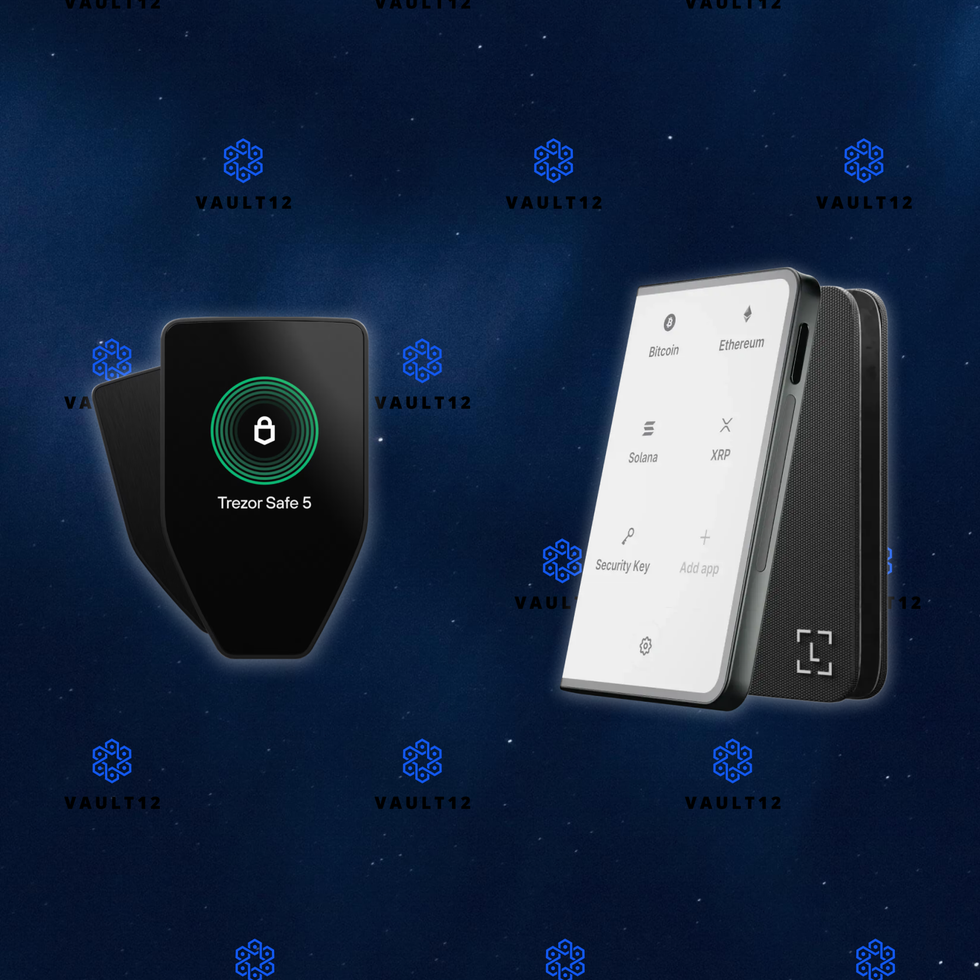
Trezor Safe 5
- No Bluetooth connectivity. iOS app is view-only.
- Smaller set of wallets, coins, and apps.
- The touchscreen and input are very well-thought-out experiences.
- Has Secure Element.
- Price Point: About the same.

Ledger Nano X vs Trezor Safe 5
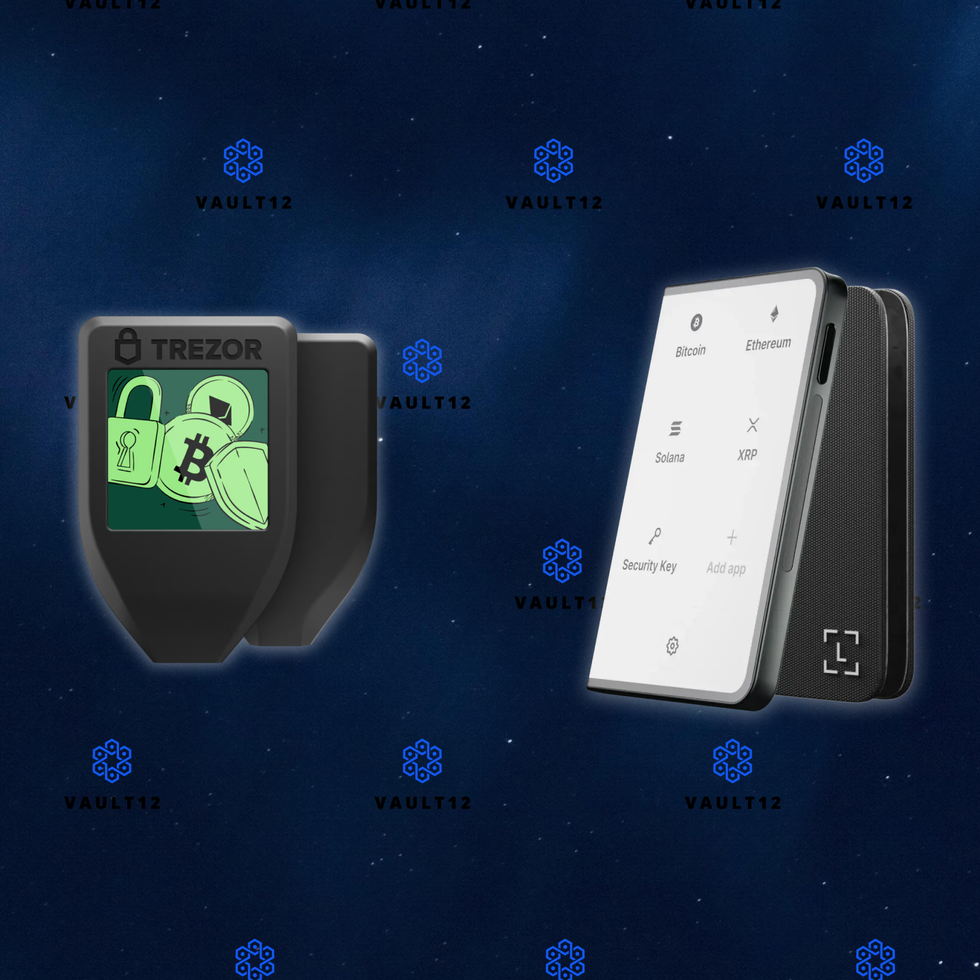
Comparison of Ledger Stax and Trezor Safe 5
Ledger Stax
- Bluetooth connectivity — works with or without a cable (at least with smartphones).
- Wider interoperability with wallets, coins, and apps.
- Posh design with according price level.
- Has Secure Element.
- Large but potentially irritating display.
Trezor Safe 5
- No Bluetooth connectivity. iOS app is view-only.
- Smaller set of wallets, coins, and apps.
- The touchscreen and input are very well-thought-out experiences.
- Has Secure Element.
- Price Point: About half of Ledger Stax.
Ledger Stax vs Trezor Safe 5
Comparison of Ledger Stax and Trezor Model T
Ledger Stax
- Bluetooth connectivity — works with or without a cable (at least with smartphones).
- Wider interoperability with wallets, coins, and apps.
- Posh design with according price level.
- Has Secure Element.
- Large but potentially irritating display.
Trezor Model T
- No Bluetooth connectivity. iOS app is view-only.
- Smaller set of wallets, coins, and apps.
- The touchscreen and input are very well-thought-out experiences.
- Missing Secure Element.
- Price Point: About half of Ledger Stax.
Ledger Stax vs Trezor Model T
More comparisons coming soon...
Missing comparison for any model not mentioned?
Inheritance Management
Managing digital assets like cryptocurrencies can be complex, especially when it comes to inheritance.
View all articlesThe Great Inheritance and Crypto: What you need to know.
The Great Inheritance is here - huge growth in wealth acquisition via Inheritance.
Crypto and Digital Assets make up approx 5-10% $6T in the next 20 years.
Ensure your customers can inherit crypto assets with Vault12.
For $1 a day your customers and their friends a manage their crypto inheritance, easily.
Summary
We are in a unique period of history. Referred to as the Great Inheritance, it is a time when inheritance is the greatest vehicle of wealth accumulation. Over $6T will be passed down to people in 2025 alone, with $80 trillion of assets passing to younger generations over the next twenty years. This means that effective strategies for wealth transfer and wealth acquisition must be in place, including for crypto and other digital assets.
Unlike traditional assets, crypto assets must be documented ahead of time; otherwise, they will be lost and irrecoverable. This requires careful management, as recording information about your crypto wallets (seed phrases and private keys) must be done in a secure and private way; otherwise, should that information get into the wrong hands, these wallets can be emptied ahead of time.
Many solutions exist to document this sensitive information. The problem, however, is that they all suffer from risks and drawbacks. This is why a native solution based on maximizing privacy and security was created by Vault12, the pioneers of crypto inheritance. This process involves securely backing up your crypto wallets, then designating a technical beneficiary. This is done in a simple and easy-to-use fashion, suitable for both the average retail consumer as well as law firms and wealth managers alike.
A little crypto inheritance planning and management will safeguard accessibility to assets from one generation to the next.
Inheritance Growth Over The Years

Image courtesy of The Economist
According to The Economist, inheritance rates are rising to levels not seen since the early 1900s. While this chart measures inheritance as a percentage of national output and not the net value of the inheritance alone, national output has undoubtedly grown globally in most cases over the past century. The Economist states that this year, the total value that will be inherited globally is equivalent to around 10% of global GDP.
What Can We Learn From The Past?
In many cases, inheritance is the largest windfall of value that people will receive at one time in their lifetime. Couple this with it occurring during a period of grief that overwhelms, and it is clear how easy it is to make decisions that lead to value destruction instead of value accumulation.
In the previous chart from The Economist, there is a clear lull in inheritance growth as a percentage of national output in the middle of the 20th century. Back in the 1960s, at the approximate bottom of the chart, it was difficult to access investment products as an average citizen globally. The internet did not exist. There had been no democratization of financial markets. Investment was available to a small portion of the population, and based on the chart, even those who could access it didn’t use it well when it came to maintaining the value of their family’s wealth.
It can be incredibly tempting to spend such a windfall, especially in a time of grief. We see the temptation to “rub your hands in glee and ponder what you ought to do” with your inheritance, as The Economist article describes. It can be surmised that this is why so few of today’s globally wealthy can trace their wealth back to the early 1900s, when the inheritance flow as a percentage of national output was at its highest levels.
Today’s Challenges
In today’s world, even more pitfalls exist than those navigated by the families of the industrial pioneers of the early 1900s. Not only are there more shiny toys to buy than ever before, but access to financial markets has become even more widespread than at any prior point in human history. This means that even if you make the responsible decision to invest some or all of an inheritance, there are more options as to what to do with that money than ever before.
In the age of the internet, someone is promising to change your entire life around every corner with the next incredible investment opportunity. These types of promises can sway people into making poor decisions with their money in any scenario, but especially when they’re in a vulnerable state after a family tragedy.

Image courtesy of The Economist
In their book “The Missing Billionaires,” wealth managers Victor Haghani and James White show that if the millionaires of the past had simply worked with someone who could’ve helped them properly plan what to do with their family fortune, they could have increased the value of each dollar invested by a multiple of six figures over the course of the past century. The Economist uses this historical data to show the value of properly planning and allocating an inheritance.
Applying this lesson to today, more and more people stand to benefit from the work that their parents and grandparents have put in over the course of their lifetimes than ever before. The decision of what to do with this money when the time comes can feel overwhelming, but creating a plan and sticking to it, especially in a time of grief, can lead to preservation and growth of the family fortune for not only you, but your children and grandchildren as well.
Who Stands to Gain?
A recent report, the 2024 Bank of America Private Bank Study on Wealthy Americans, shows key trends related to inheritance, and particularly how younger generations view the future of wealth, including crypto and estate planning. An astounding $84 trillion of wealth transfer is projected over the next 20 years from current generations to Gen X, Millennials, and Gen Z.
According to the report, younger generations (ages 21-42) are more inclined to see digital assets like cryptocurrency as a key growth opportunity. Around 28% of younger respondents ranked crypto as a promising investment vehicle, significantly higher than older generations, where only 4% expressed the same confidence. This highlights the generational shift towards embracing newer financial instruments like blockchain and decentralized finance.
Interpersonal family dynamics can create tension during wealth transfers. For both younger and older wealthy individuals, unequal distribution of assets and a lack of clear instructions or communication were common sources of strain. Younger heirs are more likely to pursue alternative investment strategies, such as private equity and digital tools, reflecting their broader interest in controlling their wealth. These individuals also prioritize sustainability and impact investing as part of their inheritance planning, distinguishing their approach from older generations.
These insights demonstrate the ongoing generational divide in attitudes toward wealth management and the evolving role of digital assets in estate planning.
How Do Digital Assets Tie Into Inheritance?
Given that approximately $84 trillion is projected to transfer from seniors and baby boomers to Gen X, millennials, and their heirs by 2045, Matthew Sigel of VanEck Investments estimates that up to $6 trillion could enter the crypto market through inheritance in the next 20 years.
Why does Sigel believe this to be the case? Well, we can surmise from the earlier information regarding digital asset investment that as this money makes its way down to younger generations, there will be a larger appetite for alternative investments outside of stocks and bonds than there was in previous generations. As a growing and developing new asset class, digital assets will certainly gain their fair share of attention from younger investors, who will be looking to diversify and conserve what will likely be their largest windfall they receive in their lifetimes.
You may think that this would require an immense risk appetite, given the volatility of digital assets in their young existence, but for Sigel’s estimate to be correct, only approximately 14% of this Great Inheritance would need to be allocated to digital assets. Couple this with the fact that younger investors do generally have a higher risk appetite than their older counterparts, and it doesn’t seem that far-fetched that Sigel’s estimate could be accurate, or even fall short of what ends up flowing into digital assets.
Breaking Down Digital Asset Inheritance
Unlike traditional assets, crypto assets need to be managed differently from an inheritance standpoint. In fact, the only similarity between traditional and digital assets is that you must maintain an updated inventory of them. The main challenges associated with crypto inheritance are:
- Ongoing Digital Asset Inventory: You must carefully maintain an inventory of crypto assets. This means backing up seed phrases and/or private keys of all crypto wallets, across all blockchains, and all types of devices or places where those wallets exist, e.g., mobile phones, hardware wallets, cloud, and paper backups. Any assets that are not documented in your backup are liable to be lost.
- Absolute Informational Privacy: You must ensure absolute privacy of the backup information. Anyone with access to private keys or seed phrases will be able to compromise the funds. This includes ensuring that any documentation left with your lawyers is strongly protected.
- Critical Points of Failure: You must eliminate personal devices and cloud services as critical points of failure. The most significant risk in inheritance is reliance on individual devices, which can be stolen, lost, or damaged. The second risk is the dependency on one or more cloud servers. We have seen what happens when business relationships between cloud partners face legal challenges, or cloud services are disrupted by malware or bad software updates.
- Technical Beneficiary Awareness: As the varieties of crypto assets expand over time, staying aware of them becomes important. You will need to designate someone technically fluent in this area. They may not be the ultimate beneficiary; however, you will need to trust them to distribute the assets per your wishes.
- Trust & Estate Attorney: You must consult with experienced lawyers who are well-versed in the inheritance of crypto assets. A great resource is "A Practical Guide to Estate Administration and Crypto Assets" by Richard Marshall from Hill Dickinson LLP.
How Vault12 Can Help
Alright, so you’ve read this far and are convinced that doing nothing and having no plan is not a good idea. However, you also read the part where it is acknowledged that this can be a difficult subject, and you’re curious how to overcome that to ensure that you don’t end up like the families of yesteryear.
The great news today is that there are inheritance management advisors out there who can help you and your family navigate this difficult topic. While this discussion may be difficult to have with your loved ones around the dinner table at a family holiday, setting an appointment with an advisor and making time to be intentional about creating a plan is a great first step in figuring out how best to navigate the future of your family’s finances.
A quality advisor will not only help you avoid all of the pitfalls of trying to invest your inheritance all on your own, but their presence and expertise in navigating these types of conversations with families over the course of their career will help make the topic more palatable for you and your family when you meet with them.
Creating a plan for your family’s existing assets, especially in today’s age, will help protect your family’s legacy from any short-term decisions brought on by grief, confusion, or anger. It is essential to acknowledge these emotions as an integral part of the human experience. Allowing yourself the ability to experience and sort through them without it having a lasting impact on your family’s future is a critical lesson that we all can take from the shortcomings of generations gone by.
Why Choose Vault12?
Vault12 is the pioneer of crypto inheritance management. Vault12 Guard is the first solution to offer a simple, direct, and secure way for all types of investors to ensure that all of their crypto assets can be accessed by future generations.
Just because digital assets are new does not mean that classic lessons of asset management have no applicational purpose in this asset class. Stop to consider traditional approaches to the inheritance of assets, when applied to digital assets, create complexity and risk. Your portfolio of digital assets is continually changing — you cannot rely on doing an inventory once, or for that matter continuously, without assistance.
Taking a simple and direct approach like Vault12 Guard reduces the uncertainty around assets not being available to the designated recipient. It also avoids having to approach and petition each service individually during probate to gain access.
What Benefits Does Vault12 Offer?
Especially in a time of crisis, like in the event of losing a loved one, the less that the family has to put on their plate and struggle through while simultaneously mourning, the better. Vault12 offers a variety of benefits for peace of mind. Let’s walk back through the checklist from before about variables that you’d want to consider when mulling over digital asset inheritance:
- Inventory of crypto assets: The first step in inheritance is backing up all your crypto wallets. Vault12 makes this as easy as possible - despite the appalling lack of usability in current hardware and software wallets. There will always be new crypto assets on new blockchains, and Vault12 can manage any crypto asset on any device, on any blockchain, now and in the future.
- Privacy of all information: Your crypto assets are protected via a Secure Element (Secure Enclave in iOS, and Strongbox on Google Android phones), and the encryption used is Quantum-safe. With this security, no one knows what assets are part of your Vault.
- No Critical Points of Failure: No assets are stored locally, no assets are stored in any cloud, and no assets are stored at Vault12. There are no devices to lose, no paper backups, and no need to manually give encrypted assets to a subset of people. The Vault12 system is decentralized, making it a difficult target for hackers — and in fact for any type of failure.
- Confidence in a Technical Beneficiary: With Vault12, you get to designate a trusted technical beneficiary. Should you change your mind, you can swap them out at any time.
- Flexibility in Trust & Estate Attorney: While regulations and guidelines for inheritance planning can vary from state to state and country to country, Vault12 Guard is designed to be independent of whatever legal framework you choose to govern the inheritance of your assets. Vault12 Guard is simply a transfer mechanism that ensures all your crypto assets are passed from your control to a designated technical beneficiary.
Key Product Features of Vault12 Guard
The Vault12 platform provides your crypto assets with the highest security and strong backup resilience. Vault12 Guard Inheritance enables you to designate a beneficiary (an executor, trustee, or other chosen beneficiary) who can inherit the entire portfolio of digital assets that you choose to store in your Vault. There is no need to update an inventory continually or to issue updated instructions. Vault12 Guard Inheritance allows for peace of mind through the following features:
- Unified Digital Vault: Use Vault12 Guard Digital Vault to store digital assets, including cryptocurrency, financial login information, legal documents, medical records, and more.
- Guardian Network: The Vault is protected by your network of Guardians: friends, family, and/or business associates — people that you know and trust.
- Beneficiary Designation: Designate a beneficiary from your chosen Guardians. A declaration is then digitally signed and can be emailed to other parties, such as lawyers.
- Trigger-Based Access: As a Vault Owner, you can configure a legally-defined trigger, such as incapacitation or death. When the trigger occurs, the beneficiary indicates they are ready to access the digital assets. Assets are unlocked and transferred to the beneficiary only when a designated number of Guardians approve the request.
- Preemptive Veto Option: Should the beneficiary attempt to access the assets before they are intended to, the owner can veto the request before any of the Guardians receive an approval request.
How Can Estate Planners Utilize Vault12?
Would you, an estate planner, be willing to spend only $1 a day to protect your customers’ legacy and expand your customer base? What about offering peace of mind to your customers, especially in their time of need?
Anyone can download and use Vault12 Guard to protect their digital assets; it’s available in the Apple and Google app stores in most countries around the world. However, there is an even larger opportunity for financial institutions to provide crypto inheritance to their customers for as little as $1 a day.
Since Vault12 encourages the use of guardians, people that the customers know and trust, to guard their digital vault, the number of people engaged through the Vault12 product is much higher than any other solution for backup and inheritance. The guardians also get to experience safe and secure management of digital assets through the Vault12 Guard Inheritance program. This makes them more likely to use your services, as well as Vault12, for their own digital asset inheritance needs, given that they have already familiarized themselves with the product.
If you are interested in learning more about Vault12, please visit https://vault12.com/.
Sources
The Economist, 2025
- 2024 Bank of America Private Bank Study on Wealthy Americans, Bank of America
- The wealth whisperers who save super-rich families from themselves
- Inheriting is becoming nearly as important as working
Van Eck/CoinMarketCap, 2024
FT (Capital Group)
- Boomers to Zoomers: Engaging the next generation of wealth
- From widows to CFOs: how women navigate inheriting wealth
- Billionaires amass more through inheritance than wealth
- The great wealth transfer is coming…
- Attracting the next generation of inheritors and self-made wealthy
- Lack of holistic advice drives inheritors to regret
Bank of America Private Bank
- 2024 Study of Wealthy Americans (covers the Great Wealth Transfer, inheritance attitudes, and family dynamics).
UBS
- Own Your Worth 2025 (focus on women & next-gen readiness for the Great Wealth Transfer; includes full PDF).
- Heir dynamics: Money in motion (wealth transfer trends; PDF).
- Billionaire Ambitions Report 2024 (succession, legacies, and inter-gen transfers among billionaire families).
RBC Wealth Management
- Wealth transfer: Are you ready? (survey-based insights; with downloadable guide).
- Wealth Transfer (UK/Europe) (survey of 3,100+ people on giving & inheriting; report download).
J.P. Morgan Private Bank
- How to successfully gift to heirs (2025 thought leadership on distribution, governance & investment strategy for transfers).
- 2024 Global Family Office Report (includes succession planning & next-gen transition).
HSBC Global Private Banking
- Harmony through succession planning (2025) (family-owned businesses in Asia; wealth & business succession; PDF).
- European Family Office Report 2024 (succession preparedness & anticipated transfer timelines; PDF).
Barclays Private Bank
- Family Business Report (commissioned research with a section on the approaching inter-generational wealth transfer; PDF).
Northern Trust
- Wealth & Wisdom Across Generations (how to talk to loved ones about family wealth & transfers; PDF).
Fidelity (Wealth Management / Custody)
- State of Wealth Mobility (2024 study; communication & readiness for transfers highlighted).
- Additional planning content tied to inter-gen transfers (not formal “reports” but authoritative insights).


$6 Trillion of Crypto Assets to Be Inherited by 2045
Over the next two decades, up to $6 trillion in crypto could be inherited, as younger investors favor digital assets over traditional stocks and bonds. Learn how this shift is reshaping wealth transfer and the future of investing
Unprecedented Asset Transfer via Inheritance by 2045
A recent report, the 2024 Bank of America Private Bank Study on Wealthy Americans, reveals key trends related to inheritance, and particularly how younger generations view the future of wealth, including crypto and estate planning.
An astounding $84 trillion of wealth transfer is projected over the next 20 years from current generations to Gen X, Millenials and Gen Z. Renowned expert Matthew Sigil, head of digital assets research at Van Eck (a prominent issuer of Bitcoin ETFs) has estimated that of this amount, $6T in crypto assets will be passed on via inheritance.
This transfer will be successful only if care and attention are paid to crypto inheritance planning and management, and if the right approaches are in place to support the technical transfer of these funds. Crypto assets are technically different in a number of ways to traditional assets, so inheritance needs to be carefully choreographed between asset owners, Trust and Estate Lawyers, and intended crypto beneficiaries.
Despite the fact that important steps must be taken for the safe, secure, and private transfer of crypto assets, none of the participants in the crypto ecosystem have offered inheritance plans or services. The pioneer of crypto inheritance management since 2015 has been Vault12.
Vault12 has built and continues to innovate a comprehensive solution that is easy to use for non-technical participants, yet incorporates a highly secure architecture and technology that is designed to preserve your crypto wealth and ensure successful transfer to your heirs. Learn more at vault12.com.
The Bank of America Private Bank Study
This report by Bank of America Private Bank analyzes financial outlooks, investing habits, and estate planning practices of wealthy Americans. The study reveals a generational divide, with younger wealthy individuals exhibiting different investment preferences than older generations. Younger individuals tend to be more skeptical of traditional investment strategies, and favor alternatives like cryptocurrencies and private equity. The study highlights the challenges facing wealthy families as they navigate wealth transfer, including the emotional strain of inheritance and the increasing burden of serving as trustee or executor.
Takeaways
- Great Wealth Transfer: Approximately $84 trillion is projected to transfer from seniors and baby boomers to Gen X, millennials, and their heirs by 2045.
- Crypto Inheritance Surge: Matthew Sigel of VanEck Investments estimates that up to $6 trillion could enter the crypto market through inheritance in the next 20 years.
- Investment Shifts: Millennials and Gen Xers will inherit $84 trillion, with a growing proportion of cryptocurrencies.
- Young Investor Participation: To reach the $6 trillion estimate, young investors (ages 21-43) need to allocate 14% of their inherited wealth to crypto: about $300 billion annually.
- Broader Investment Preferences: Many young investors view traditional stocks and bonds as insufficient for superior returns, preferring high-growth assets like cryptocurrencies.
- Risk Appetite by Generation: Younger investors show a higher risk tolerance, with significant crypto allocations (14%-17%) compared to older investors, who remain conservative.
- Crypto Exposure: Younger investors hold the highest average exposure to crypto, highlighting a shift in how the next generation approaches digital assets.
Sources:
2024 Bank of America Private Bank Study of Wealthy Americans
VanEck: $6 Trillion Could Pour Into Bitcoin, XRP and Crypto via Inheritances Over 20 Years
Crypto and Digital Asset Allocations
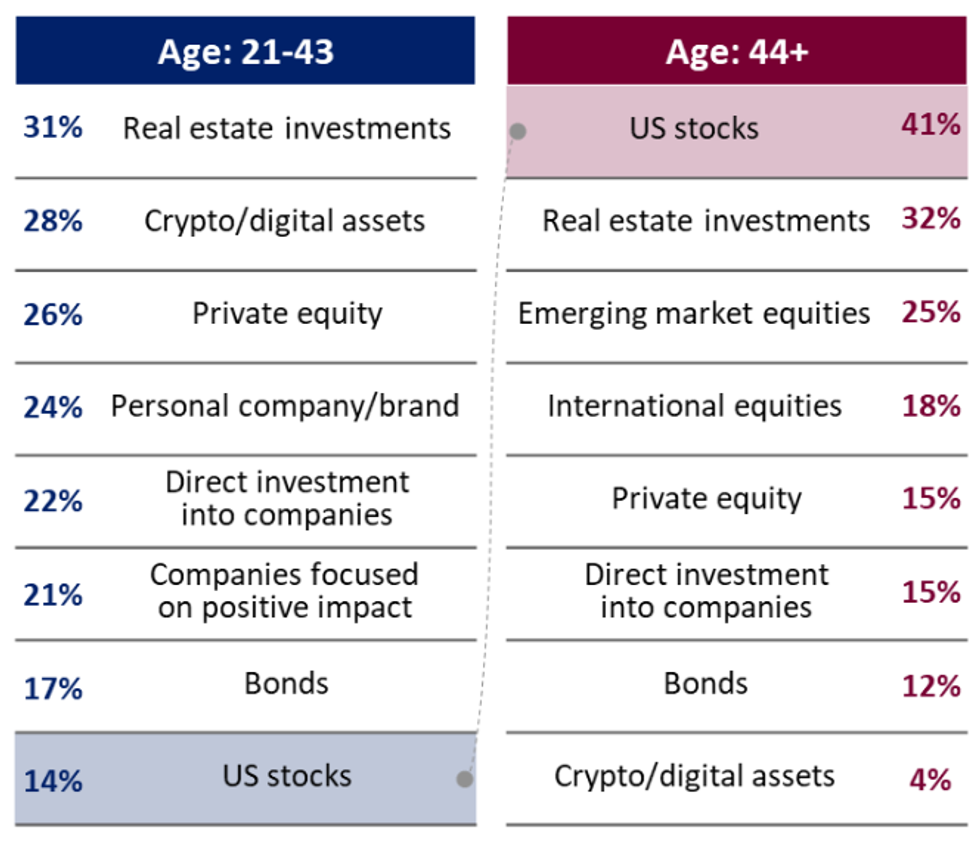
Bank of America 2024 Private Bank Study on Wealthy Americans
Crypto, Inheritance, and Wealth Management in Younger Generations
The 2024 Bank of America Private Bank Study on Wealthy Americans focuses on several key trends related to inheritance, particularly how younger generations view the future of wealth, including crypto and estate planning.
1. Crypto and Digital Assets
Younger generations (ages 21-42) are more inclined to see digital assets like cryptocurrency as a key growth opportunity. Around 28% of younger respondents ranked crypto as a promising investment vehicle, significantly higher than older generations, where only 4% expressed the same confidence. This highlights the generational shift towards embracing newer financial instruments like blockchain and decentralized finance.
2. Inheritance and Estate Planning
Interpersonal family dynamics can create tension during wealth transfers. For both younger and older wealthy individuals, unequal distribution of assets and a lack of clear instructions or communication were common sources of strain. Younger generations are more focused on including hard assets like jewelry and heirlooms — which are frequently overlooked in formal planning — in their estate plans.
3. Generational Differences in Wealth Management
Younger heirs are more likely to pursue alternative investment strategies, such as private equity and digital tools, reflecting their broader interest in controlling their wealth. These individuals also prioritize sustainability and impact investing as part of their inheritance planning, distinguishing their approach from older generations.
These insights demonstrate the ongoing generational divide in attitudes toward wealth management and the evolving role of digital assets in estate planning.
Inheritance and Estate Planning "Strain Points"
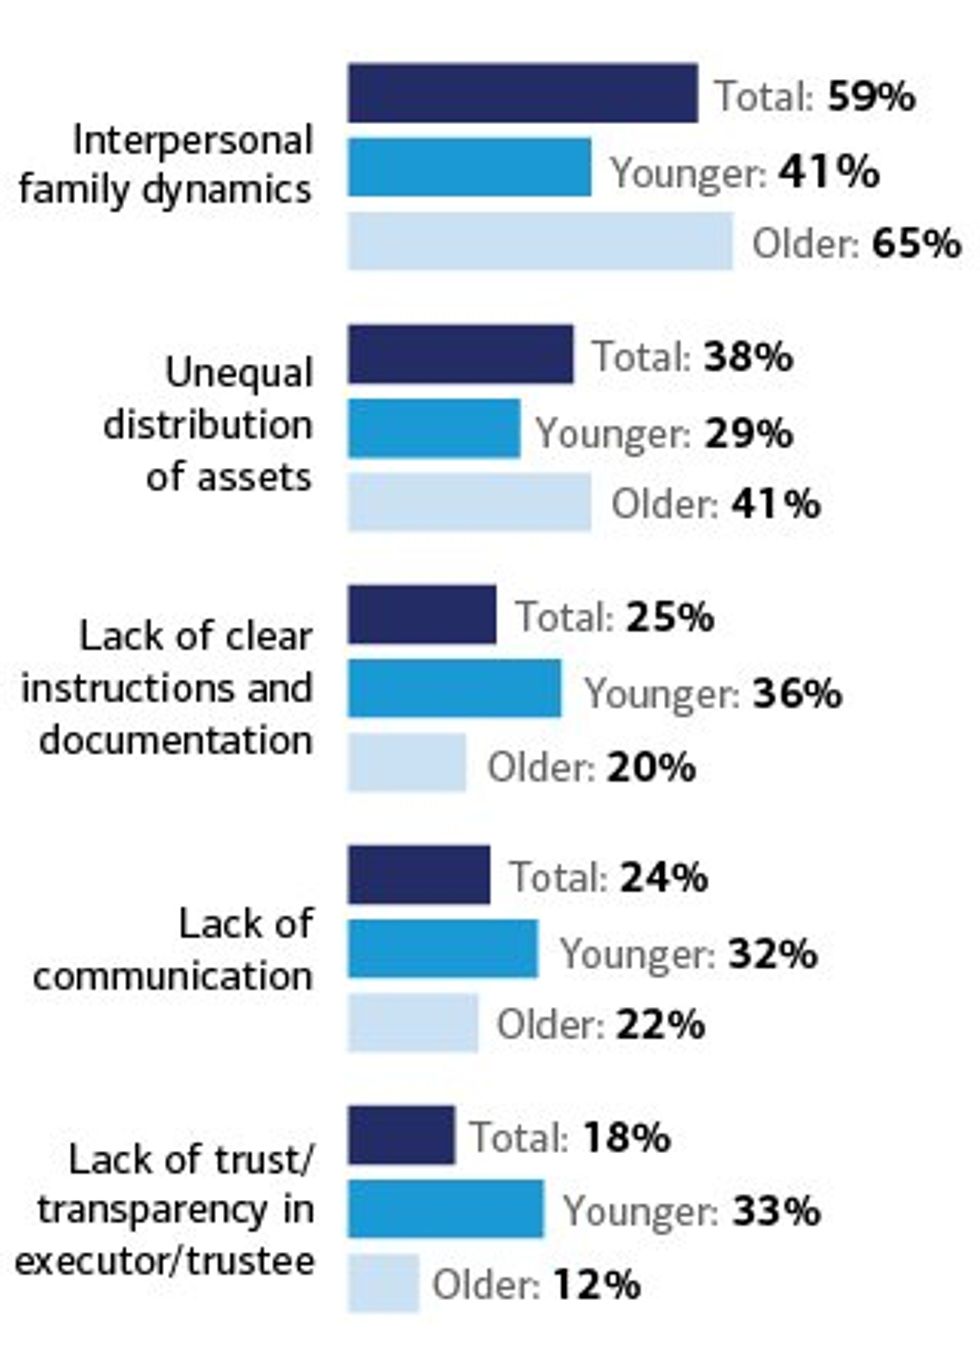
Factors driving strain on inheritance-related issues
Bank of America 2024 Private Bank Study
What you need to know about Crypto Inheritance Planning
Unlike traditional assets, crypto assets need to be managed differently from an inheritance standpoint. In fact, the only similarity between traditional and digital assets is that you must maintain an update inventory of them. The main challenges associated with crypto inheritance are:
- Inventory of crypto assets: You must carefully maintain an inventory of crypto assets. This means backing up seed phrases and/or private keys of all crypto wallets, across all blockchains, and all types of devices or places where those wallets exist, e.g., mobile phones, hardware wallets, cloud, and paper backups. Any assets that are not documented in your backup are liable to be lost.
- Privacy of all information: You must ensure absolute privacy of the backup information. Anyone with access to private keys or seed phrases will be able to compromise the funds. This includes ensuring that any documentation left with your lawyers is strongly protected.
- Critical Points of Failure: You must eliminate personal devices and cloud services as critical points of failure. The most significant risk in inheritance is reliance on individual devices, which can be stolen, lost, or damaged. The second risk is the dependency on one or more cloud servers. We have seen what happens when business relationships between cloud partners face legal challenges, or cloud services are disrupted by malware or bad software updates.
- Technical Beneficiary awareness: As the varieties of crypto assets expand over time, staying aware of them becomes important. You will need to designate someone technically fluent in this area. They may not be the ultimate beneficiary; however, you will need to trust them to distribute the assets per your wishes.
- Trust & Estate Attorney: You must consult with experienced lawyers who are well versed in inheritance of crypto assets. A great resource is "A Practical Guide to Estate Administration and Crypto Assets" by Richard Marshall from Hill Dickinson LLP.
Why Choose Vault12 Guard for Crypto Inheritance Management?
Vault12 is the pioneer of crypto inheritance management, and Vault12 Guard is the first solution to offer a simple, direct, and secure way for all types of investors to ensure that all of their crypto assets can be accessed by future generations.
Consider that:
- Traditional approaches to the inheritance of assets, when applied to digital assets, create complexity and risk.
- Your portfolio of digital assets is continually changing — you cannot rely on doing an inventory once, or for that matter continuously, without assistance.
- A simple and direct approach like Vault12 Guard reduces the uncertainty around assets not being available to the designated recipient. It also avoids having to approach and petition each service individually during probate to gain access.
- Inventory of crypto assets: The first step in inheritance is backing up all your crypto wallets. Vault12 makes this as easy as possible - despite the appalling lack of usability in current hardware and software wallets. There will always be new crypto assets on new blockchains, and Vault12 can manage any crypto asset on any device, on any blockchain, now and in the future.
- Privacy of all information: Your crypto assets are protected via a Secure Element (Secure Enclave in iOS, and Strongbox on Google Android phones), and the encryption used is Quantum-safe. With this security, no one knows what assets are part of your Vault.
- No Critical Points of Failure: No assets are stored locally, no assets are stored in any cloud, and no assets are stored at Vault12. There are no devices to lose, no paper backups, and no need to manually give encrypted assets to a subset of people. The Vault12 system is decentralized, making it a difficult target for hackers — and in fact for any type of failure.
- Confidence in a Technical Beneficiary: With Vault12 you get to designate a trusted technical beneficiary. Should you change your mind, you can swap them out at any time.
- Flexibility in Trust & Estate Attorney: While regulations and guidelines for inheritance planning can vary from state to state and country to country, Vault12 Guard is designed to be independent of whatever legal framework you choose to govern the inheritance of your assets. Vault12 Guard is simply a transfer mechanism that ensures all your crypto assets are passed from your control to a designated technical beneficiary.
Key Product Features of Vault12 Guard
The Vault12 platform provides your crypto assets with the highest security and strong backup resilience. Vault12 Guard Inheritance enables you to designate a beneficiary (an executor, trustee, or other chosen beneficiary) who can inherit the entire portfolio of digital assets that you choose to store in your Vault. There is no need to update an inventory continually or to issue updated instructions.
- Unified Digital Vault: Use Vault12 Guard Digital Vault to store digital assets, including cryptocurrency, financial login information, legal documents, medical records, and more.
- Guardian Network: The Vault is protected by your network of Guardians: friends, family, and/or business associates — people that you know and trust.
- Beneficiary Designation: Designate a beneficiary from your chosen Guardians. A declaration is then digitally signed, and can be emailed to other parties, such as lawyers.
- Trigger-Based Access: As a Vault Owner, you can configure a legally-defined trigger such as incapacitation or death. When the trigger occurs, the beneficiary indicates they are ready to access the digital assets. Assets are unlocked and transferred to the beneficiary only when a designated number of Guardians approve the request.
- Preemptive Veto Option: Should the beneficiary attempt to access the assets before they are intended to, the owner can veto the request before any of the Guardians receive an approval request.
.
The death of safe deposit boxes
Vaults are a historic solution
For thousands of years, wealthy tribes and individuals have stored their treasures in temples, palaces, and fortresses. From ancient Mesopotamia to Egypt to the Knights Templar to today’s public banks, vaults have long been used to safeguard valuable possessions.
In the last couple of centuries, increased availability has led more "regular people" to turn to safe deposit boxes held at banks or private vaults to store heirlooms, cash, and important documents. In this way, vaults — once limited to society's elites — became a popular and practical mechanism for protecting one's most important assets.
We all need vaults in today's digital world
Just in the last couple of decades, people have had to consider what the safest place is to store not just small physical assets, but also digital assets and passwords such as electronic documents and crypto wallet seed phrase backups.
Digital asset owners know how important it is to keep a backup copy of one’s wallet seed phrase. Losing your wallet seed phrase results in losing access to your digital wallet — and thus, losing access to all of the digital assets you hold! The stakes are very high, and there are not many simple and robust solutions to choose from.
Safe deposit boxes for digital wallet private keys?
It has seemed natural for many people to turn to safe deposit boxes to store paper, electronic, or engraved-metal copies of their digital asset wallet seed phrases. In fact, the iconic and well-educated Winklevoss twins Cameron and Tyler used safe deposit boxes as part of their early strategy to distribute and protect pieces of their Bitcoin wallet keys.
"The Winklevosses came up with an elaborate system to store and secure their private keys. They cut up printouts of their private keys into pieces and then distributed them in envelopes to safe deposit boxes around the country, so if one envelope were stolen the thief would not have the entire key.""How the Winklevoss Twins Found Vindication in a Bitcoin Fortune" by Nathaniel Popper, New York Times, December 19, 2017
Safe deposit boxes are no longer the best solution
But given the state of the world today, is it a good idea to rely on a safe deposit box to store your digital wallet seed phrase backup? Unfortunately, the answer is a resounding “No.” Let’s consider why not.
Safe deposit boxes are disappearing
Many banks have phased out the availability of safe deposit boxes. In the United Kingdom, HSBC and Barclays have completely stopped offering safe deposit boxes. In the United States, JPMorgan Chase, Santander, and Capital One have stopped offering new safe deposit boxes, while Bank of America and Citibank have also reduced their availability. Among the reasons for this trend: declining demand, high maintenance costs, and regulatory challenges. The chart below reflects these startling changes.
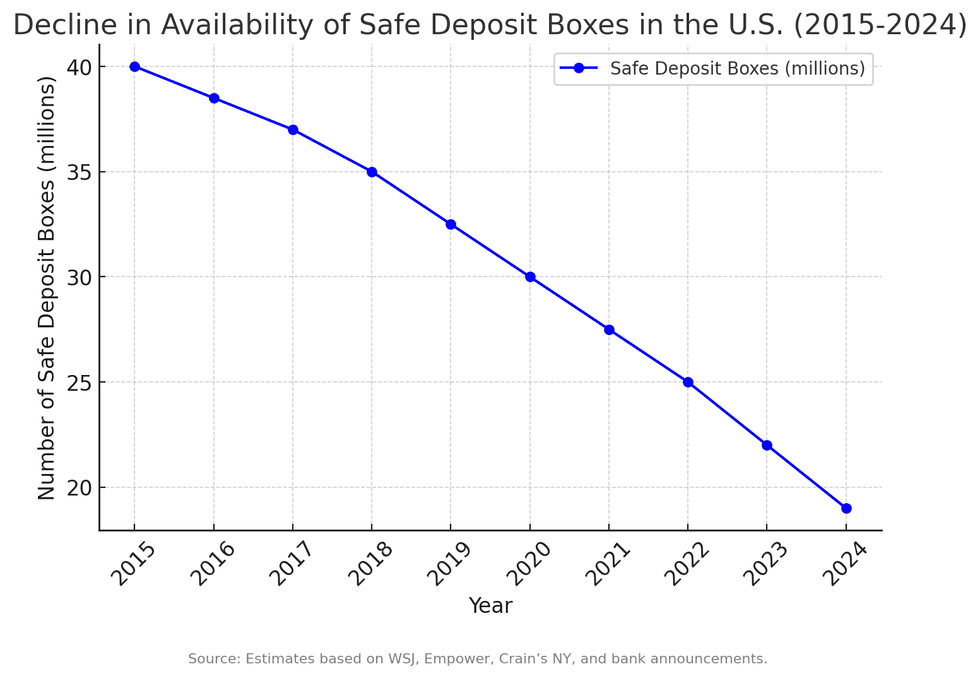
Fewer and fewer safe deposit boxes are available
ChatGPT
Safe deposit boxes are subject to theft
In 2015, a Citibank safe deposit box in Sherman Oaks, California was mysteriously emptied of over half a million dollars worth of valuables — and surveillance cameras only covered the vault entrance, not individual boxes. In 2017, a Brooklyn Santander bank branch was broken into from an adjacent basement, and crooks made off with the contents of about 50 boxes. And from 2020 to 2023, safe deposit box customers at MUFG Bank in Tokyo had valuables stolen by a bank employee! (In this case, the customers were repaid by the bank.)
Safe deposit boxes are subject to natural disasters
Natural disasters do not spare safe deposit boxes. Hurricanes in the United States (Katrina in 2005 and Harvey in 2017) led to many lost and damaged safe deposit box valuables. Earthquakes have resulted in safe deposit box losses in Japan and New Zealand. Fires destroyed the contents of safe deposit boxes in Australia (2019/2020) and California (during several years including 2025), after the boxes essentially became high-temperature ovens. In cases of extreme physical disaster, sometimes the only possible safety is being in a different location.
Safe deposit boxes can be legally seized
If a safe deposit box custodian is presented with a legal claim to freeze or seize the contents of a safe deposit box (for example, if there is a suspicion of illegal activity), law enforcement will assume custody of the contents as permitted by the relevant jurisdiction. Sometimes, depending on a warrant’s scope, many boxes can be opened even without specific individual warrants.
Safe deposit boxes aren’t insured
Many people assume that safe deposit boxes are insured by default — but they’re not! In the United States, neither the FDIC nor the National Credit Union Administration insures them.Some private insurers will cover them with special policies, but you have to specifically seek them out and pay extra for them — and carefully analyze the fine print about valuation, exclusions, and policy limits.
Safe deposit boxes aren’t always accessible
Banks aren’t always open for business. Beyond expected “business hour” limitations, banks can be unexpectedly closed for various reasons, including pandemic responses. If a bank that holds safe deposit boxes finds itself in a legal dispute or financial failure, although the contents of the safe deposit boxes are not considered bank assets, access to the boxes may be temporarily blocked while administrative proceedings unfold.
Additionally, if a safe deposit box owner passes away, special access rules (varying by region) come into play, and a spouse or the executor of a will may not be permitted to access a safe deposit box — even if they have the key and PIN.
A Digital Vault is safer and more convenient
A better solution is to use a secure Digital Vault like Vault12 Guard. The Vault12 Digital Vault fulfills and exceeds all of the secure digital storage requirements that a physical vault offers … without the limitations or third-party risks. Vault12 Guard takes the form of a simple-to-use mobile app that can protect all of your digital assets in a highly-secure, decentralized manner, monitored by Guardians of your choice.
A Vault12 Digital Vault is secure and always-accessible
The Vault12 Digital Vault is more secure than a safe deposit box, safe from natural disasters due to its decentralized design, always accessible, and its Digital Inheritance feature is simple for your next of kin to use when the time comes.
View the Vault12 Guard demo and download a trial today
Check out an overview with demo to see how the Vault12 Digital Vault works. Learn more on the Vault12 website. When you’re ready, you can get started with your Digital Vault in just a few minutes.
Backup
Vault12 Guard provides inheritance, and secure decentralized backup of seed phrases and/or private keys, giving Bitcoin (BTC), Ethereum (ETH).
View all articles

How to securely destroy your paper seed phrase backup.
TL;DR (concentrated takeaways)
You should not keep any temporary paper copies of your crypto wallet seed phrase.
The Vault12 Digital Vault is perfect for permanently and safely storing your seed phrase backup.
Disposing of your temporary paper seed phrase is easy, but the details are very important.
You could dispose of it by burning it in your kitchen, and then flushing the ashes.
You could dispose of it by erasing, shredding, and then flushing the pieces.
Remember that your wallet seed phrase allows access to your crypto
By now, you know that your crypto wallet seed phrase is the most important thing to protect in order to guard your crypto assets. You have read about the need to use randomness to generate your seed phrase, and then how important it is to back it up to ensure that it is not lost or stolen. In this article, we will assume that you have already decided on which wallet to use, how to generate your seed phrase, and how to back it up. With your wallet set up and your seed phrase safely and permanently backed up, now you find yourself with a piece of paper that holds a "spare copy" of your seed phrase scrawled on it. How should you dispose of that precious piece of paper?
Why would you have a paper copy of your seed phrase?
You probably ended up with that piece of paper containing your seed phrase as a result of your seed phrase generation and/or wallet setup steps. Until you are sure that your wallet configuration is complete, and your permanent seed phrase backup is complete, you likely wrote down your seed phrase on paper along the way.
If you generated your seed words incrementally with dice, you likely calculated them one by one, capturing each one on paper after it was chosen.
Similarly, if you let a crypto wallet choose your seed phrase for you, you likely wrote it down in order to confirm the words back to the wallet during the configuration process. In any case, you probably did not transcribe each word directly into permanent storage the instant that it was generated - you wrote it down offline, on paper, in order to have a copy to use to help you complete the steps of saving it to its permanent storage medium. Then you saved your seed phrase to a permanent medium such as your Vault12 Digital Vault, a steel card, or a limited-access, backed-up encrypted file. You might even have chosen to use two of those forms of secure, permanent backup.
Congratulations! But now you also have this extra piece of paper that you don't need - and it would be silly to leave it lying around waiting to be stolen, or to just throw it into your trash can.
Planning to destroy your temporary seed phrase copy
You need a foolproof way to destroy the now-unnecessary, temporary paper copy of your wallet seed phase, such that it can never be reconstructed. Here are some things to keep in mind as you plan to destroy it:
- Don't put the task off. If you do not keep the temporary copy in a high-security safe until it is destroyed, every moment that it remains readable holds some risk that you could misplace it, or that it could be otherwise accessed. Properly disposing of it is not hard to do, and it does not take long - finish the task.
- Meanwhile, be aware of cameras that could record the seed phase from the paper. Your smartphone, laptop, tablet, or security camera could all capture an image of your seed phrase without your realizing it. We have all become so accustomed to cameras around us all of the time, especially when they are part of our home security system, that we lose our awareness of what is being recorded. Don't take the chance of accidental image capture.
- If you wrote down the seed phrase on a pad of paper, ensure that the page below the one that you wrote on does not have impressions that could be used to detect and reconstruct the words. Tap into your spy novel knowledge to imagine that possibility! If necessary, destroy the page underneath as well to remove all traces.
- Be absolutely sure that you did not make any errors in backing up your seed phrase to permanent storage.
Now you are ready.

Option #1: Destroy your seed phrase copy with fire and water
For all activities related to fire, you should of course carefully take appropriate safety precautions.
It is possible to burn your seed phrase outdoors, but we recommend doing it indoors, since indoor space is more controllable. (Outdoors, you may be more conspicuous, the paper could blow away partially-burned, or worst of all, you could accidentally start a larger fire.)
Indoors, you have a ready-made seed phrase burning area: your kitchen stove. When you are ready:
- Just in case, know where your fire extinguisher is located!
- Survey the area around the stove to ensure that there is nothing flammable.
- Turn on the ventilation fan near your stove to prevent setting off the smoke detector.
- Have a lighter handy.
- Put a metal pan that you will use to contain the burning paper onto the stove.
- Fold your seed phrase paper in half so that it makes a V-shaped "tent."
- Place the folded paper into the pan, pointy side up (as an upside-down "V") - this will allow oxygen to circulate underneath it for a complete burn.
- Carefully light the paper on fire, and wait for the flame to completely consume it.
- Wait for the paper to cool. Crumble the ashes.
- Flush the ashes down the toilet to avoid any chance of reassembly.
Option #2: Destroy your seed phrase copy by shredding and flushing
To destroy your paper seed phrase without fire:
- First, if the words are written with pencil, completely erase them.
- Shred the paper into extremely small pieces, such that even if any letters could still be read, no more than one letter would be shown on any piece. (This could be done using your hands, scissors, or a shredding machine.)
- Flush the shredded pieces down the toilet to avoid any chance of their reassembly.
Your Vault12 Digital Vault is secure and convenient for your seed phrase backup
It is a good feeling to know that your seed phrase is safe and secure without having to keep paper copies lying around. Your Vault12 Digital Vault is the perfect place to store your sensitive digital assets including your seed phrase. Congratulations on being an informed, responsible holder of your own crypto assets.

How to back up your seed phrase on Cryptosteel.
TL;DR (concentrated takeaways)
Backing up your seed phrase to steel plates offers a robust solution that is subject to only a few threats.
Don't give a steel plate vendor your seed phrase to stamp or engrave for you! This is a "DIY" task.
Once created, protect it well from discovery and theft.
Some options are Cryptosteel, Ledger CryptoSteel Capsule, Crypto Key Stack and Hodlinox (engraveable options), ColdTi (titanium), and Billfodl.
When it comes to a decision about how to back up your seed phrase, you have to consider your personal circumstances, and weigh the pros and cons of the many options that exist.
For offline, long-term, cold storage backups, utilizing steel is one of the most secure options. Steel requires no software, is nearly indestructible, and the backup process is completely manual and offline. Furthermore, the steel devices that are on the market today don't look like a seed phrase backup to those not already familiar with crypto seed phrases - this offers a degree of "security through obscurity" that could deter a common thief. (However, you should not rely on that protection! Always keep your backup in a safe or lockbox.)
Steel backups exist in a variety of formats. If you are handy with metalworking, you could even create a steel backup yourself. This review showcases Cryptosteel, which is produced from the original blueprints of the open-source Cryptosteel steel backup solution that was the first metal backup solution on the market. Cryptosteel sells its original model as the Cassette and has since added a Capsule version. Since the blueprint is open-source, the "cassette-type" steel wallet backup solution may be available from a variety of providers. If you consider several different steel backup solutions, consider the quality of each before making a purchase, since the place of manufacture, the grade of steel, and other characteristics may vary.
How is the seed phrase recorded onto the card?
A few companies offer ready-made steel plates, and all you have to do is input your seed phrase onto the steel. Different companies offer different ways of doing this, from sliding metal tiles into locking slots, to engraving, or using a metal punch. If you are handy and have the tools, you can even make a steel plate backup yourself.
There are 2 rules that you must follow if you are considering using metal plates as a backup:
1. Simplicity is the win-win! Some solutions are way too complicated. Fewer pieces = less chance for failure.
2. You should never ever provide the card manufacturer with your private key or seed phrase for "engraving" or whatever process they use. Unfortunately, some reckless manufacturers expose their customers to this severe risk ... pease keep your seed phrase safe by avoiding them.
What risks are steel cards still subject to?
Backing up to a steel plate is great - but don't forget about the importance of keeping that plate in a safe location. There is no "data security" layer present on a steel plate, so it becomes critical to implement steps to prevent unauthorized people from accessing the seed phrase or steel plate.
- Consider encrypting your seed phrase before committing it to steel - that way if the plate is exposed, you still have a layer of protection.
- Keep it in a safe place! If the plate is exposed, then your seed phrase is exposed, and you become at risk of your funds being drained.
Why protect Your Seed Phrase?
In the world of cryptocurrency, you are your own bank, and with great power comes great responsibility. Public blockchain cryptocurrencies are run on open, permissionless systems, where transactions are irreversible. There is no credit card company or bank to call and dispute the charges.
Your seed phrase provides full access to your wallet, and because of this, protecting your seed phrase is critically important. You can think of your seed phrase as equivalent in legacy finance to someone having all of your online banking information. Anyone with your seed phrase can access your wallet, just as anyone with your online banking information can log in to your banking account.
Protecting/backing up your seed phrase serves two purposes: First, it backs up your Wallet, allowing you to reconstruct your wallets in cases of device failure, new devices, etc. Second, it secures your Wallet by preventing bad actors from gaining access to your seed phrase, which would allow them to steal funds.
What is the Cryptosteel
Cryptosteel was the first steel seed phrase backup solution on the market. The concept was developed in 2013, and the blueprints were later released as open-source software. The rectangle block resembles a cassette deck, as suggested by its model name "The Cassette." The frame is a little bigger than a credit card and will fit easily into your pocket (although the pocket is a poor choice of locations for safekeeping).
The purpose of steel backup solutions like Cryptosteel is to safeguard your seed phrase from extreme scenarios. The Cryptosteel Capsule will survive fire up to 1400C/2500F degrees, and the Cryptosteel Cassette up to 1200C/2100F. (For reference, a house fire is around 600C/1100F degrees.) It will survive physical damage from flooding, electric shock, corrosion, magnetic shockwaves, and extreme pressure.
The form of the device does not appear to the untrained eye as a seed phrase backup solution - it appears simply as a block of metal. However, someone who is familiar with the devices will recognize what it is. After you have backed up your seed phrase, choose a proper location for storage, such as a safe or a lockbox.
The device is made from 100% AISI 304 grade stainless steel - the Capsule form also incorporates AISI 303 grade steel - and the company says that it can go undetected by many scanners and metal detectors. Since tech is always advancing, this is not a safe long-term reliance if your objective is stealth and your threat profile involves entities searching your house with metal detectors. If this is the case, embed the device onto a stainless steel object, preferably inside a wall, and your Cryptosteel will become masked and invisible to metal detectors.
How to use the Cryptosteel
When you first open the Cryptosteel, you will notice that the instructions are printed on the inside top of the cardboard box, along with pictures for each step. The device and the engraved steel tiles are neatly embedded into cushions.
0. Cryptosteel Unboxing
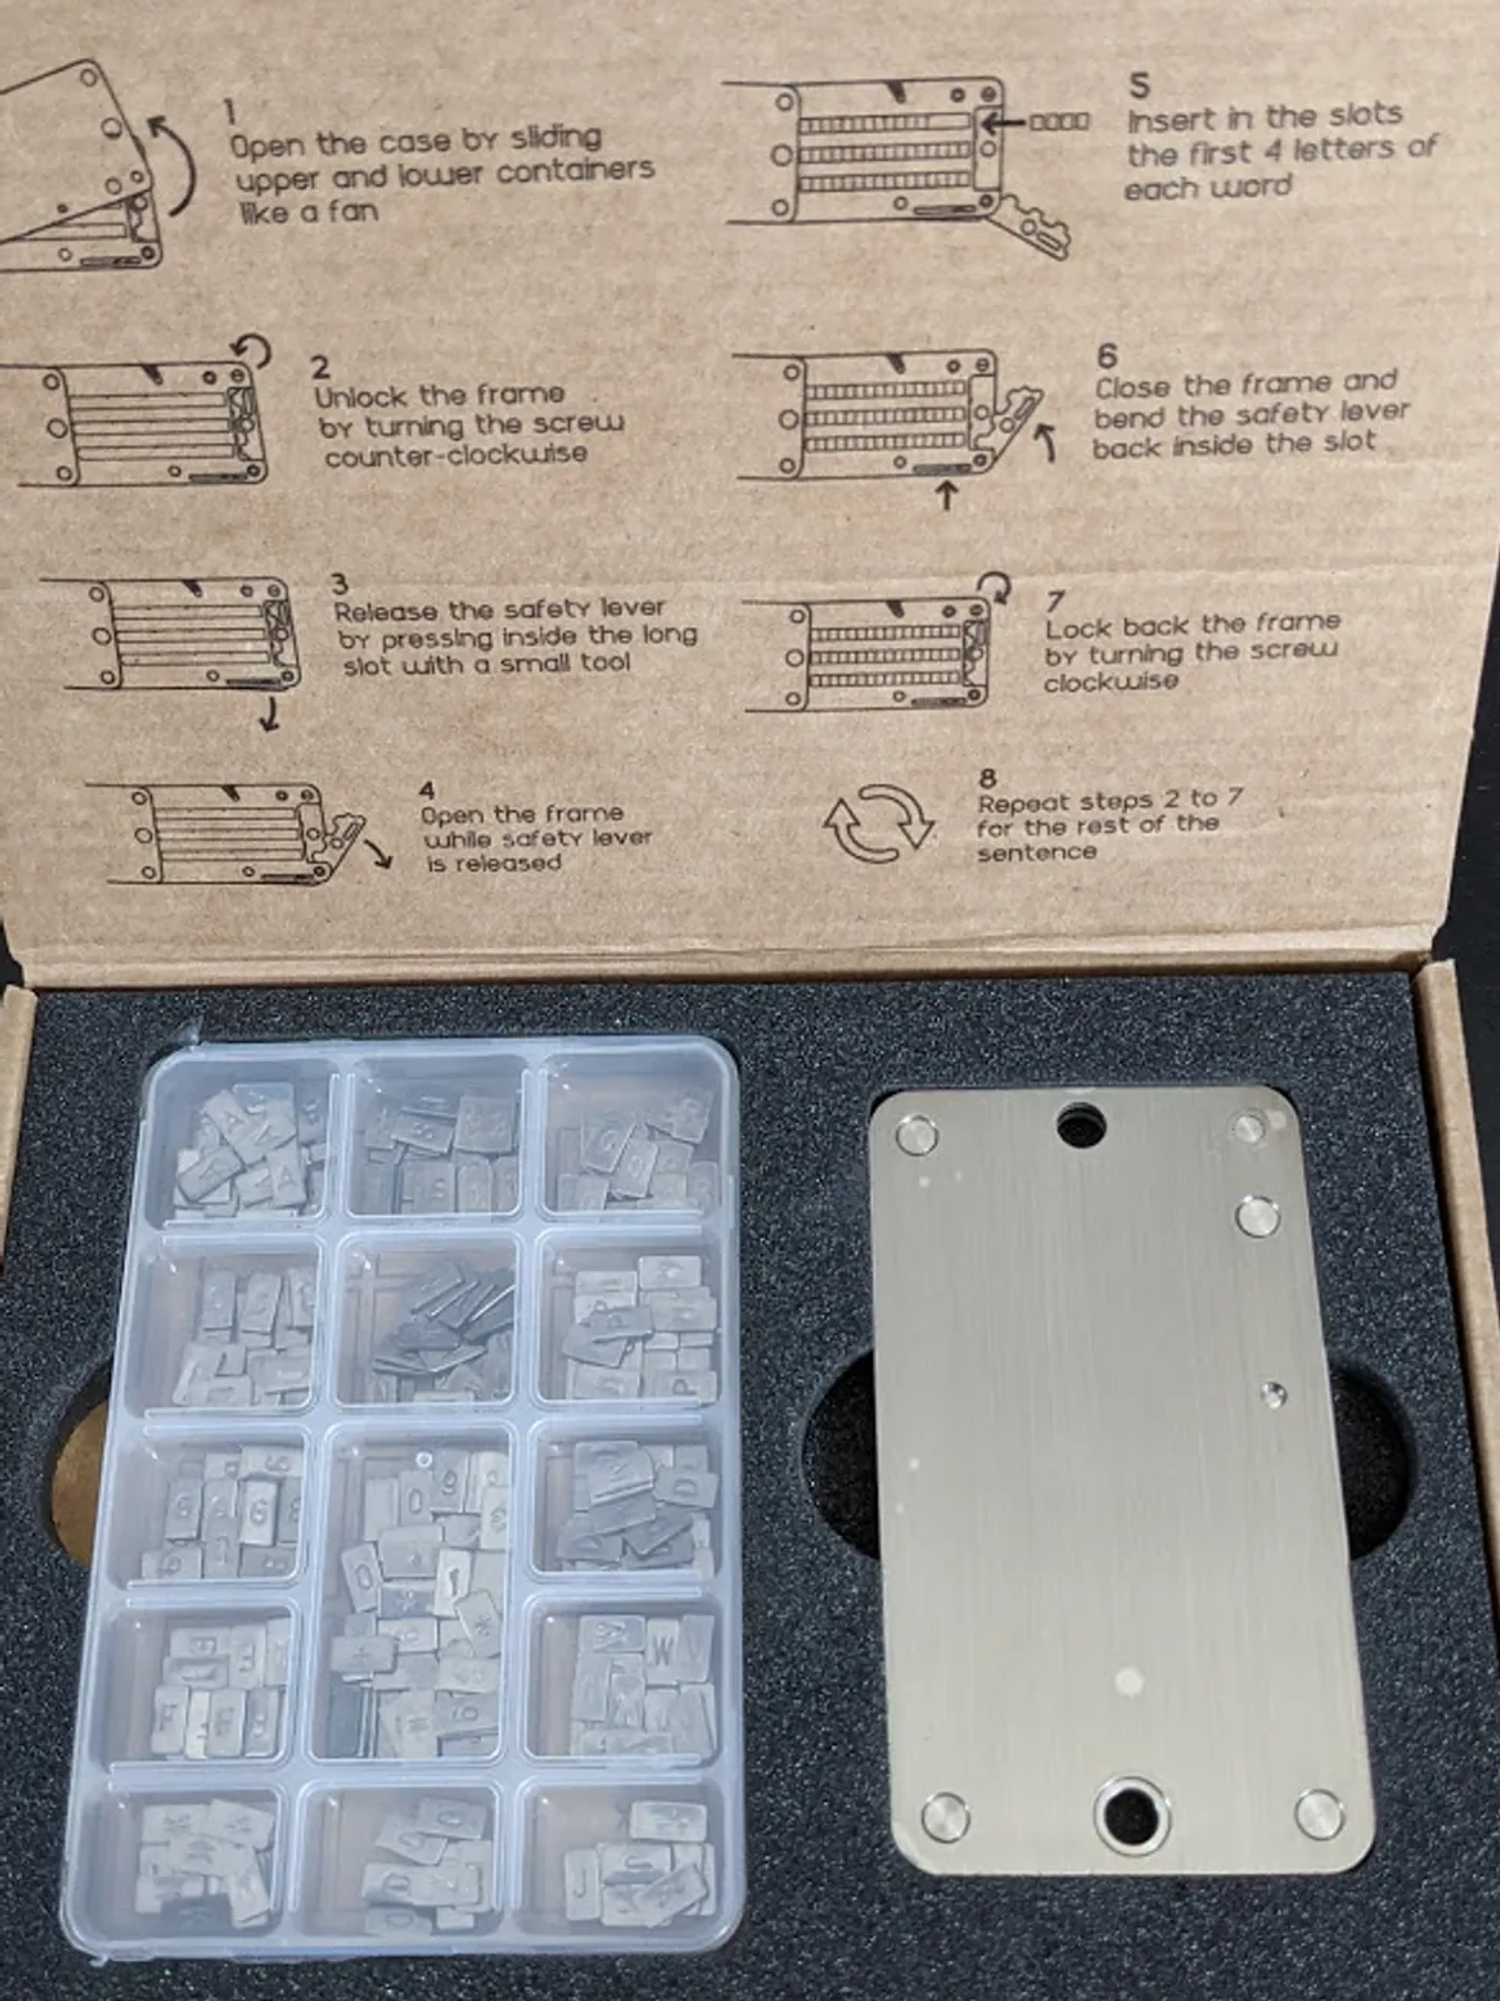
Cryptosteel unboxing
Remove the Cryptosteel device from the box, and the plastic container holding the engraved steel tiles. Printed on the box, underneath the plastic container, is an outline that maps out where each letter can be found in the plastic container. Each box shows 2 letters because the engraved steel tiles have one letter on each side.
Do you notice the elongated box in the middle, with numbers and symbols? BIP39 seed phrases do not contain numbers and symbols, but BIP39 does support adding a passphrase to the end of your seed phrase: this is sometimes referred to as the 13th or 25th word. However, the steel wallet only has 24-word options to fill, so if you have a 25th word, it won't fit. If you have a 12-word seed phrase, it will fit.
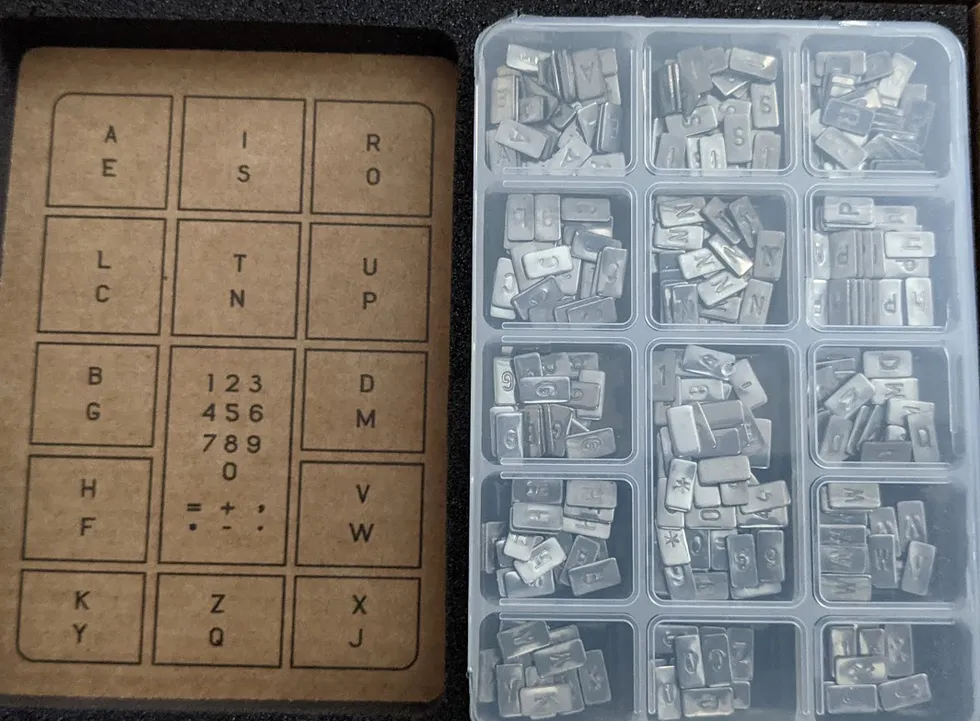
Cryptosteel outline and steel tiles
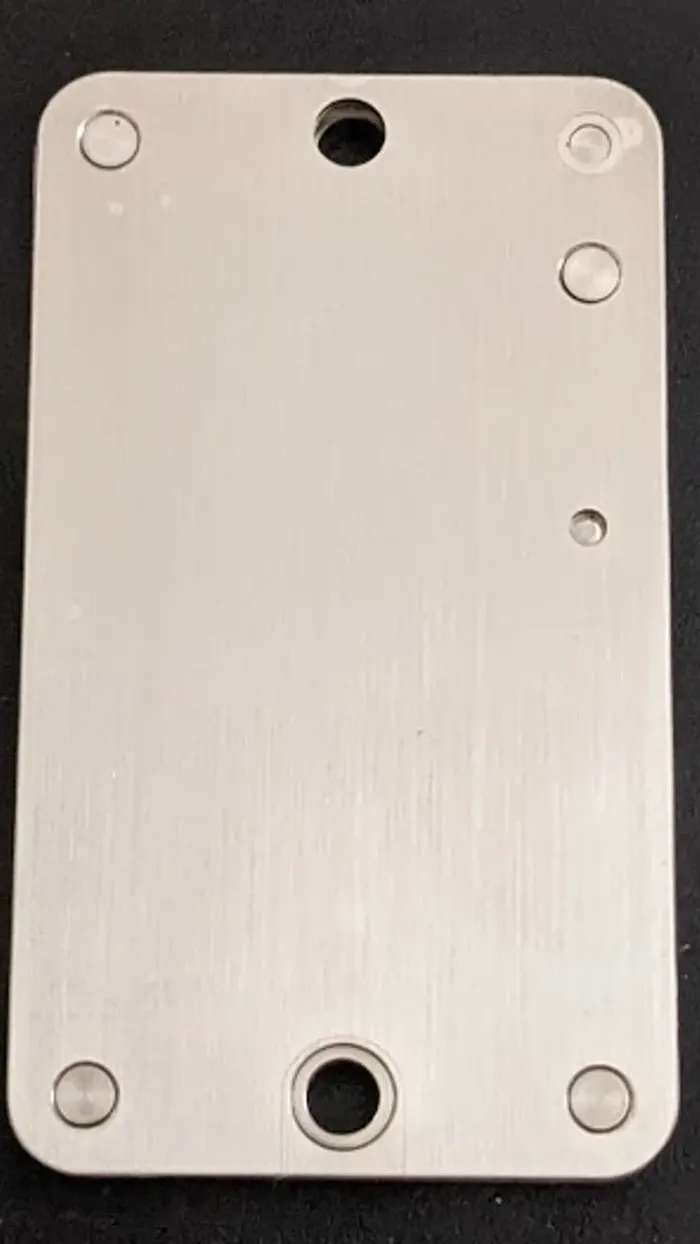
Cryptosteel device
1. Setup Cryptosteel
Now that you are familiar with the device and have had a chance to look everything over, let's back up your seed phrase.
Step #1 - "Open the case by sliding upper and lower containers like a fan."
When you first hold your Cryptosteel, the device frame is closed and locked, and it appears as a rectangular block of steel. To back up your seed phrase, first, you need to open the device.
To open the device easily, place your fingers near the top of the device, and slide each side in opposite directions.
Identify the top of the Cryptosteel by looking for the side that has a thin rectangular opening, which separates the two blocks of metal. In contrast, the bottom of the device will be completely closed and solid.
You shouldn't have to push too hard to open the Cryptosteel. If you are pushing hard, you are likely pushing near the bottom of the device.
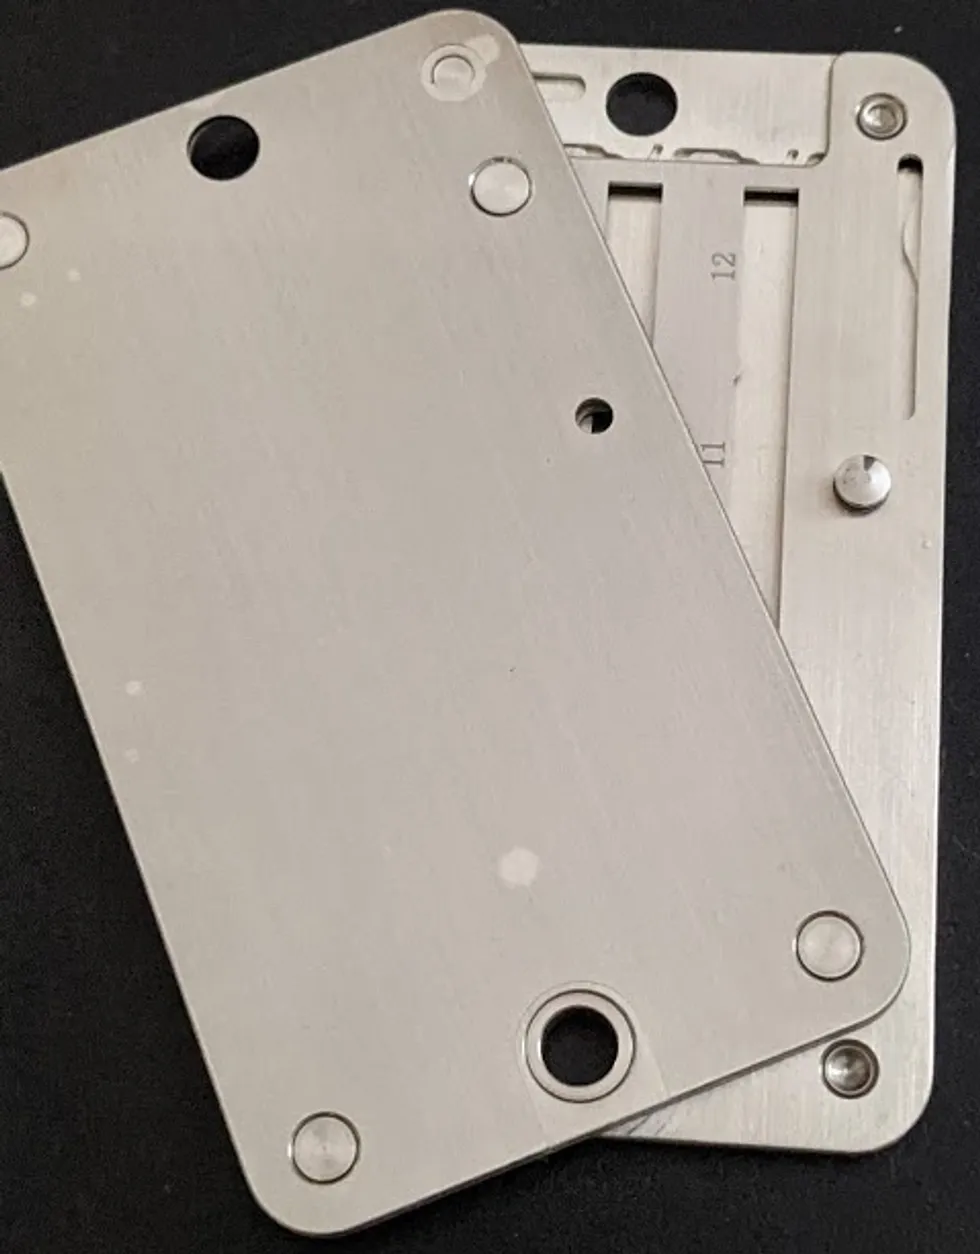
Opening Cryptosteel
2. Unlock the frame by turning the screw counter-clockwise
Now that the Cryptosteel is opened, notice that the device frame is actually 2 plates of steel, with each steel plate holding 12 words, so that you can store your seed phrase.
The way that you store your seed phrase is by sliding engraved steel tiles into the Cryptosteel and then locking it. By default, the device comes locked. To unlock it, you will need to use a flathead screwdriver, or something similar, to turn a screw counter-clockwise. In our testing, we were also able to use a credit card and a fingernail to turn the screw.
It is easy to identify the screw, because it is the only screw on the device that has an opening to be turned. If you lay the Cryptosteel horizontal, the screw is on the top right.

Unlocking the Cryptosteel
3. Release the safety lever by pressing inside the long slot with a small tool.
Before you can open the frame, you need to release the safety lever. The safety lever prevents you from accidentally opening the frame and having your steel tiles fall out.
To identify the safety lever, look for the thin rectangular opening with a small half-oval inside of it. On the 1-12 word side, it is underneath word 12. On the 13-24 word side, it is underneath word 24.
To release the safety lever, you need to push out the metal piece inside the long slot. It's possible to push it out using your finger, but it's much easier to use something like a screwdriver or similar object.
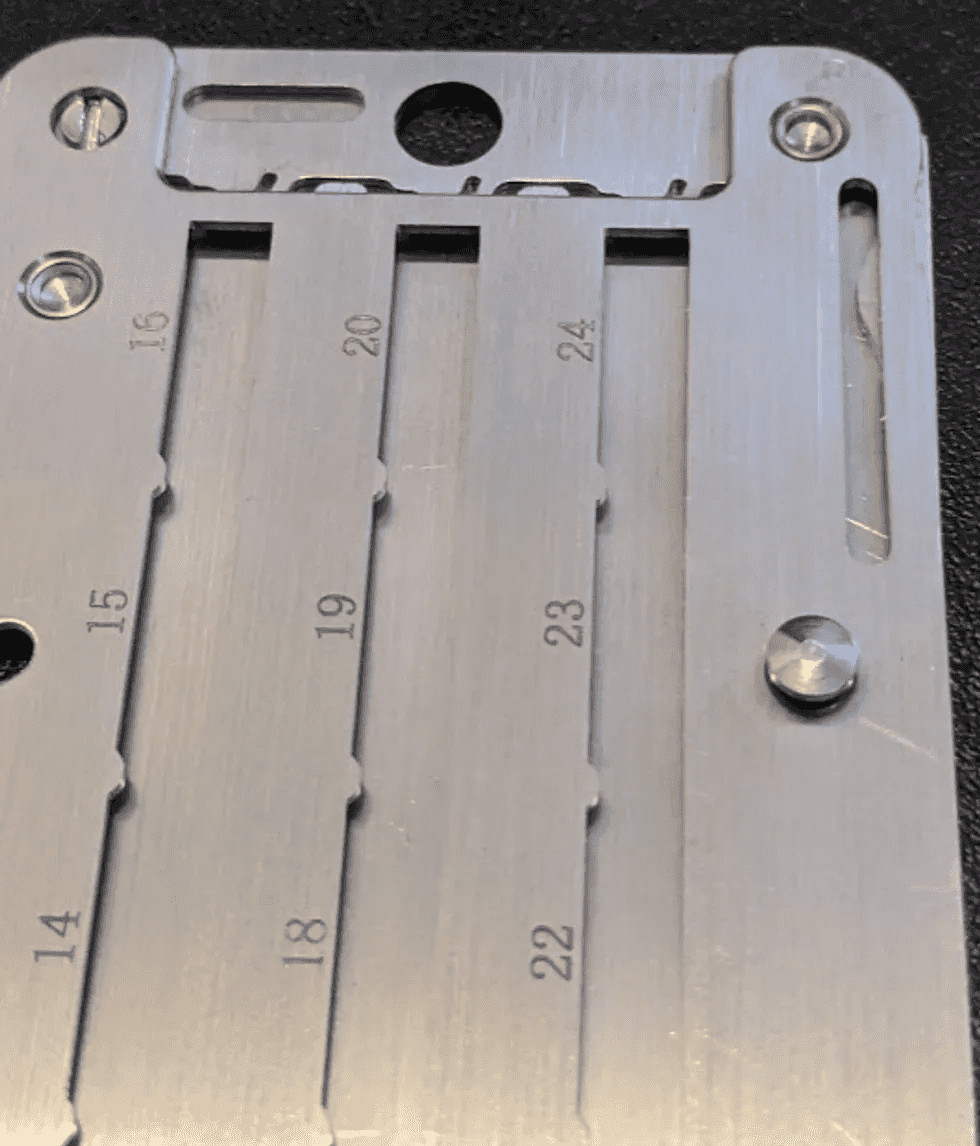
Releasin safety lever
4. Open the frame while safety lever is released
Once the safety lever is released, you can easily open the frame by sliding it open. When the frame is shut, it protects the steel tiles from falling out by keeping them locked in place. After you have opened the frame, you are ready to start placing your seed phrase in the Cryptosteel.
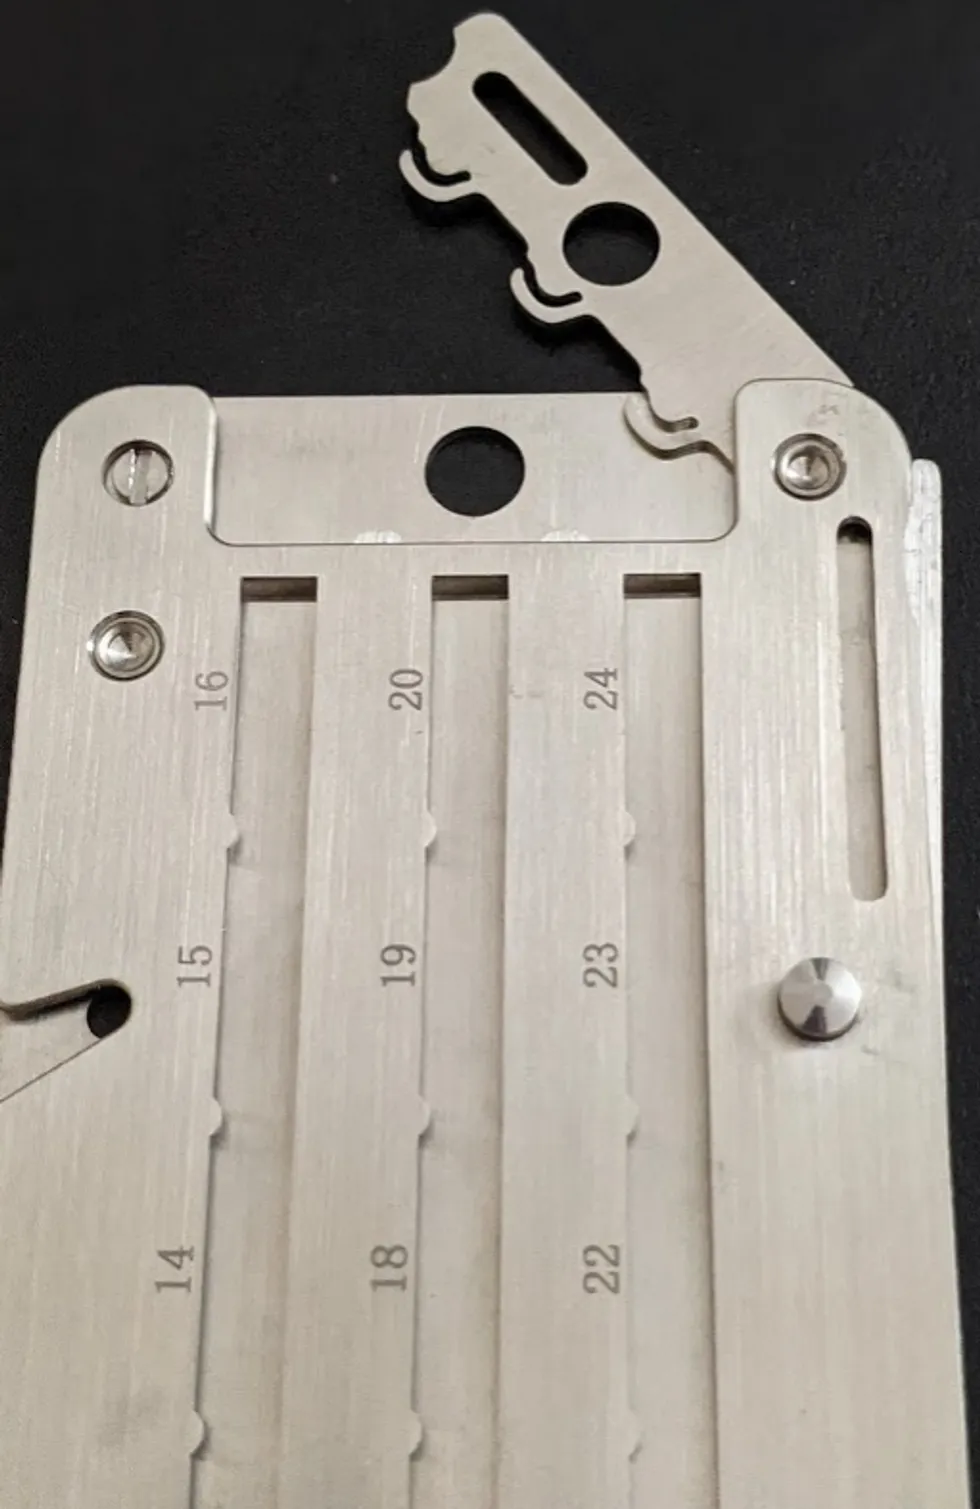
Opening the frame on the Cryptosteel
5. Insert the slots with the first 4 letters of each word
With the frame open, you will be able to slide the engraved steel tiles into the Cryptosteel. Notice the numbers engraved on the device. It is extremely important to follow the correct order! The Cryptosteel has 3 rows, each with 4 words.
Due to the way BIP39 works, you will only need the first 4 letters of each word. This is because each word of the 2,048 word list has unique first 4 letters. If you have a word that only has 3 letters, feel free to use a steel tile from the numbers and symbols box to represent the "extra" space.
Now, it is time to open the plastic case containing your letters, and put them into the Cryptosteel:
- Identify word 1 of your seed phrase, and identify the position of word 1 on the Cryptosteel.
- Gather the engraved steel tiles of the first 4 letters of your word.
- Insert the 1st letter first, position it in the slot, and slide it to the bottom.
- Insert the remaining engraved steel tiles to complete your 4 letters.
- Repeat the process for the rest of your 12 words.
*If you have a seed phrase that has more than 12 words, keep following this guide till the end, and then repeat the same steps for the second steel block that contains words 13-24.*
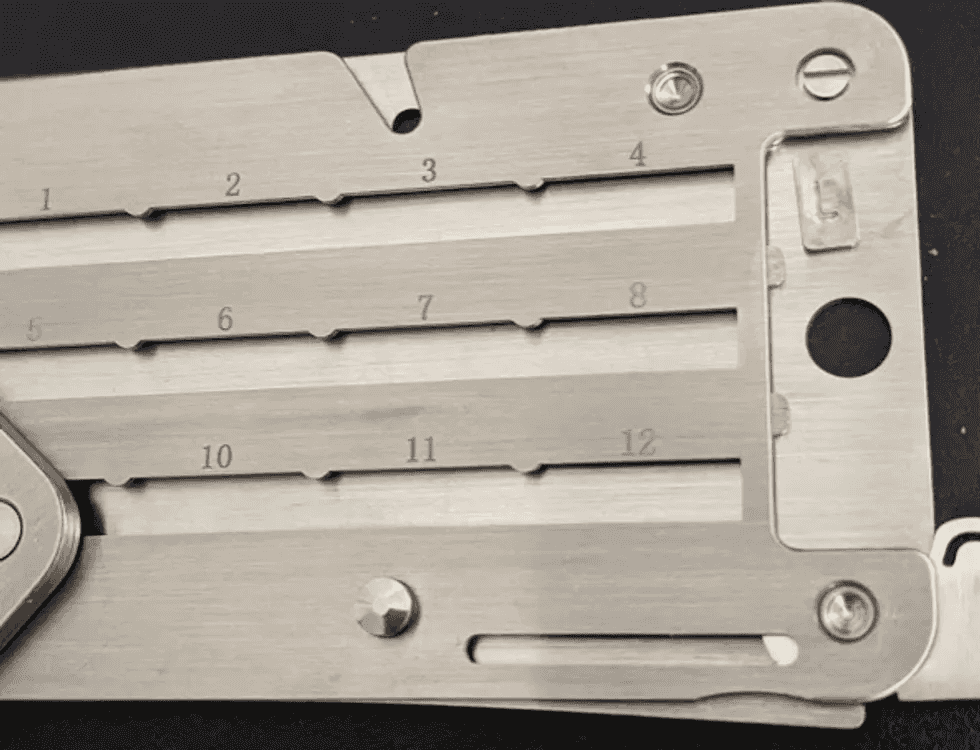
Sliding the engraved steel tile into the Cryptosteel
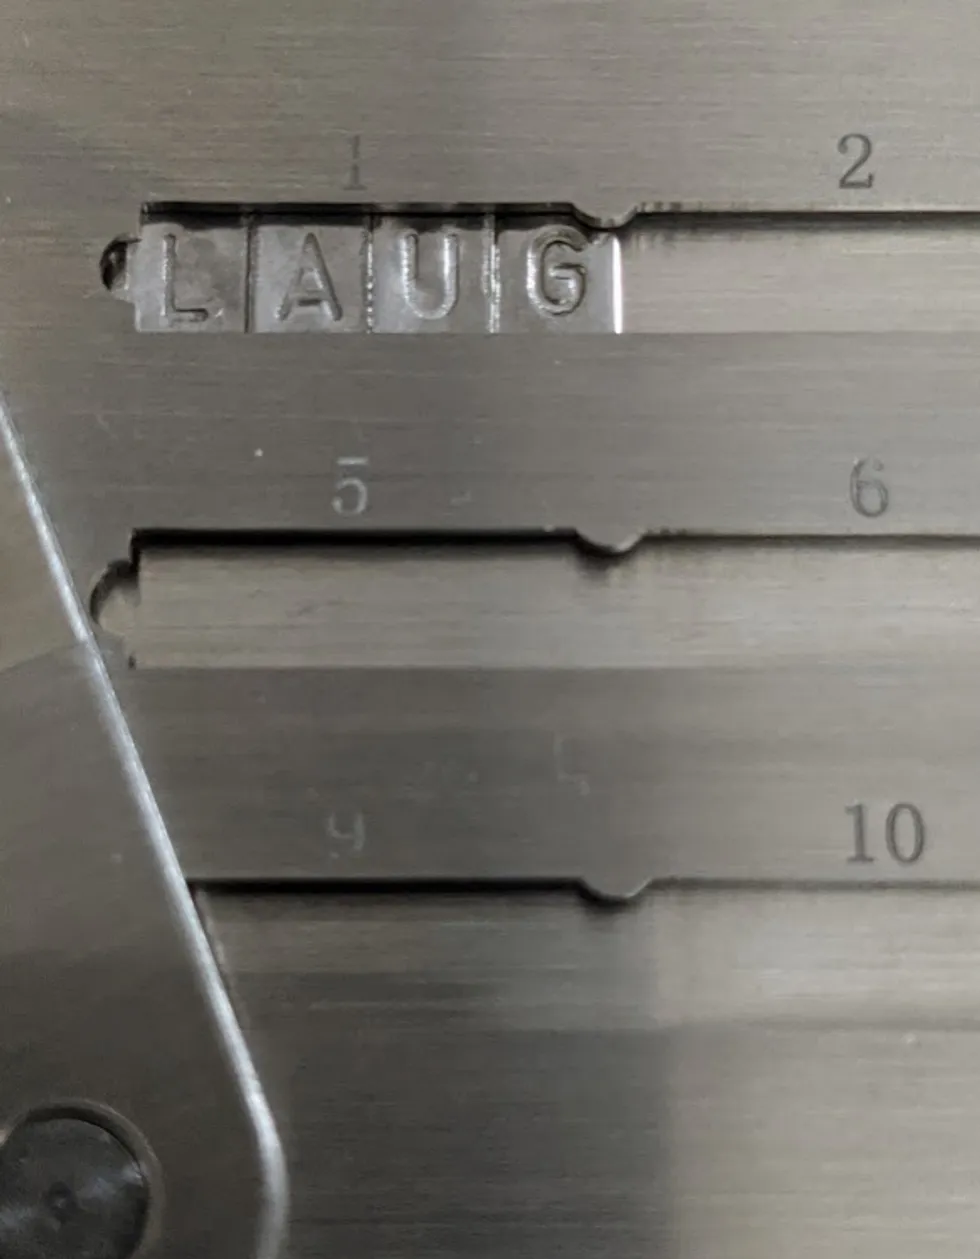
First 4 letters of the first word in the Cryptosteel
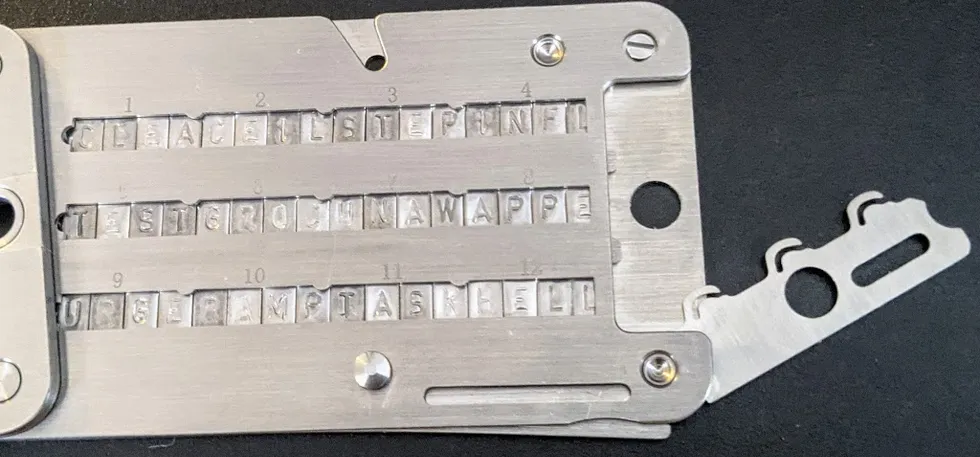
When you are finished sliding in the steel tiles, this is what it will look like
6. Close the frame and bend the safety lever back inside the slot
Now that all the slots are filled, the next step is to close the frame and close the safety lever. When doing this step, be very careful to keep the Cryptosteel flat and horizontal. If you tilt it too much, it is possible for the steel tiles to slide out!
Before you can close the safety lever, you have to close the frame. Closing the frame is super-simple: just push it back down into place, and it should naturally fall into place without much resistance.
To close the safety lever, you need to push it back inside the slot. This requires a little more resistance than closing the frame. If the safety lever doesn't want to bend back into the slot, just give it a good push.
7. Lock back the frame by turning the screw clockwise
Recall Step 2, when you had to unlock the frame by turning the screw counter-clockwise? This step is the opposite of that: you are going to lock the frame by turning the screw clockwise.
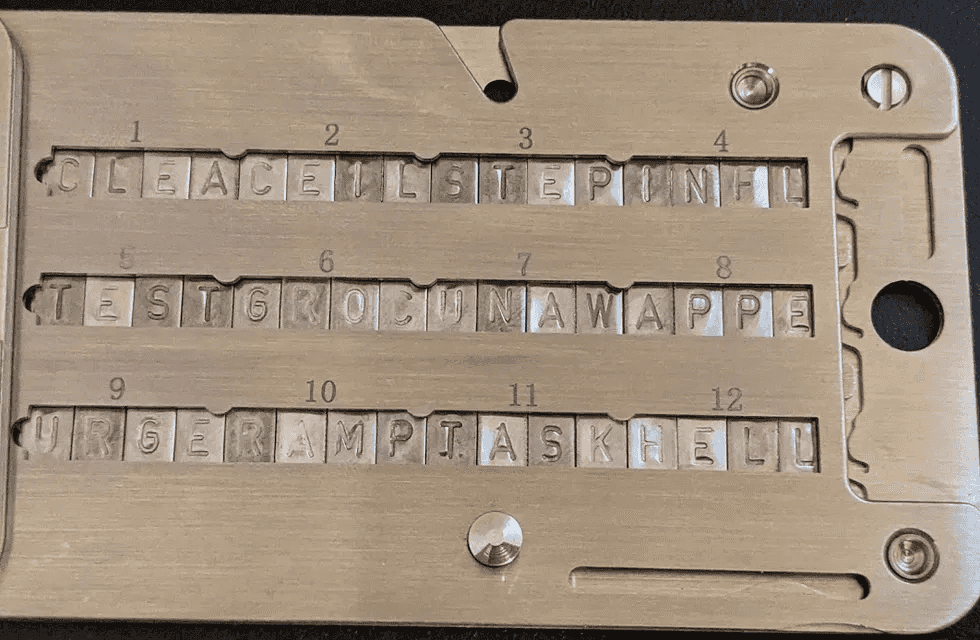
This is what your Cryptosteel will look like once you have locked the frame
8. If you have a seed phrase more than 12 words, repeat these steps for the other side
The Cryptosteel is made up of 2 steel plates, with each steel plate containing 12 words. You have just completed setting up the Cryptosteel for a 12-word backup ... congratulations!
But what if you have an 18, or 24-word seed phrase? If so, repeat these same steps for the 2nd steel plate to back up the remaining words of your seed phrase.
When you are done, slide the 2 steel plates together so they form 1 steel plate. When finished, it will look like this:
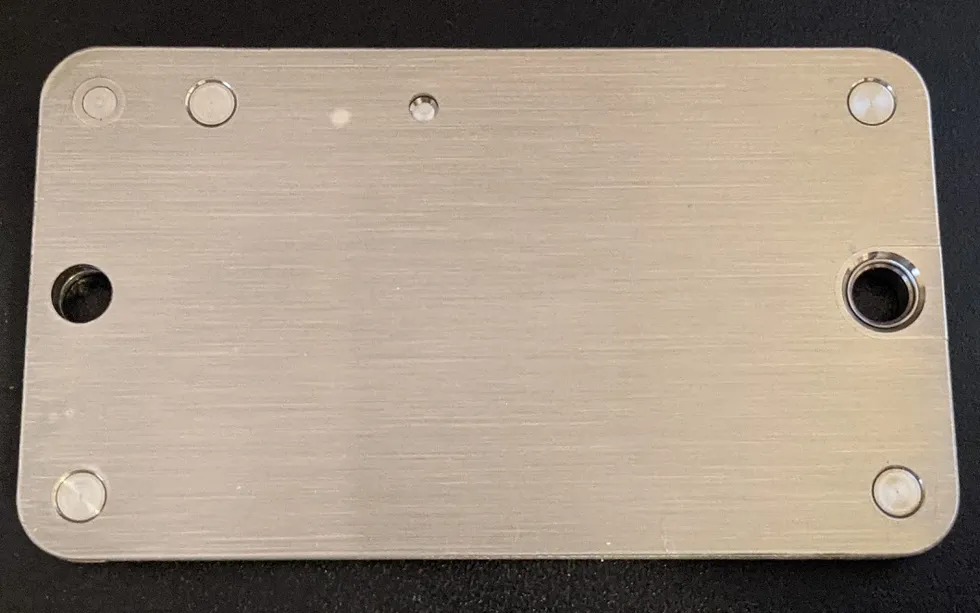
The Cryptosteel, closed and locked
The advantages of using Cryptosteel
Using this method to backup your seed phrase provides protection from destruction via disaster. In today's world, you do not need to look far to see natural disasters happening around the world. From Texas freezing over, to fires in California, Cryptosteel ensures that your seed phrase is protected, and comes out completely intact on the other side.
The ideal solution
Cryptosteel is near-perfect as a long-term backup and storage solution. Since the steel wallet is a physical device, storing it in a safe place that is under your control is crucial. The best place to store the Cryptosteel would be in a safe, lockbox, or cleverly hidden - for example, embedded in a steel object.
The Cryptosteel is not without downsides. For starters, recovering your seed phrase requires physically retrieving the device, which could be tricky, depending on your chosen hiding place.
Today, next-generation digital backup solutions are available that utilize military-grade encryption, providing the same level of security as the Cryptosteel, and incorporating high levels of fault-tolerance and ease of access to your backups. You could choose to have the best of all worlds by using the Cryptosteel to provide protection against disaster and destruction, combined with next-generation tools like Vault 12 for your day-to-day use - with the same level of security.
Who Holds The Key?
You Used cryptography fifty times before breakfast
You unlocked your phone with your face. Paid for coffee with a tap. Sent a message that promised it was “end-to-end encrypted.” Every one of those moments ran on cryptography — the technology that protects your digital life, and the technology most people understand the least.
In Who Holds the Key?, technologist Wasim Ahmad explains, in plain English, the simple ideas behind the locks your life runs on. Through true stories and real-world examples — including the $1.5 billion theft where nobody stole the keys: the screen lied — he shows how encryption, digital signatures, passkeys, secure hardware, and cryptographic keys work, and why understanding them has become an essential life skill.
Built on four plain ideas and one master question — the one on the cover — the book runs from WhatsApp and Apple Pay to Bitcoin, AI, and quantum computing. No math. No jargon. No paranoia.
You don’t need to become a cryptographer. But by the time you finish this book, you’ll think like one.
QUESTIONS IT ANSWERS
- Can WhatsApp really not read my messages?
- Where does my Face ID data go — and is it safe?
- Isn’t keeping every password in one app insane?
- What am I agreeing to when my wallet says “Sign”?
- Will quantum computers break everything?
- What happens to my crypto and photos when I die?
Every chapter opens with a question ordinary people ask — and closes with an answer you can act on the same afternoon.
INSIDE THE BOOK
PART I
LIVING IN A MATERIAL WORLD: THE SINGLE IDEA THAT GOVERNS YOUR DIGITAL LIFE
An ordinary morning, seen clearly for the first time — and the key: the one idea everything else hangs from.
PART II
DEMYSTIFYING THREE KEY ELEMENTS
What “end-to-end encrypted” really means, what the Sign button really does, and where your keys actually live.
PART III
STAKES AND THREATS
Your passwords, your front door, your money and your crypto: who can freeze them, who can steal them, and who inherits them when you’re gone.
PART IV
THREATS FROM BEYOND
Quantum computers and governments — the two forces powerful enough to threaten the locks themselves, and exactly how worried to be.
PART V
AGENCY AND RESOLUTION
How to judge what deserves your trust, size up your own risks, and build a defense you’ll actually keep — Good, Better, or Paranoid.
PART VI
EVOLUTION OF PERSONAL PRIVACY
Cryptography’s turn from hiding to enabling — and why the same mathematics the powerful want weakened puts control back in your hands.
ABOUT THE AUTHOR
Wasim Ahmad has spent decades where this book lives: at the exact point where deep, difficult technology meets everyday people.
It started early. As a schoolboy in Britain in the 1970s, he was among the first children to learn Prolog, the artificial intelligence language. He went on to the University of Sussex to study Mathematical Physics, then switched to Physics and French so he could spend a year in Paris — an early sign of a career that would keep crossing between the technical and the human. After university, he was an astronaut candidate with the Juno Project, but was too young to be allowed into space.
In the 1990s he joined Synon, the British startup whose software-based code generation won the Queen’s Award for Technology, moving with the company to Marin County, California. Then came the chapter that runs through the heart of Who Holds the Key?: as a founding member of Voltage Security, a Stanford University spinout, he launched the first commercial email encryption built on Identity-Based Encryption — the first genuine breakthrough in public-key cryptography in thirty years — working alongside some of the world’s most renowned cryptographers, including Stanford’s Dan Boneh. When catastrophic breaches hit the payments industry, he helped launch end-to-end protection for the world’s payment systems using format-preserving encryption, the elegant technique readers meet in Chapter 4.
His crypto journey began with AlphaPoint, working with the founding team that launched some of the world’s first cryptocurrency trading exchanges. He then joined Vault12, the pioneer of crypto inheritance, where the mathematics of Adi Shamir’s Secret Sharing — the scheme at the center of this book’s chapters on backup and inheritance — became a product that lets people pass their digital assets safely to the ones they love.
Most recently, he has been lobbying hard in both the United States and the United Kingdom — engaging with the SEC, CFTC and the FCA — to evolve the laws and regulations governing crypto, so that everyday people can access these technologies safely and confidently.
The pattern across all of it is the same one that drives this book: taking complex technology and formidable algorithms, and shaping them into solutions that ordinary people can trust, understand, and use.
Wasim lives in London and New York.

Get Started Now.


How-Tos
Articles on crypto security how to's e.g how to secure, back up, and inherit all your cryptoassets such as Bitcoin, Ethereum, crypto, private keys, seed phrases, NFTs, digital art, DAOs, and DeFi tokens.
View all articlesWhich is a better wallet: Ledger Nano X or Exodus?
When choosing crypto wallets, many users base their decisions on day-to-day asset management needs and perceived wallet or device security. However, savvy crypto users first consider a wallet's ability to handle long-term security scenarios.
Long-term security includes expected essentials like backup and recovery tools, and often-overlooked features related to secure and fault-proof third-party recovery. Wait, what's third-party recovery? You can think of third-party recovery as your ability to allow crypto assets to be inherited by successors. All crypto investors should have a comprehensive security strategy for the full life cycle of their crypto assets.
Let's begin by helping you understand the pros and cons of the Ledger Nano X hardware wallet and the Exodus software wallet for day-to-day activities, as well as considering their ability to safeguard the long-term security of your assets.
Overview
The Ledger Nano X and Exodus wallets both provide a wide variety of features and support a broad spectrum of cryptocurrencies, making them suitable for diverse crypto portfolios.
At a high level, several differences are clear:
Ledger Nano X
- Form: A hardware wallet, with mobile-centric usability via Bluetooth.
- General Usability: User-friendly (with necessary trade-offs due to its more-robust security features).
- Design: Compact and durable. The de facto standard for securing transactions on desktops.
- Price Point: It's not free, like software wallets are.
Exodus
- Form: A software wallet, available in both mobile and desktop versions.
- General Usability: Easy to use, and has particularly well-reviewed customer support.
- Design: Built-in exchange features and a moderate number of integrations.
- Price Point: The wallet software is free; the company makes money on exchange services provided through the wallet.
The decision between the two will likely hinge on individual preferences for target security requirements, preferred platforms (mobile or desktop), and should take into account the planned frequency of use.
Approach to comparison
Now, let's have a closer look.
When choosing the best hardware wallet for cryptocurrency security, you may wonder not only which is better, the Ledger Nano X or the Exodus, but also:
- What happens if your wallet is lost or stolen? (How well can these wallets recover from user errors?)
- How do these wallets handle more advanced scenarios like inheritance of crypto assets?
- How easy to use are these wallets?
- How do their security features compare?
This article compares important characteristics for these two popular wallets. We’ll break down the strengths and weaknesses of each, focusing on security, ease of use, and backup and recovery methods. By the end of this comparison, you’ll clearly understand which wallet is right for you, as well as how to recover your crypto assets in case of accidents.
What happens if your wallet is lost or stolen?
Wise wallet owners recognize the critical importance of crypto recovery before they find themselves in an unexpected bind! That's why it's important to understand the fundamental topic of crypto asset longevity, including features such as backup, recovery, and inheritance for crypto assets. These considerations are central to long-term planning.
Technical security is essential, but in the world of crypto, the degree to which backup and recovery solutions are foolproof for users is at least equally important. Here are the backup and recovery options for these two wallets:
How do these wallets handle Crypto Inheritance?
Crypto Inheritance Features
Currently, most crypto wallets, including the Ledger Nano X and Exodus, lack any features for establishing and managing crypto inheritance. This gap presents a challenge for users who want to be sure that their crypto assets can be transferred to their heirs.
Backup and recovery differentiators
Ledger Nano X Recover service Disadvantages:
- The optional Ledger Recover backup service is a paid service provided by three corporations that each hold parts of the user’s seed phrase in a cloud. This introduces risks, as the seed phrase could potentially be accessed via subpoena; or business partners could terminate agreements or become involved in lawsuits that result in locked data or resources (like, for example, Gemini and Genesis). These scenarios contain multiple potential points of failure.
- Very important detail: The terms of the optional Ledger Recover service do not mention support for inheritance, meaning any unfortunate accident related to the user could make crypto assets unrecoverable for his or her successors. Ledger itself suggests using 3rd-party crypto inheritance services for those purposes.
Ledger Nano X Recover service Advantages:
- People have different preferences. If a user is comfortable trusting a bank with their assets, they might also feel confident using Ledger Recover for securing their seed phrase backup (even though Ledger is not providing the entire cloud backup solution).
Exodus backup Disadvantages:
- Exodus has a cloud backup feature that comes with similar security assumptions and risks as all other passwords stored in your cloud provider. It is not recommended to rely on cloud backups for significant crypto balances.
Exodus backup Advantages:
- Exodus does offer a one-click solution for backup for insignificant balances of crypto.
How easy are these crypto wallets to use?
Let's compare the key aspects of both wallets side by side, and then summarize what really stands out for user convenience:
Crypto wallet user experience (UX) differences
Ledger Nano X with Smartphone UX
Ledger Nano X Disadvantages:
- The display is literally the size of a coin: very uncomfortable to use.
- Requires two-handed operation, making it difficult to use with a phone simultaneously — contrary to some misleading ads.
- The buttons are stiff, making operations cumbersome.
Ledger Nano X Advantages:
- Offers Bluetooth connectivity — works with or without a cable, at least with smartphones.
- Wide support for third-party wallets and dapps, allowing the Ledger Nano X to sign transactions directly in MetaMask, Uniswap, and other platforms without relying on Ledger Live software. This is a huge advantage for DeFi users.
Exodus UX Disadvantages:
- As a product that prioritizes ease of use, Exodus does not offer a full suite of advanced features such as fiat currency on/off ramps or advanced Web3 / DeFi integrations.
- The desktop version of Exodus offers more features than the mobile version (e.g., portfolio management tools, Trezor hardware integration, and a broader set of supported cryptocurrencies).
Exodus UX Advantages:
- Exodus is generally more user-friendly than the Ledger Nano X (and other hardware wallets).
How do these wallets' security features compare?
Now, we dive deeper into the core specification of every hardware wallet: security features.
| Ledger Nano X | Exodus | |
| PIN-code | 4 - 8 digits | up to 6 digits |
| BIP39 Passphrase | Yes | No |
| Open-source | Partial | Partial |
| Secure Element | Yes | No |
| Multisignature | Yes | No |
Crypto wallet security feature differentiators
Ledger Nano X security Disadvantages:
- Some critical components are closed-source. This raises concerns, especially after the controversial introduction of the Ledger Recover backup service, which challenged the previous assumption that the Secure Element could never transmit the recovery seed phrase outside the hardware wallet.
Ledger Nano X security Advantages:
- Includes a Secure Element, giving Ledger devices a strong reputation for withstanding physical attacks. This is important for users who prefer not to complicate their security with BIP39 passphrases, prioritizing ease of use.
Exodus security Disadvantages:
- Portions of the Exodus wallet are closed-source, preventing full transparency of its code security.
- Exodus, like all software wallets, operates in an inherently less-secure operating environment than a hardware wallet.
- As a software wallet, Exodus lacks a Secure Element.
- Exodus lacks support for some common security extensions such as 2-factor authentication, creation of multisignature transactions, and entry of a wallet "extra word" passphrase.
Exodus security Advantages:
- Some of Exodus's security disadvantages could be mitigated by using Exodus together (integrated) with Ledger Nano X (they are compatible with each other).
Summary of Ledger Nano X and Exodus Comparison
The Ledger Nano X and Exodus both provide a respectable set of features, and support a broad spectrum of cryptocurrencies, making them suitable for diverse crypto portfolios.
The Ledger Nano X is a mobile-friendly, security-oriented solution, and offers a balance of security and convenience features. It provides a small display and uncomfortable input, but with the advantages of a Secure Element and wireless connectivity options like Bluetooth.
On the other hand, Exodus is free and simple, but provides fewer security capabilities. It's great for beginning users and suitable for relatively small amounts of crypto.
The decision between the two will likely hinge on individual preferences for the target use case and balance, and should take into account the planned frequency of use.
Given their convenient integration, the best of all worlds could be to use both wallets, holding larger amounts of crypto in your Ledger Nano X wallet while keeping a small, ready-to-transact "petty cash" stash in your Exodus wallet.
Whichever you choose, remember to add crypto inheritance to your choice of wallet to ensure the long-term safety of your digital assets.
Vault12 Guard: a decentralized solution for Crypto Inheritance
Vault12 is the pioneer in Crypto Inheritance Management, and delivers an easy-to-use and secure method for assigning a legacy contact to your crypto wallets. This enables you to pass on your wallet seed phrases and private keys for all types of digital assets to future generations. Vault12 Guard is designed for everyday people, yet strong enough for Crypto OGs.
Vault12 Guard has a uniquely-secure design. Utilizing advanced encryption and decentralized storage, it ensures that crypto assets are not only safe but also transferable under predefined conditions, filling a critical need unmet by most traditional hardware wallets. Vault12 Guard applies a hybrid approach of software fused with the hardware-based Secure Element of phone devices (The Secure Enclave for iOS devices, and Strongbox for Google devices). Vault12 Guard's decentralized design reduces possible points of failure. Nothing is stored on cloud servers or Vault12 servers, and no assets are stored on local devices, making them less of a target.
From a user perspective, the Vault12 Guard app asks users to appoint one or more people (or mobile devices) as Guardians. The designated Guardians are entrusted to protect the user's comprehensive collection of wallet seed phrases and private keys, which are safely stored within a decentralized digital Vault. Its simple, user-friendly workflow removes the necessity for regularly revising wallet inventories or modifying instructions for your lawyers — a process that otherwise could lead to privacy breaches.
Both the Ledger Nano X and Exodus are compatible with Vault12 Guard Inheritance. This addresses the seed phrase backup dilemma for any hardware wallet. It also makes less-secure backup methods, such as paper or steel plates, unnecessary.
Quantum-safe Data Storage for App Developers with Open-Source Shamir Secret Sharing for Capacitor
How to build quantum-resistant apps with the Shamir Secret Sharing plugin for Capacitor?
The future of computing is knocking at our door. Quantum computers promise to revolutionize industries, solve impossible problems, and, unfortunately, break most of the encryption that protects our digital lives today.
This is where the Shamir Secret Sharing plugin for Capacitor plugin becomes your secret weapon for building truly resilient and secure apps.
What is Capacitor by Ionic?
Capacitor is an open-source, cross-platform native runtime that lets developers build iOS, Android, and web apps from a single modern JavaScript/TypeScript codebase. Created by the team behind Ionic, it provides a consistent API layer that bridges web technologies (like React, Vue, Angular, or vanilla JS) with native device capabilities such as secure storage, biometrics, filesystems, and more. Through its plugin system, Capacitor allows both first-party and community plugins—like Shamir Secret Sharing plugin for Capacitor—to expose powerful native functionality in a way that feels natural to web developers, enabling high-performance, production-grade apps without sacrificing the speed and flexibility of a web-based stack.
What are the challenges of Self-Custody?
We're witnessing a fundamental shift in how people think about their digital assets and personal data. From crypto wallets to personal health records, users increasingly want control over their own information. They don't want to trust centralized services with their most sensitive data.
But self-custody creates a terrifying problem: what happens when someone loses their phone, forgets their password, or worse—their device gets stolen? Traditional backup solutions force users to trust third parties or create single points of failure.
The Shamir Secret Sharing plugin for Capacitor plugin solves this elegantly by eliminating the need for any single point of trust or failure.
What is the mathematics behind Shamir's Secret Sharing?
Shamir's Secret Sharing reads like something from a cryptography fairy tale. Invented by Adi Shamir (the "S" in RSA encryption), this algorithm takes any secret and mathematically divides it into pieces called shards.
Here's where it gets beautiful: you can lose some shards and still recover your secret perfectly. Need 3 shards to reconstruct your data? Generate 5 shards and distribute them to trusted friends or devices. Even if 2 shards disappear forever, you can still recover everything.
But the real magic happens in what cryptographers call "information-theoretic security." Each individual share reveals absolutely nothing about your secret. Not a single bit of information leaks, no matter how powerful the computer trying to crack it.
This isn't just computationally difficult to break—its mathematically impossible. Even with unlimited processing power, an attacker with insufficient shards learns nothing. The mathematics guarantee this, not the limitations of current technology.
How do you Future-proof against quantum threats?
Most encryption today relies on mathematical problems that are hard for classical computers to solve. Factoring large prime numbers takes classical computers thousands of years. Quantum computers could solve these same problems in hours.
Shamir's Secret Sharing takes a completely different approach. Its security doesn't depend on computational difficulty—it depends on mathematical impossibility. Think of it like trying to solve an equation with fewer values than unknowns. There are infinite equally valid solutions, making it impossible to determine which one is correct.
This information-theoretic approach means quantum computers offer no advantage to attackers. The underlying mathematics remain just as secure whether facing classical computers, quantum computers, or hypothetical super-quantum computers that might emerge decades from now.
Your applications built with the Shamir Secret Sharing plugin for Capacitor today will remain secure through whatever computing revolution comes next.
How can you Fault-proof your apps through distribution
Traditional security models create single points of failure. Lose your password manager database? Everything's gone. Company servers get compromised? Your data's exposed. Phone gets stolen? Access to your accounts vanishes.
Shamir's Secret Sharing flips this model entirely. Instead of protecting one critical thing perfectly, you distribute security across multiple independent channels. Each share can live in a different place:
- One share encrypted by your phone's secure enclave
- Another with a trusted friend or family member
- A third is stored in a safety deposit box
- Additional shards distributed to other devices or locations
The threshold system means you're protected against multiple simultaneous failures. Device breaks? Friend moves abroad? Safety deposit box becomes inaccessible? Your system keeps working because no single failure can compromise your security.
This distributed approach creates applications that become more resilient as they scale, not more vulnerable.

What are Common Use Cases for the Shamir's Secret Sharing Capacitor Plug-in?
The Shamir Secret Sharing plugin for Capacitor plugin provides the foundation, but imagination determines the possibilities. Consider these emerging use cases:
Family digital inheritance becomes possible when crypto seeds or important documents are shared across trusted family members. Parents can ensure their digital assets transfer smoothly without exposing sensitive information during their lifetime. That's what the Vault12 Guard app does by using Shamir Secret Sharing plugin for Capacitor.
Collaborative authentication allows teams to protect shared resources without any single administrator having complete control. Critical business systems require multiple people to authorize changes, preventing both external attacks and insider threats.
Progressive disclosure enables applications that reveal information only when specific conditions are met. Legal documents that unlock automatically when multiple parties agree, or time-locked messages that require distributed consent to access early.
Redundant backup systems can store encrypted application state across multiple cloud providers, user devices, and physical locations. Users never lose access to their data, but no single provider ever has complete information.
The plugin's cross-platform nature—supporting iOS, Android, and web—means these experiences work seamlessly across all user devices and contexts.
How has the Shamir's Secret Sharing Capacitor Plug-in been tried and tested in commercial apps?
The convergence of quantum computing, increased privacy awareness, and demand for user-controlled applications creates unprecedented opportunities for developers who think ahead.
Applications built with traditional security models will face obsolescence as quantum computers emerge. Centralized platforms will struggle as users demand true ownership of their data. Single points of failure will become unacceptable as digital stakes continue rising.
But developers using Shamir Secret Sharing plugin for Capacitor can build applications that thrive in this new landscape. Your users get genuine self-custody without sacrificing usability. Your architecture becomes more resilient as it scales. Your security improves as computing power increases rather than becoming more vulnerable.
The plugin abstracts away the complex mathematics and cross-platform implementation details. You get enterprise-grade Shamir's Secret Sharing through simple TypeScript interfaces, letting you focus on creating innovative user experiences rather than cryptographic implementation.
How can you start using the Shamir's Secret Sharing Capacitor Plug-in?
Quantum computers won't wait for our applications to catch up. User expectations for data ownership and privacy continue accelerating. The developers who start building quantum-resistant, fault-proof applications today will define the next generation of digital experiences.
The Shamir Secret Sharing plugin for Capacitor plugin gives you the tools. The mathematical foundations are unshakeable. The production validation is complete. The cross-platform compatibility ensures a broad reach.
What remains is the most exciting part: imagining and building the resilient, user-empowering applications that will define computing's next chapter. The future belongs to developers who understand that true security comes not from building higher walls, but from removing single points of failure entirely.
Your users are ready for applications they can truly trust. The technology is ready to support your vision. The question is: what will you build?
Using the Shamir Secret Sharing plugin for Capacitor - Github: https://github.com/vault12/capacitor-shamir
What is Shamir's Secret Sharing?
Shamir's Secret Sharing is a cryptographic algorithm that divides a secret into multiple parts (shards), where a minimum threshold of shards is required to reconstruct the original secret. This ensures that:
- No single shard reveals any information about the secret
- Any threshold number of shards can reconstruct the secret
- Security through distribution - store shards separately for maximum security
What are the Security Concepts behind Shamir's Secret Sharing?
Shamir's Secret Sharing provides information-theoretic security, which means the algorithm is mathematically proven to be unbreakable regardless of computational power. Key security advantages:
- Quantum Resistance: Security relies on mathematical impossibility rather than computational complexity, remaining secure against quantum computers
- No Key Management: There is no single master key to rotate or protect; instead, security hinges on distributing and safeguarding the individual shards
- Mathematical Foundation: Based on polynomial interpolation over finite fields, where reconstructing the secret without sufficient shards is mathematically impossible, not just computationally difficult
What are the features of Shamir's Secret Sharing Capacitor Plug-in?
- Secure Secret Splitting: Split sensitive data into encrypted shards using Shamir's Secret Sharing
- Cross-Platform: Native support for iOS, Android, and Web
- Flexible Storage: Memory-based and filesystem-based operations
- Progress Tracking: Real-time progress callbacks for all operations
- Performance Optimized: Efficient handling of large files and data
- Recovery Options: Restore complete secrets or individual shards
What are examples of Real-World Usage?
This plugin has already been battle-tested in production for a decade on almost a million iOS and Android devices, as a core component of Vault12 Guard, a mobile app that provides decentralized backup, and inheritance for crypto wallets and other sensitive data.
More information is at Github: https://github.com/vault12/capacitor-shamir
Vault12 Guard now imports your iOS Credentials from Apple Password and other Password Managers
How to Move Your Passwords, Passkeys, and Codes Between Your Password Manager and Vault12 Guard?
With the latest Vault12 Guard release, effortless password backups are no longer just for crypto and seed phrases — you can now bring in your logins, verification codes, passkeys, and even Wi-Fi credentials from Apple Passwords and major third-party managers (like Bitwarden), store them in your decentralized Vault, and export them back into any compatible app later if you ever need to move or recover. This works on iPhone, iPad, and Mac running iOS 26, iPadOS 26, and macOS 26.
Vault12 Guard now supports Apple’s new Credential Exchange Protocol (CXP), making it much easier to bring your existing credentials into your inheritance Vault. CXP is a new industry standard designed for the secure transfer of passkeys and passwords between compatible apps and platforms—so instead of manually copying details or re-creating accounts, you can move them directly and safely into Vault12 Guard.
With iOS 26, Apple is the first major platform to roll out CXP, opening the door to real credential portability and user choice. Thanks to our integration, iPhone users now have a secure, standardized way to import passkeys from other password managers and platforms into Vault12 Guard, while keeping everything encrypted and under their control.
Why back up your credentials in Vault12 Guard?
When you bring credentials into Vault12 Guard, they’re protected like any other high-value asset:
- Decentralized protection with Guardians
Your credentials are encrypted, split, and stored across your chosen Guardians (trusted people or your own devices), not in a single cloud account or server. - Inheritance-ready by design
Through Vault12 Digital Inheritance, your beneficiary can recover critical logins and keys when Guardians approve an inheritance request—using the same audited restore flow already documented for other assets. - No vendor lock-in
Because Vault12 Guard uses the same system-level transfer mechanism as Apple Passwords and leading managers like Bitwarden, you can always export your credentials back into another app later.
We strongly recommend having active Guardians configured before importing, so your credential backup is both secure and recoverable.
What is needed to import your passwords into Vault12 Guard?
- Vault12 Guard updated to the latest version on iOS 26 / iPadOS 26 / macOS 26.
- A password manager that supports the new secure export flow, such as:
- Apple Passwords
- Bitwarden
- Other compatible apps as they roll out support over time.
How are Passwords transferred into and out of Vault12 Guard?
Apple’s Credential Exchange capabilities in iOS 26, iPadOS 26, and macOS 26 introduce a standardized, OS-controlled way for credential apps to talk to each other securely.
At a high level:
- The export always starts in the app that currently holds your data (Apple Passwords, Bitwarden, etc.).
You choose an option like “Export data to another app” / “Move to another password app”. - The system shows a list of compatible destination apps (including Vault12 Guard).
- Once you select Vault12 Guard, the OS:
- Packages the selected credentials (logins, passkeys, verification codes, and, where supported, Wi-Fi details),
- Sends them directly and securely to Vault12 Guard,
- Ensures only the chosen destination app can read them.
No manual juggling, no generic file exports in this flow—just a controlled, encrypted handoff mediated by the operating system and the participating apps.
Vault12 Guard simply plugs into this mechanism as a secure backup & inheritance destination (and as an export source), instead of inventing its own incompatible format.
How do I import passwords into Vault12 Guard?
Use this when you want Vault12 Guard to serve as your resilient backup for credentials stored elsewhere.
On iPhone, iPad, or Mac (same pattern):
- Open your password manager (e.g., Apple Passwords, Bitwarden).
- Select the items you want to protect in Vault12 Guard:
- Logins, passkeys, verification codes, Wi-Fi credentials.
- Choose “Export to another app” / “Move to another password app”.
- In the destination list, select “Vault12 Guard”.
- Vault12 Guard opens:
- Shows what’s being imported,
- Lets you choose Asset Name,
- Confirms and saves everything into your Vault.
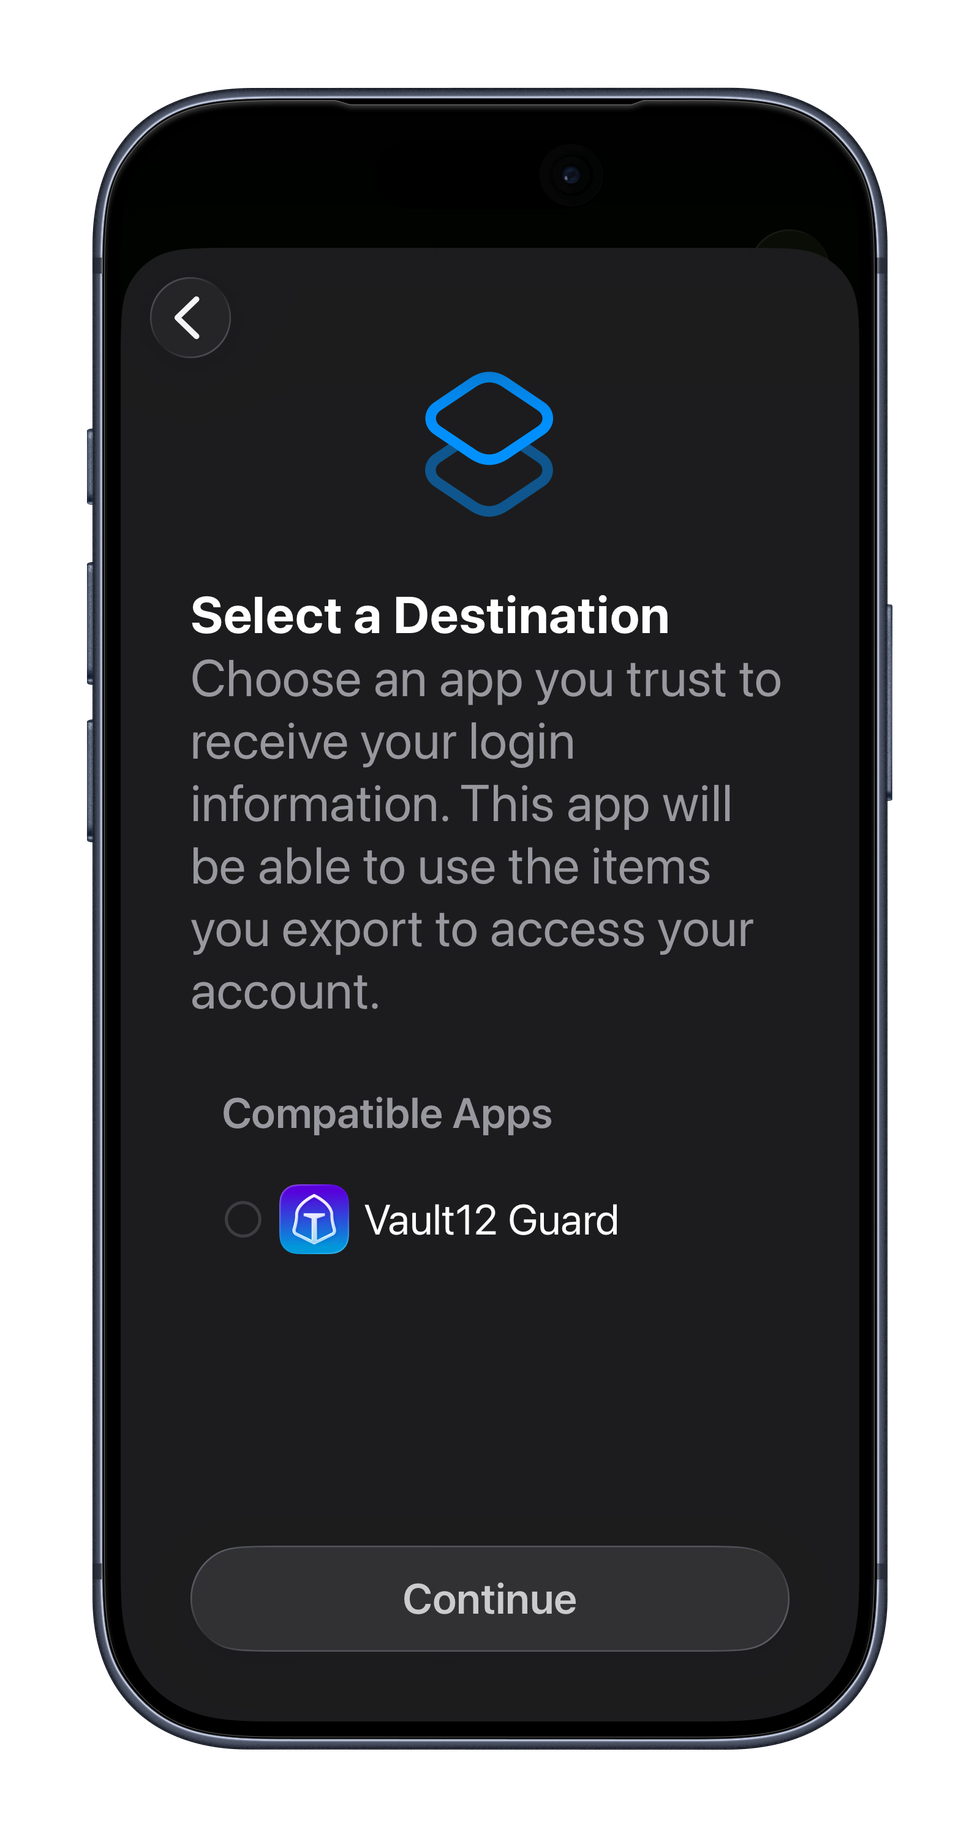
In Apple Password choose the Export option and select the credentials to export, then select the destination.
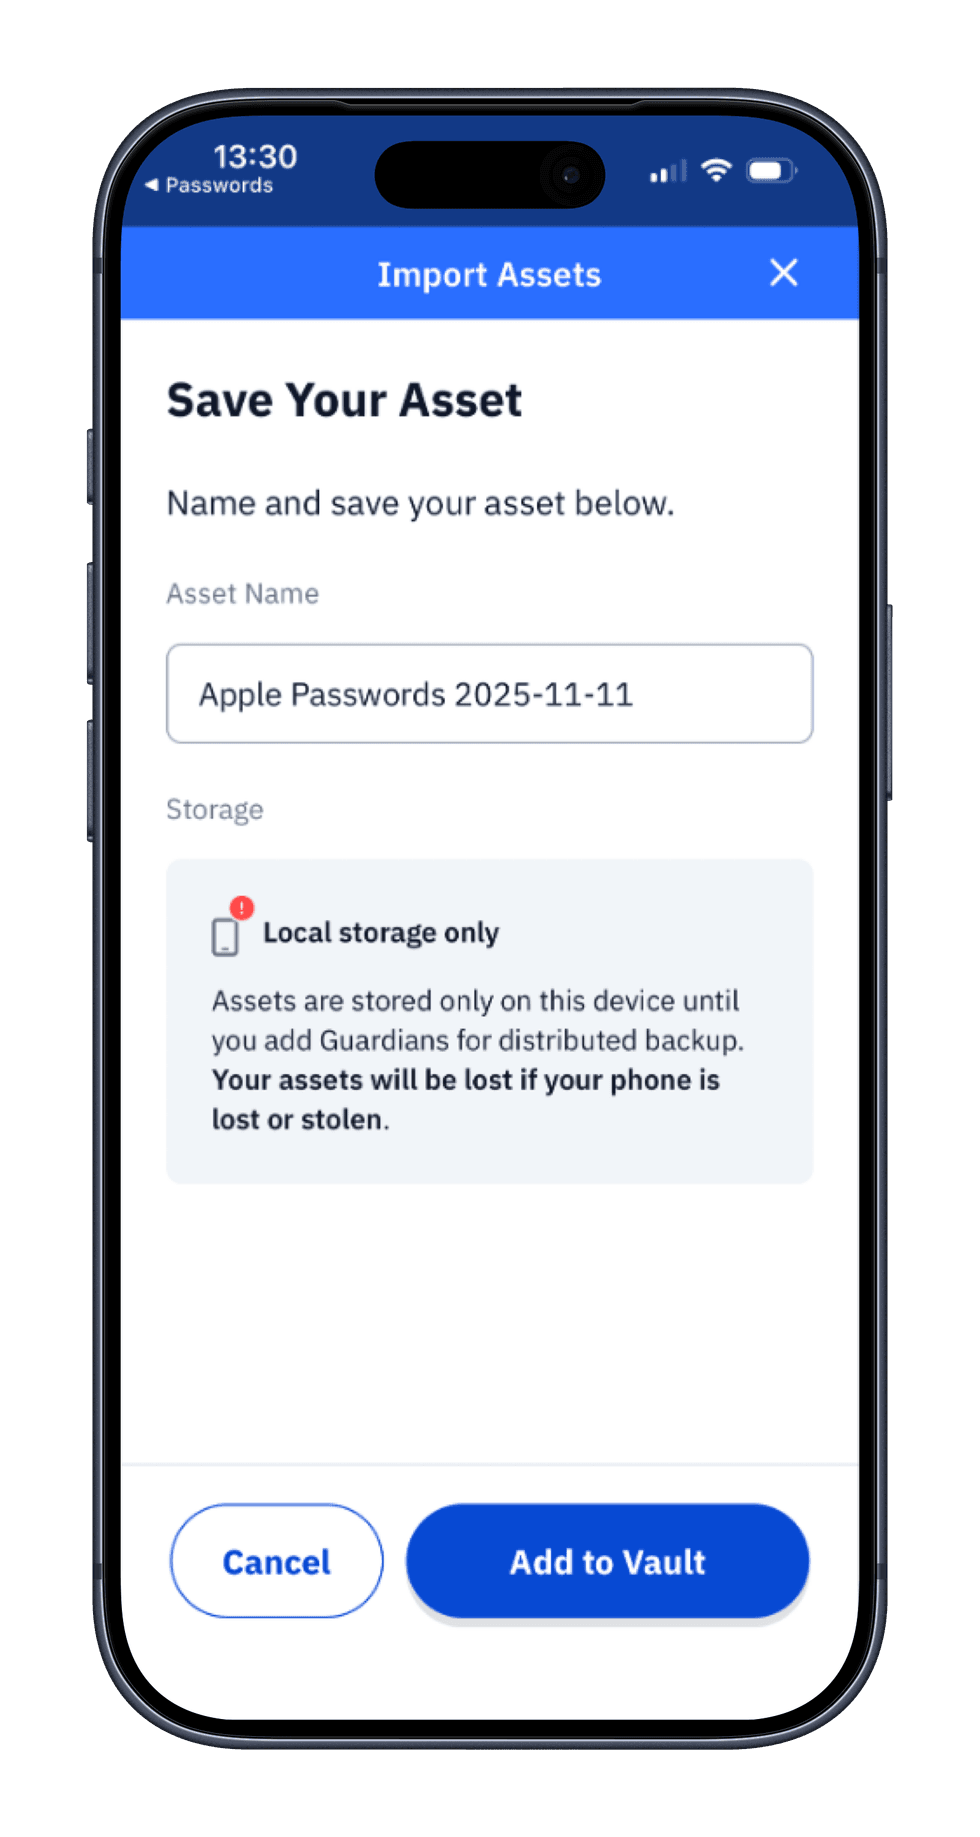
Once exported open Vault12 and name your credential file and add to your inheritance Vault.
How do I export from Vault12 Guard into another app?
When a Vault is inherited and contains an imported password file, you can export the file to compatible password managers.
Also, you can use this if you’re switching tools, rebuilding another manager, or validating portability.
On iPhone, iPad, or Mac:
- Open Vault12 Guard.
- Navigate to the relevant Asset Details screen.
- Open the context menu (⋯).
- Tap “Export Credentials to Another App”.
- Choose your target (e.g., Apple Passwords, Bitwarden, other supported managers).
- Confirm the system prompt.
The OS delivers those credentials straight into the chosen app using the same secure channel—so Vault12 Guard is both an endpoint for imports and a clean, standards-aligned source for exports.
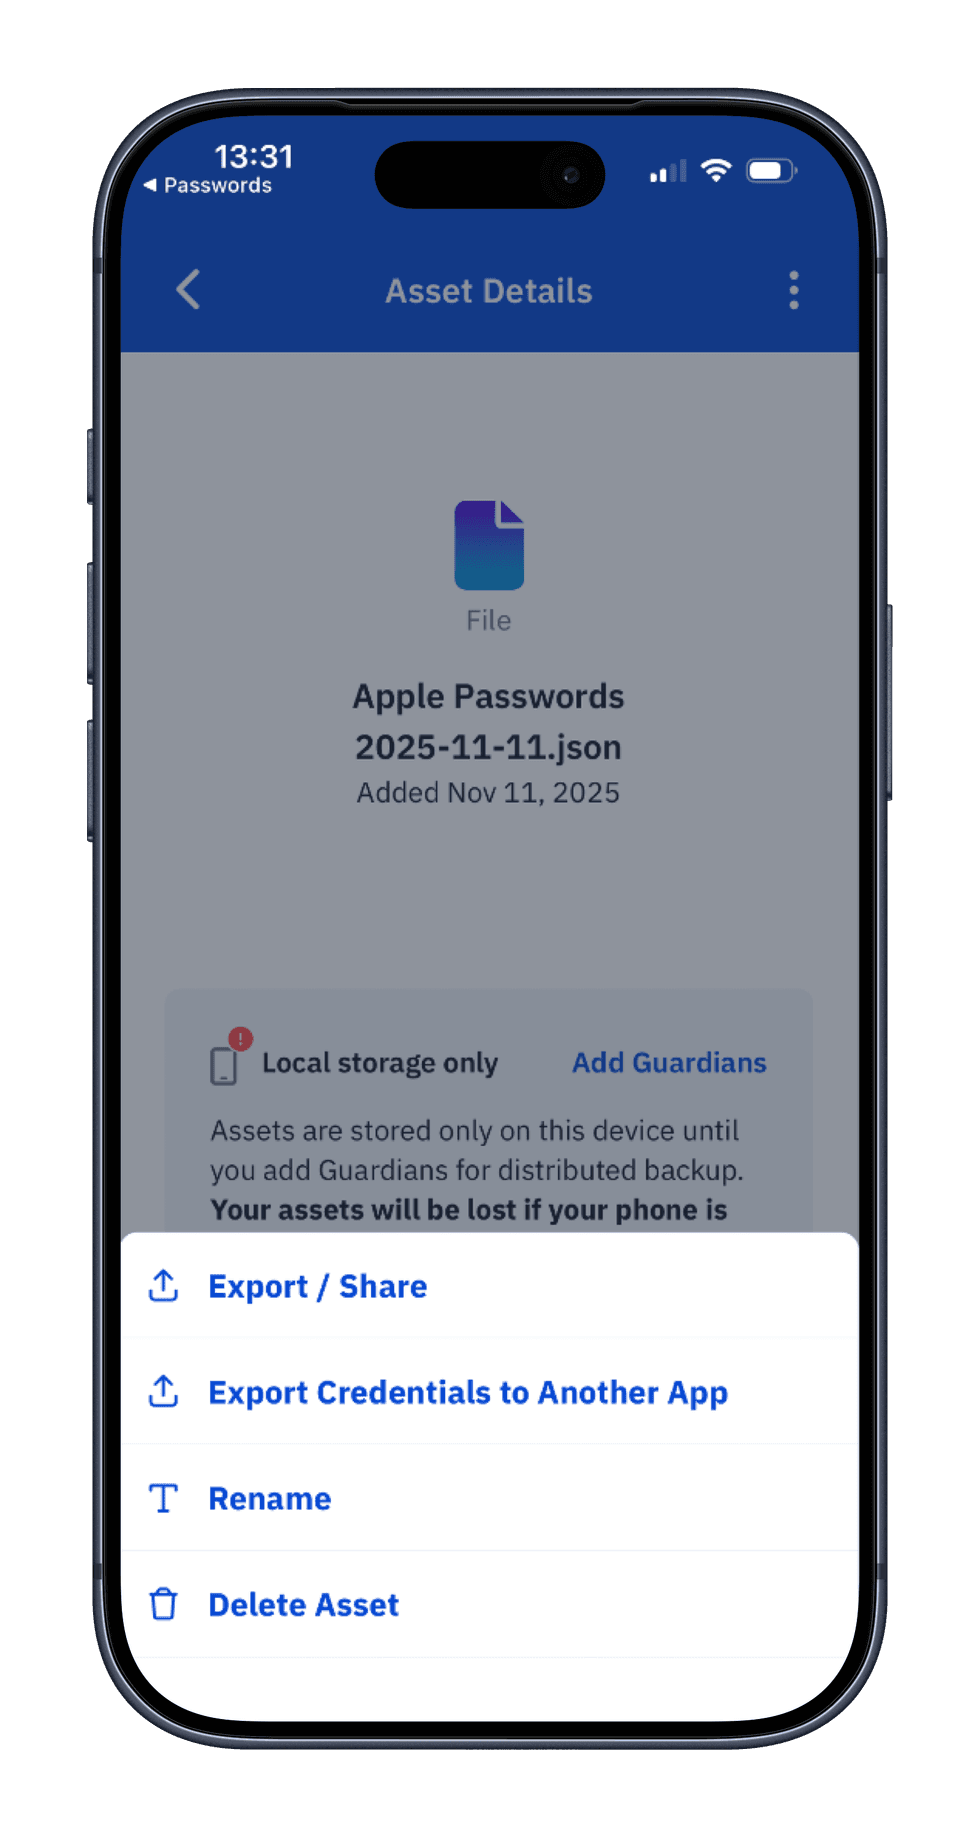
Export Passwords file
What are the best practices for transferring credentials with Vault12 Guard?
- Import only on trusted devices protected with biometrics and device passcodes.
- Keep Guardians active & up to date to avoid recovery friction later.
- Use Vault12 Guard as your neutral backup hub, not as a replacement for day-to-day autofill. Let your password manager handle sign-ins; let Vault12 Guard guarantee long-term recoverability.
- Only export to apps you trust. The system dialog makes this explicit—if you don’t recognize the app, don’t send credentials there.
1) AppleID/iCloud Password and Passkey are NOT backed up during export from Apple Password
2) Master passwords to password managers should be backed up manually

How to access your Seed Phrase or asset stored in Vault12.
There are many ways to generate and back up seed phrases, and a superb choice is to use Vault12 Guard.
If you used Vault12 Guard to back up your seed phrase, this guide describes how you can access that seed phrase by unlocking your asset.
To access a seed phrase that you have stored in your Vault, you will follow these steps:
- Confirm that your seed phrase is backed up in your Vault, and that your Guardians are active.
- In the Vault12 Guard app, request that the asset be Unlocked.
- Wait for Guardians to confirm your request.
- View the asset.
1. How to confirm your Digital Vault setup?
In order to access your seed phrase or backup code that has been stored in your Vault, first check that you have a working Vault in your Vault12 Guard app, and that your Guardians are available. In general, it is a recommended practice to do a Vault "health check" regularly.
If you don't have a Vault because you changed phones, then you can recover your entire Vault - see instructions for Vault recovery. After recovery, your Vault and its stored assets will again exist on your phone, and you can proceed with these instructions to unlock the stored seed phrase or other asset.
If you have not created a Digital Vault and assigned Guardians to protect it, please follow these instructions (since you did not have a Digital Vault, the new Vault created will be empty).
Are your Guardians active?
Once you have confirmed that your assets are stored in the Vault installed on your phone, ensure that your Vault Guardians are available. You can do this by switching to the "My Guardian" tab from the bottom navigation pane. If all of your Guardians are shown as active, you can proceed to request an Unlock.
If not enough of your Guardians are shown as active, you may want to call your inactive Guardians in advance and ask them to open the Vault12 Guard app on their phone, to refresh the encrypted connection between your apps.
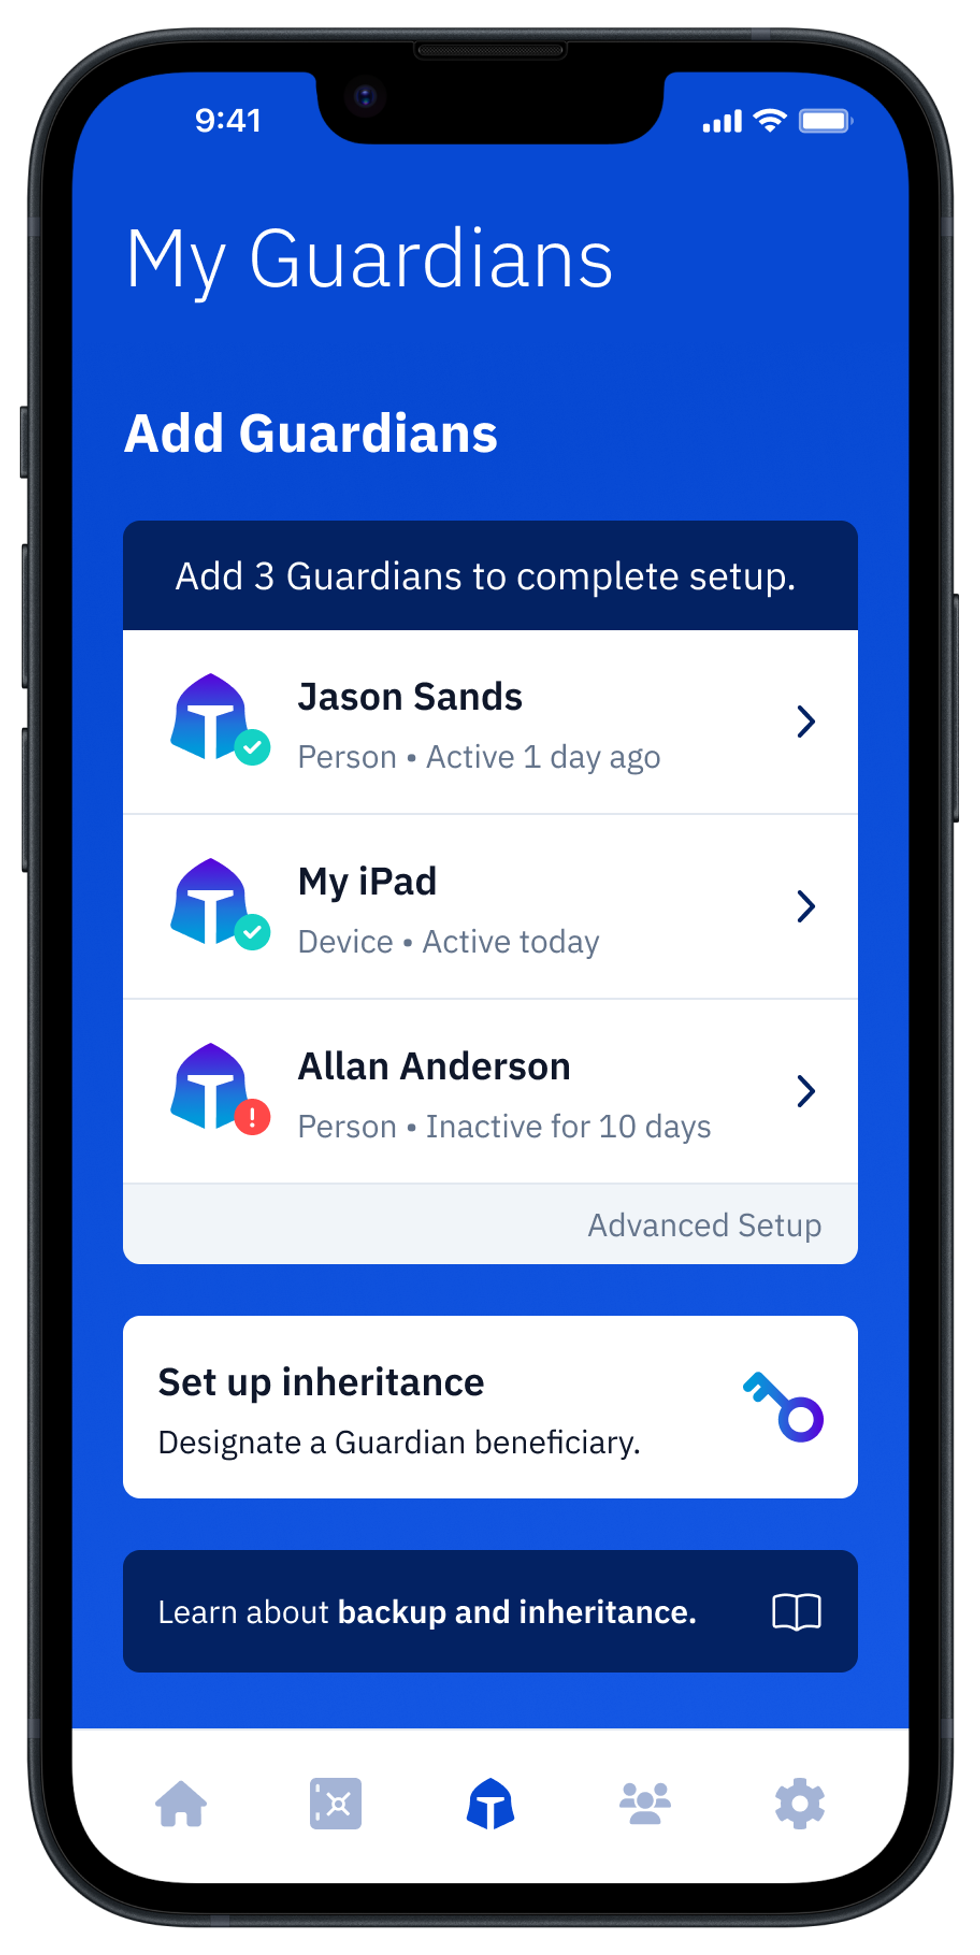
2. How to use Guard to request that your asset be Unlocked?
First, jump to the Vault section of your Guard app by using the bottom navigation pane.
On the "My Vault" screen, you will see your asset inventory, with the current state of each asset shown below its name. As you can see, there may be a variety of different states for the same asset:
- Blue icon - asset has a local copy on the device
- Grey icon - asset only saved with Guardians
- Recovering badge - the asset is requested for Unlock, and Guardians' responses are pending.
- Recovered badge - the asset was unlocked by Guardians, and a local copy is temporarily available.
- Sent to Guardians badge - the newly-created asset is in the process of backup and distribution to Guardians.

To Unlock an asset, choose the asset that you wish to unlock from the inventory list, and tap to open the Asset Details screen.
Then click on the "Recover from Guardians" button.
In the image above, there are two assets in a locked state (with grey icons). Let's unlock one of them (Metamask-wallet.txt) for illustrative purposes.
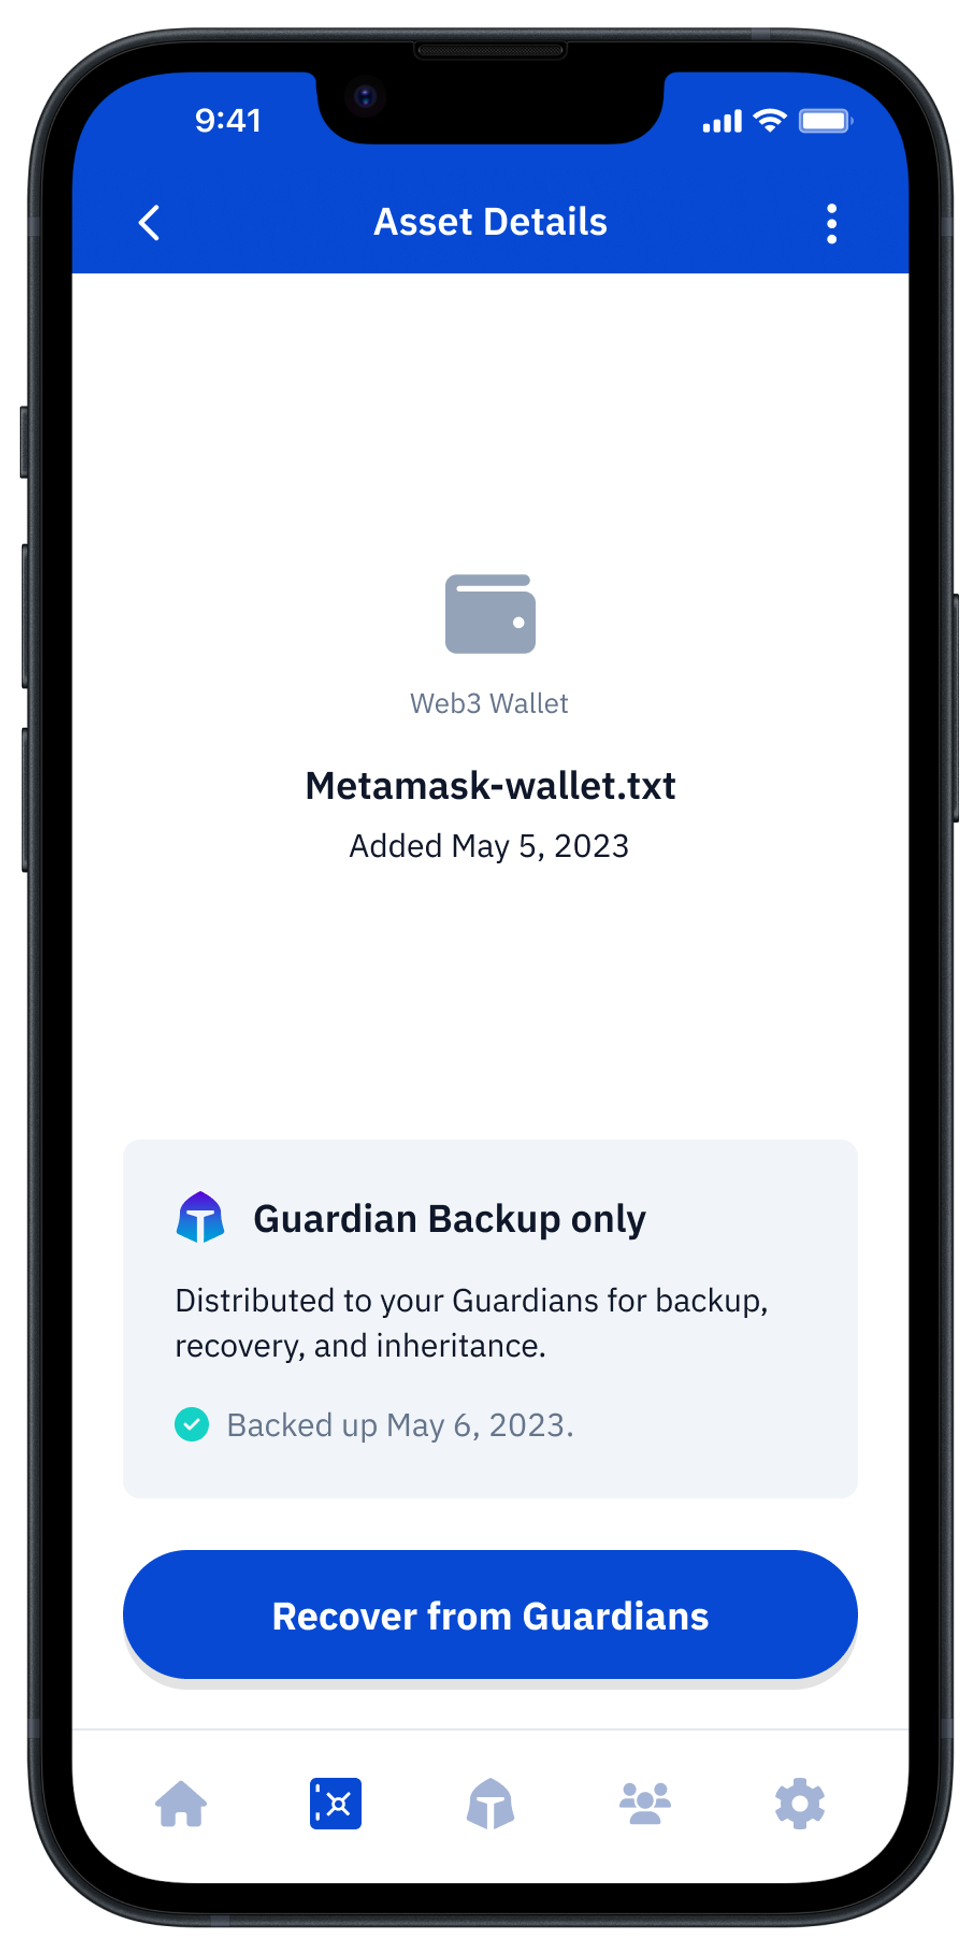
How do Guardians confirm recovery requests?
When the "Recover from Guardians" button is pressed, all of your Guardians will be notified with your Vault unlock request.
You have significant privacy even from your Guardians, since none of your Guardians can see which assets you are accessing. Your Guardians only see that you requested them to identify you, and they are asked to confirm that you made such a request.
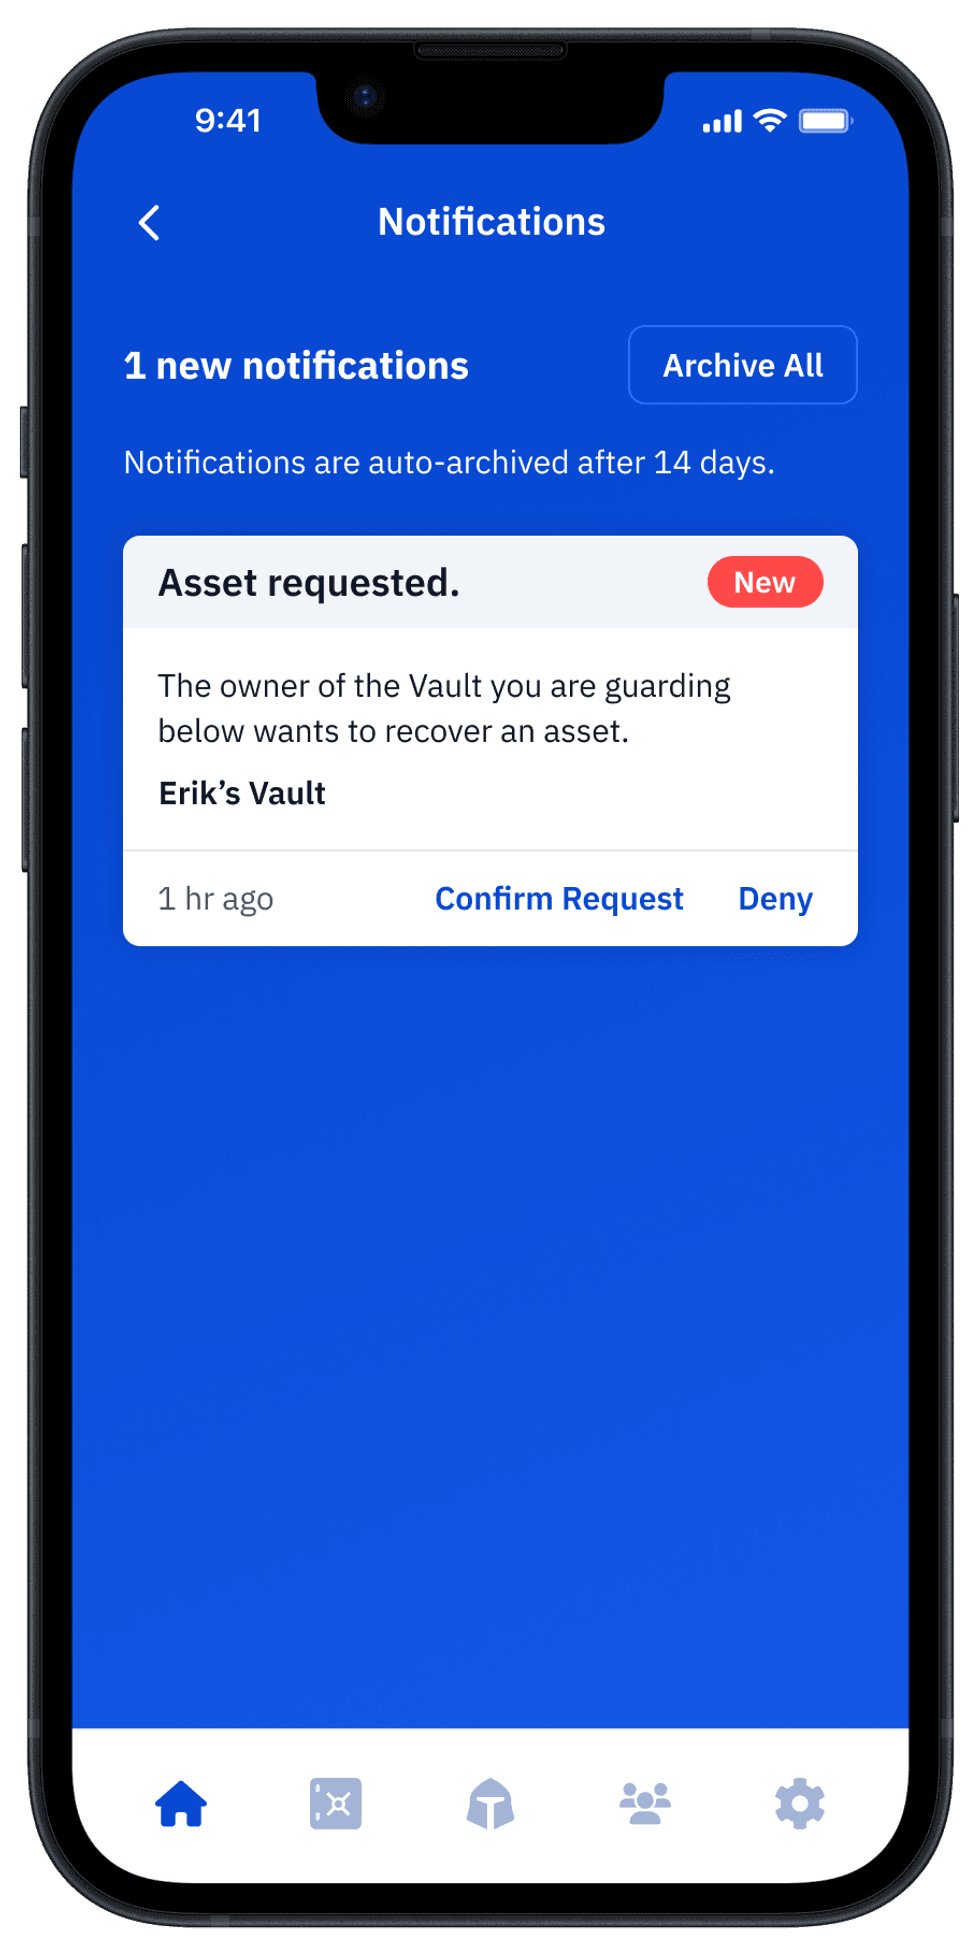
Guardian's in-app notification of your request
As the Vault owner, to see the progress of Guardians' responses, and of your overall recovery request, tap "View Status" in your Vault app.
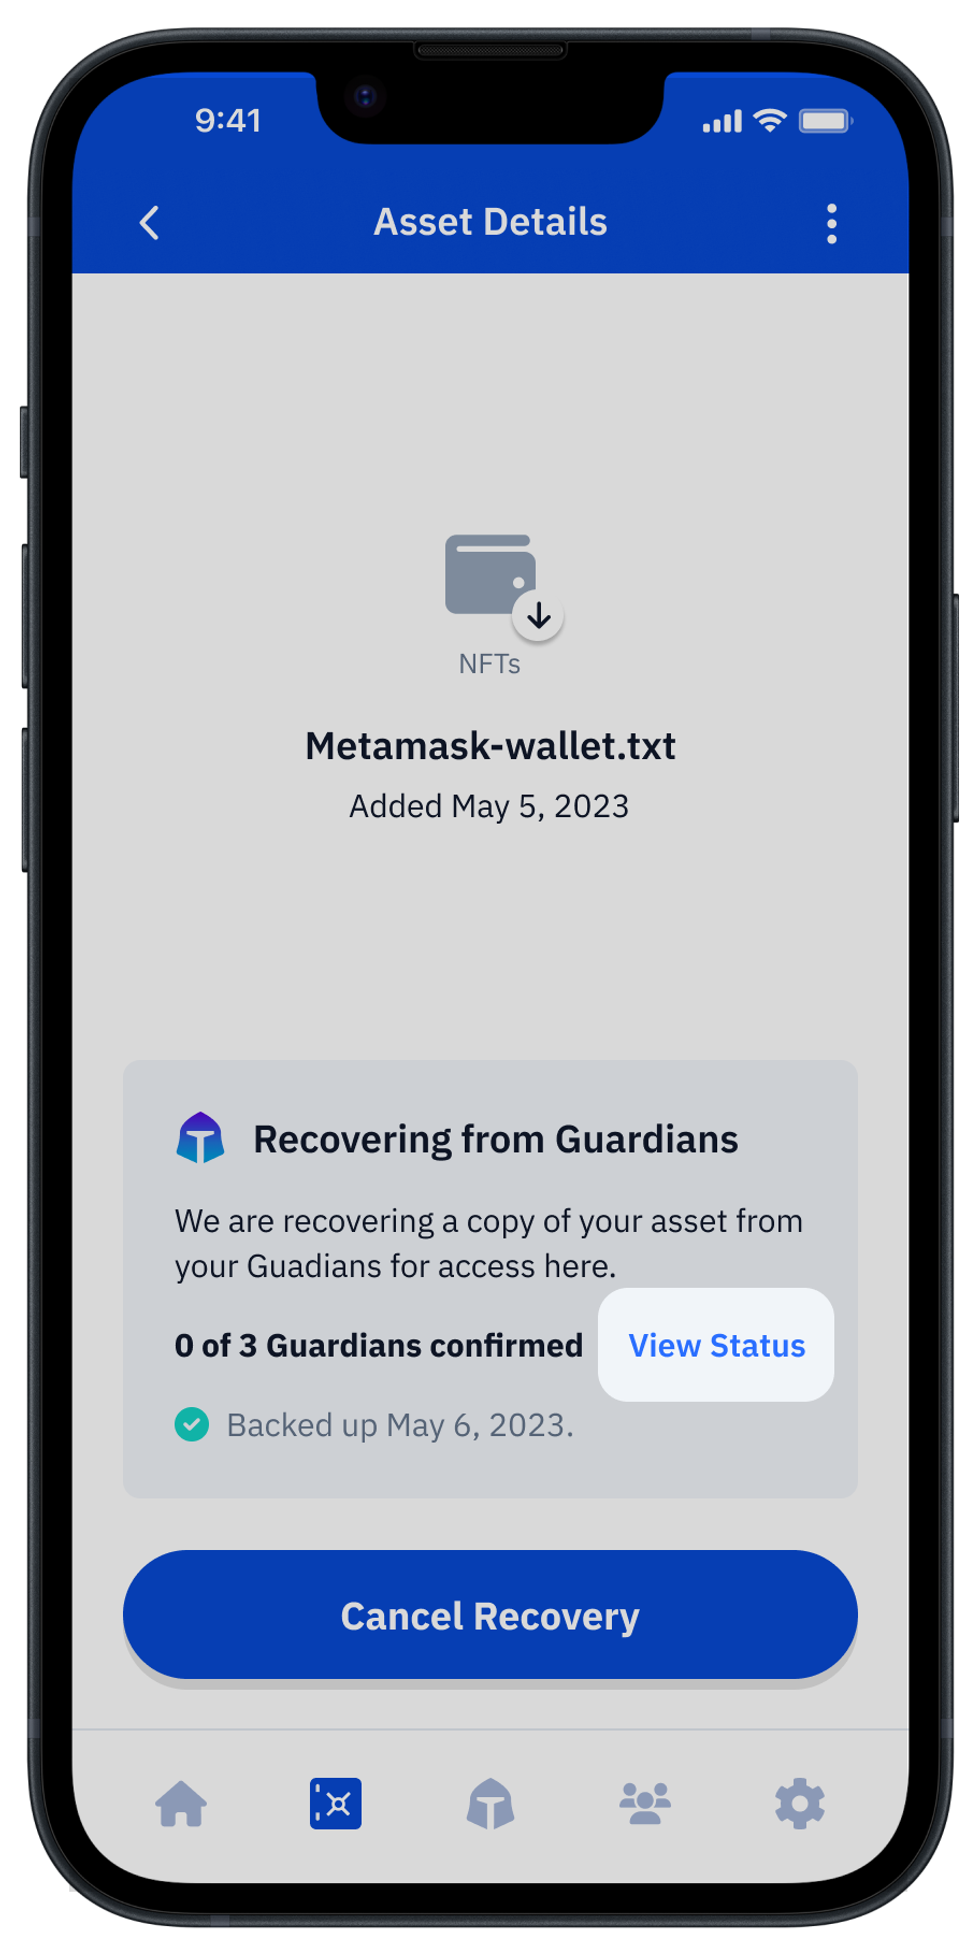
How do Guardians approve your recovery of the asset?
Here you can see all the details of the Guardians' confirmations progress and the recovery:
- The total number of Guardians requested (by default 3)
- Number of confirmations you need to receive from Guardians to recover (by default 2)
- Guardians' names, and status of their responses.

How to view the recovered seed phrase?
As soon as you have been positively identified by the required number of Guardians, and they confirmed your restore request, your asset will be recovered and available for you to view. You can then tap on "View Recovered Asset" to interact with it. Be careful not to expose your asset unintentionally to observers or cameras!
Do not hesitate to learn more about how to maintain your crypto safely and easily at SecureMyCrypto.org.
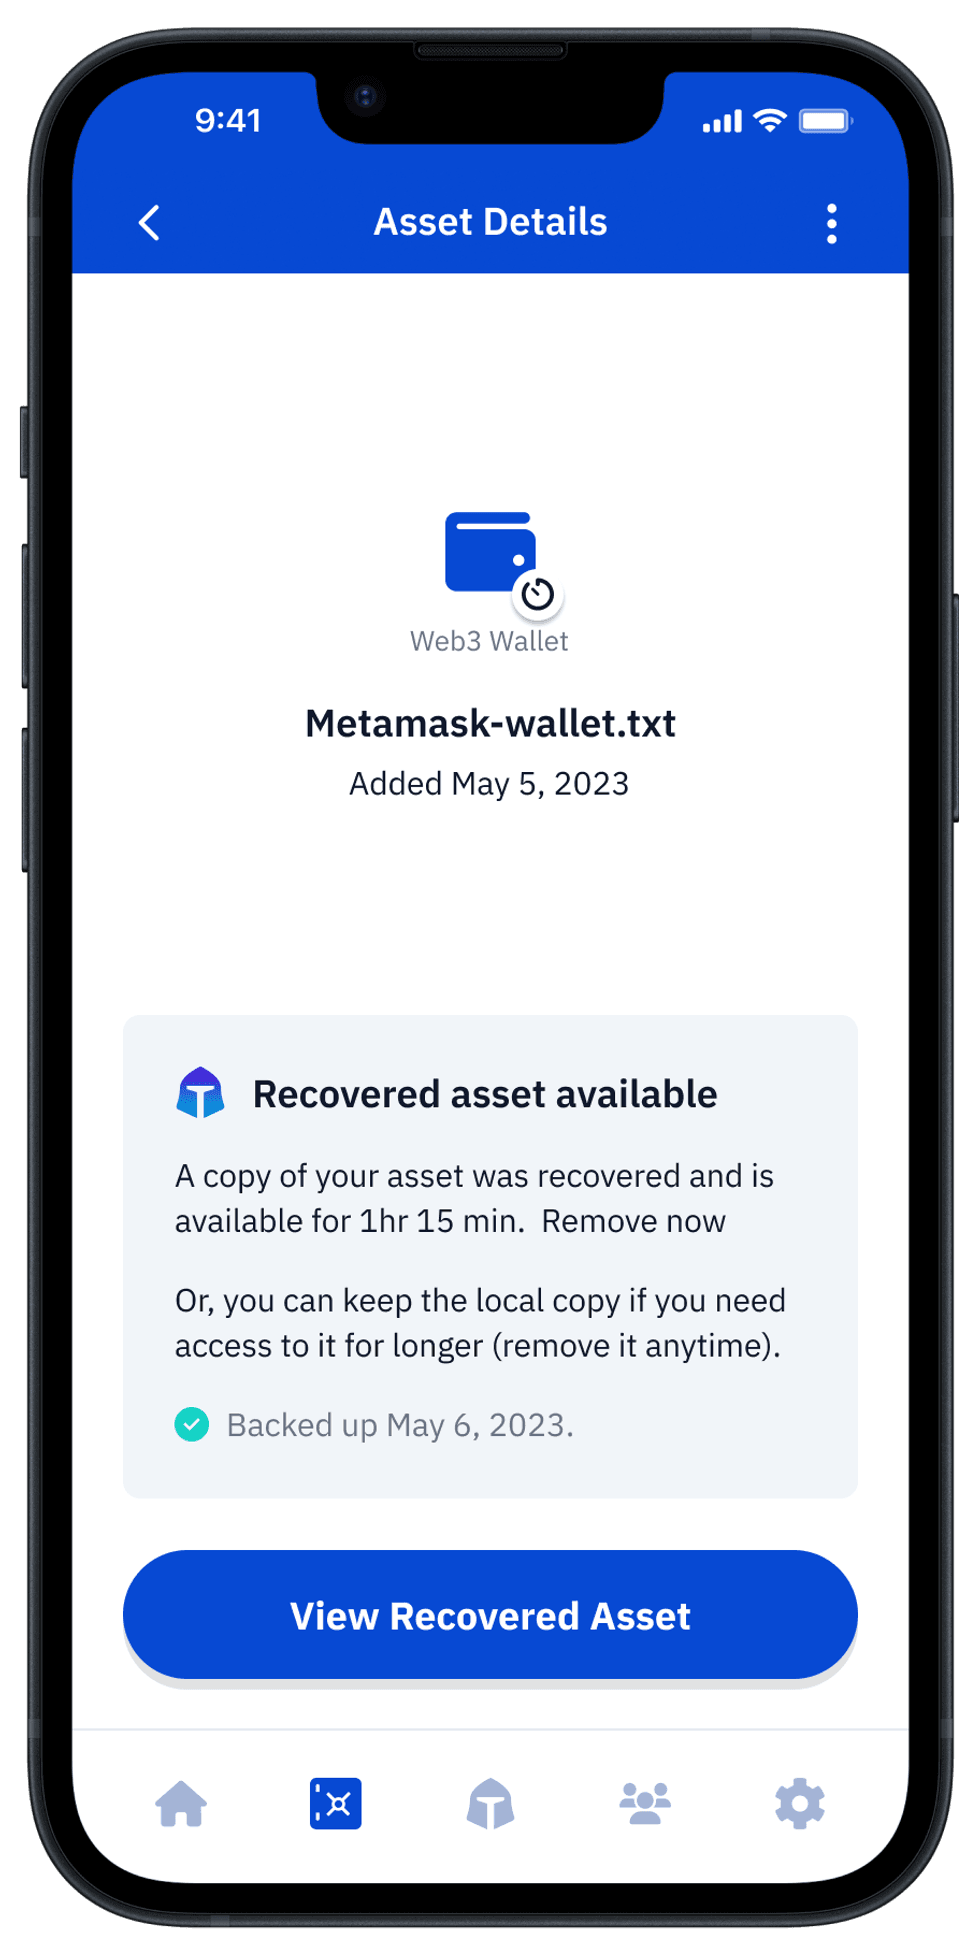

.
Wallet Guides
Articles on crypto security how to's e.g how to secure, back up, and inherit all your cryptoassets such as Bitcoin, Ethereum, crypto, private keys, seed phrases, NFTs, digital art, DAOs, and DeFi tokens. Start here to learn the basics about security risks in Web3, and where to learn more about keeping your cryptoassets secure.
View all articlesComparison of Ledger Nano X and Trezor Safe 5
When choosing the best hardware wallet for cryptocurrency security, you may wonder:
- Which is better, the Ledger Nano X or the Trezor Safe 5?
- How easy to use are these wallets?
- How do their security features compare?
- Do these wallets have vulnerabilities, and have they been hacked?
- What happens if your wallet is lost or stolen?
- How do these wallets handle Crypto Inheritance Management?
This article compares important characteristics for these two popular wallets. We’ll break down the strengths and weaknesses of each, focusing on security, ease of use, and backup methods.
Additionally, we’ll explore the fundamental topic of inheritance and backup for crypto assets — a crucial aspect of long-term planning. By the end of this comparison, you’ll clearly understand which wallet is right for you, and how to address the often-overlooked safety issue of recovering your crypto assets in case of loss.
How easy are these crypto wallets to use?
Let's compare the key aspects of both wallets side by side, and then summarize what really stands out for user convenience:
Crypto wallet user experience (UX) differences
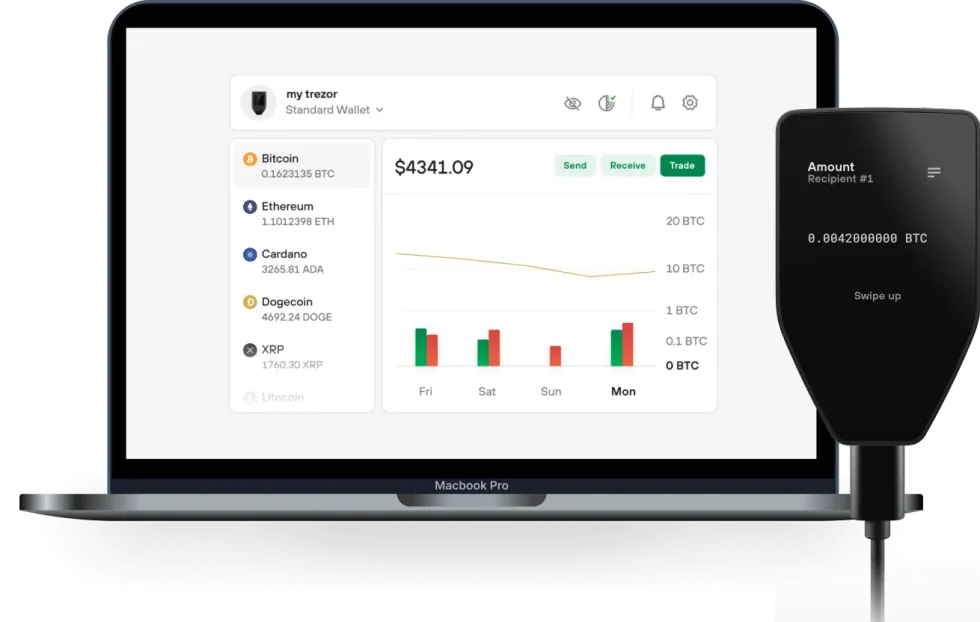 Trezor Safe 5 wallet and desktop software
Ledger Nano X Disadvantages:
- The display is literally the size of a coin: very uncomfortable to use.
- Requires two-handed operation, making it difficult to use with a phone simultaneously — contrary to some misleading ads.
- The buttons are stiff, making operations cumbersome.
Ledger Nano X Advantages:
- Offers Bluetooth connectivity — works with or without a cable, at least with smartphones.
- Wide support for third-party wallets and dapps, allowing the Ledger Nano X to sign transactions directly in MetaMask, Uniswap, and other platforms without relying on Ledger Live software. This is a huge advantage for DeFi users.
Trezor Safe 5 Disadvantages:
- No wireless connectivity: you always have to use a cable.
- iOS integration is a view-only, you can only watch balance and can't send transactions from iOS app.
Trezor Safe 5 Advantages:
- The display is convenient to work with on a regular basis, and easy to read.
- The touchscreen and input are very well-thought-out experiences on Trezor Safe 5 — you can use it without any discomfort.
Ledger Nano X with Smartphone UXHow do these wallets' security features compare?
Now, we dive deeper into the core specification of every hardware wallet: security features.
| Ledger Nano X | Trezor Safe 5 | |
| PIN-code | 4 - 8 digits | up to 50 digits |
| BIP39 Passphrase | Yes | Yes |
| Open-source | Partial | Full |
| Secure Element | Yes | Yes, and it's NDA-free |
| Multisignature | Yes | Yes |
Crypto wallet security feature differentiators
Ledger Nano X Disadvantages:
- Critical components like the Secure Element and its operating system are closed-source. This has raised concerns, especially after the controversial introduction of the Ledger Recover backup service, which challenged the assumption that the Secure Element could never transmit the recovery seed phrase outside the hardware wallet.
Ledger Nano X Advantages:
- Includes a Secure Element, giving Ledger devices a strong reputation for withstanding physical attacks. This is important for users who prefer not to complicate their security with BIP39 passphrases (prioritizing ease of use).
Trezor Safe 5 Disadvantages:
- The hardware and software are not not fully open-source, but Trezor mitigates this limitation architecturally, so that the seed phrase is not touched by closed source software. The Secure Element chip is responsible for secure boot only, and it is NDA-free: Trezor is not bound by Non-Disclosure Agreements (NDAs) that would restrict them from publicly disclosing any security flaws.
Trezor Safe 5 Advantages:
- With its new flagship product, Trezor raises the security bar by incorporating Secure Elements into their products. Further, its Secure Element chips are NDA-free.
- Allows for longer PIN codes, which might appeal to particularly cautious users.
Have there been vulnerabilities or hacks of these wallets?
There have been vulnerabilities and hacks associated with both the Ledger and Trezor products. Let's review the history of hacks for the manufacturers, which is more representative than for individual models.
Far from delivering uncompromised security, these wallets are routinely subject to malware, supply chain, and firmware vulnerabilities. Here are some recent notable incidents:
Ledger Vulnerabilities:
- The Connect Kit Attack (2023): The Connect Kit breach was discovered by the security teams of Ledger.
- Ledger User Data Breach (2020): A major data breach exposed the personal information of thousands of customers, leading to phishing attacks.
- Another User Data Breach (2021): Ledger announced on Twitter that it has been targeted by rogue Shopify team members who exported over 200 merchants’ customer databases.
- Ledger Live (2020): Users were exposed to basic double spending attacks, amplified double spending attacks, and DoS attacks without user consent.
- Potential Supply Chain Attack Vulnerability (2020): Kraken Security Labs Identifies Supply Chain Attacks Against Ledger Wallets.
Trezor Vulnerabilities:
- Ability to Physically Hack Trezor T Wallet (2023): Crypto Security Firm Unciphered Claims Ability to Physically Hack Trezor T Wallet
- Five Reported Vulnerabilities in Two Models of Trezor Hardware Wallets (2019): Ledger’s Attack Lab has found five vulnerabilities in hardware wallets of its direct competitor Trezor.
- Kraken Identifies Critical Flaw in Trezor Hardware Wallets (2020): Kraken Security Labs has devised a way to extract seeds from both cryptocurrency hardware wallets offered from industry leader Trezor, the Trezor One and Trezor Model T.
What happens if your wallet is lost or stolen?
Security is essential, but in the world of crypto, the degree to which backup and recovery solutions are foolproof for users is equally important. Here are the backup and recovery options for these two wallets:
Backup and recovery differentiators
Ledger Nano X Recover service Disadvantages:
- The optional Ledger Recover backup service is a paid service provided by three corporations that each hold parts of the user’s seed phrase in a Cloud. This introduces risks, as the seed phrase could potentially be accessed via subpoena; business partners could terminate agreements or become involved in lawsuits that result in locked data or resources (like, for example, Gemini and Genesis); and there are multiple potential points of failure.
Ledger Nano X Recover service Advantages:
- People have different preferences. If a user is comfortable trusting a bank with their assets, they might also feel confident using Ledger Recover for securing their seed phrase backup (even though Ledger is not providing the complete cloud backup solution).
Trezor Safe 5 backup Disadvantages:
- Trezor has a Multishare backup service, but it is fully manual, and challenging to maintain. The user is responsible for generating, distributing, and keeping track of the encrypted shards.
Trezor Safe 5 backup Advantages:
- Trezor does offer a Multishare backup option for those who are able and willing to set it up.
How do these wallets handle Crypto Inheritance Management?
Crypto Inheritance Features
Currently, most hardware wallets, including the Ledger Nano X and Trezor Safe 5, lack any features for establishing and managing crypto inheritance. This gap presents a challenge for users who want to be sure that their crypto assets can be transferred to their heirs.
Summary of Ledger Nano X and Trezor Safe 5 Comparison
The Ledger Nano X and Trezor Safe 5 both provide a variety of security measures, and support a broad spectrum of cryptocurrencies, making them suitable for diverse crypto portfolios.
The Ledger Nano X is more mobile-friendly, and offers a balance of security and convenience features. It offers a small display and uncomfortable input, but with the advantages of a Secure Element and wireless connectivity options like Bluetooth.
On the other hand, the Trezor Safe 5, at the same price, boasts more open-sourced and NDA-free framework, reasonably sized display with colors, and touchscreen interface for enhanced user interaction, but with reduced convenience features working only with USB connections and missing iOS integration.
The decision between the two will likely hinge on individual preferences for the target platform (mobile or desktop), and should take into account the planned frequency of use.
Whichever you choose, remember to add crypto inheritance to your choice of wallet to ensure the long-term safety of your digital assets.
Vault12 Guard: a decentralized solution for Crypto Inheritance
Vault12 is the pioneer in Crypto Inheritance Management, and delivers an easy-to-use and secure method for assigning a legacy contact to your crypto wallets. This enables you to pass on your wallet seed phrases and private keys for all types of digital assets to future generations. Vault12 Guard is designed for everyday people, yet strong enough for Crypto OGs.
Vault12 Guard has a uniquely-secure design. Utilizing advanced encryption and decentralized storage, it ensures that crypto assets are not only safe but also transferable under predefined conditions, filling a critical need unmet by most traditional hardware wallets. Vault12 Guard applies a hybrid approach of software fused with the hardware-based Secure Element of phone devices (The Secure Enclave for iOS devices, and Strongbox for Google devices). Vault12 Guard's decentralized design reduces possible points of failure. Nothing is stored on cloud servers or Vault12 servers, and no assets are stored on local devices, making them less of a target.
From a user perspective, the Vault12 Guard app asks users to appoint one or more people (or mobile devices) as Guardians. The designated Guardians are entrusted to protect the user's comprehensive collection of wallet seed phrases and private keys, which are safely stored within a decentralized digital Vault. Its simple, user-friendly workflow removes the necessity for regularly revising wallet inventories or modifying instructions for your lawyers — a process that otherwise could lead to privacy breaches.
Both the Ledger Nano X and Trezor Safe 5 are compatible with Vault12 Guard Inheritance. This addresses the seed phrase backup dilemma for any hardware wallet. It also makes less-secure backup methods, such as paper or steel plates, unnecessary.

Ledger Stax and Ledger Nano X Wallets: Which is right for you?
When choosing hardware wallets, many crypto users base their decisions on day-to-day asset management needs and perceived device security. However, savvy crypto users first consider a wallet's ability to handle long-term security scenarios. Long-term security includes expected essentials like backup and recovery tools, and also often-overlooked features related to secure and fault-proof third-party recovery. You can think of third-party recovery as your ability to allow crypto assets to be inherited by successors. Successful crypto users require a comprehensive security strategy for the full life cycle of crypto assets. This article will help you achieve that.
Let's jump into helping you understand the pros and cons of the Ledger Stax and Ledger Nano X hardware wallets for day-to-day activities, as well as their potential to safeguard the long-term security and longevity of your assets.
Overview
The Ledger Stax and Ledger Nano X both provide a wide variety of reliable security features and support a broad spectrum of cryptocurrencies, making them suitable for diverse crypto portfolios. However, several differences are clear:
Ledger Stax
- Mobile-Centric Usability: Designed with mobility in mind, the Ledger Stax features wireless connectivity options like Bluetooth and NFC, making it highly compatible with mobile platforms. Stax also has a longer battery life (up to 10 hours versus Nano X's 5).
- Premium Design: Its unconventionally large display enhances readability, though it comes with slightly slower responsiveness.
- Price Point: Positioned as a premium product, its cost reflects its advanced features and sleek design.
Ledger Nano X
- Mobile-Centric Usability: Offers Bluetooth connectivity — works with or without a cable, at least with smartphones.
- Design: A bit more compact than Stax. User input is via buttons, not touchscreen.
- Price Point: Not so overpriced.
In terms of crypto asset longevity features, such as backup, recovery, and crypto inheritance, both devices provide industry-standard and proprietary options with certain trade-offs, as well as compatibility with third-party solutions like Vault12 Guard for succession planning scenarios.
The decision between the two will likely hinge on individual preferences for the target platform (mobile or desktop), and should take into account the planned frequency of use.
Approach to comparison
When choosing the best hardware wallet for cryptocurrency security, you may wonder:
- Which is better, the Ledger Stax or the Ledger Nano X?
- How easy to use are these wallets?
- How do their security features compare?
- Do these wallets have vulnerabilities, and have they been hacked?
- What happens if your wallet is lost or stolen?
- How do these wallets accomodate user errors, and complex scenarios like inheritance of crypto assets?
This article compares important characteristics for these two popular wallets. We’ll break down the strengths and weaknesses of each, focusing on security, ease of use, and backup and recovery methods.
By the end of this comparison, you’ll clearly understand which wallet is right for you, as well as how to recover your crypto assets in case of accidents.
What happens if your wallet is lost or stolen?
Wise wallet owners recognize the critical importance of crypto recovery before they find themselves in an unexpected bind! That's why it's important to understand the fundamental topic of crypto asset longevity, including features such as backup, recovery, and inheritance for crypto assets. These considerations are central to long-term planning.
Technical security is paramount, but in the world of crypto, the degree to which backup and recovery solutions are foolproof for users is at least equally important. Here are the backup and recovery options for these two wallets:
How do these wallets handle Crypto Inheritance?
Crypto Inheritance Features
Currently, most hardware wallets, including the Ledger Stax and Ledger Nano X, lack any features for establishing and managing crypto inheritance. This gap presents a challenge for users who want to be sure that their crypto assets can be transferred to their heirs.
Backup and recovery differentiators
Ledger Stax and Ledger Nano X both have similar recovery service Disadvantages:
- The optional Ledger Recover backup service is a paid service provided by three corporations that each hold parts of the user’s seed phrase in a Cloud. This introduces risks, as the seed phrase could potentially be accessed via subpoena; or business partners could terminate agreements or become involved in lawsuits that result in locked data or resources (like, for example, Gemini and Genesis). These scenarios contain multiple potential points of failure, and should be taken into account.
- Very important detail: The terms of the optional Ledger Recover service do not mention support for inheritance, meaning any unfortunate accident related to the user will make crypto assets unrecoverable for his or her successors. Ledger itself suggests using 3rd-party crypto inheritance services for those purposes.
Ledger Stax and Ledger Nano X both have similar recovery service Advantages:
- People have different preferences. If a user is comfortable trusting a bank with their assets, they may also feel confident using Ledger Recover for securing their seed phrase backup (even though Ledger is not providing the entire cloud backup solution).
 User holding a mobile phone and using Ledger Stax as FIDO U2F security key
How easy are these crypto wallets to use?
Let's compare the key aspects of both wallets side by side, and then summarize what really stands out for user convenience:
Crypto wallet user experience differences
Ledger Nano X with Smartphone UXLedger Stax UX Disadvantages:
- The display has a noticeable response delay due to the "E Ink" touchscreen technology, and could be irritating.
- Not all apps are ported to Stax yet. Even the native Passwords app still has no release date identified as of this article's publish date, so check in advance whether your favorite network/coin is supported.
- Extremely expensive. The value in Stax is more about design, rather than practical aspects.
Ledger Stax UX Advantages:
- Huge informative display and "Clear Signing" allows you to review and confirm all transaction details directly on Ledger Stax and in a human-readable language before they are signed and sent. This enhances security and ensures that you see exactly what you are approving in a secure and tamper-proof manner.
- Offers Bluetooth connectivity as well as NFC — works with or without a cable, at least with smartphones.
- Wide support for third-party wallets and dapps, allowing the Ledger Stax to sign transactions directly in MetaMask, Uniswap, and other platforms without relying on Ledger Live software. This is a huge advantage for DeFi users.
Ledger Nano X Disadvantages:
- The display is literally the size of a coin: very uncomfortable to use.
- Requires two-handed operation, making it difficult to use with a phone simultaneously — contrary to some misleading ads.
- The buttons are stiff, making operations cumbersome.
- No NFC.
Ledger Nano X Advantages:
- A bit more compact than Stax while also offering Bluetooth connectivity — works with or without a cable, at least with smartphones.
- Wide support for third-party wallets and dapps, allowing the Ledger Nano X to sign transactions directly in MetaMask, Uniswap, and other platforms without relying on Ledger Live software. This is a huge advantage for DeFi users.
- Not so overpriced.
How do these wallets' security features compare?
Now, we dive deeper into the core specification of every hardware wallet: security features.
| Ledger Stax | Ledger Nano X | |
| PIN-code | 4 - 8 digits | 4 - 8 digits |
| BIP39 Passphrase | Yes | Yes |
| Open-source | Partial | Partial |
| Secure Element | Yes | Yes |
| Multisignature | Yes | Yes |
Crypto wallet security feature differentiators
Ledger Stax and Ledger Nano X both have similar security feature Disadvantages:
- Critical components like the Secure Element and its operating system are closed-source. This raises concerns, especially after the controversial introduction of the Ledger Recover backup service, which challenged the previous assumption that the Secure Element could never transmit the recovery seed phrase outside the hardware wallet.
Ledger Stax and Ledger Nano X both have similar security feature Advantages:
- Includes a Secure Element, giving Ledger devices a strong reputation for withstanding physical attacks. This is important for users who prefer not to complicate their security with BIP39 passphrases, prioritizing ease of use.
- Clear Signing is also a security feature.
Have there been vulnerabilities or hacks of these wallets?
There have been some vulnerabilities and hacks associated with Ledger products in the past — let's consider their "hack history." While relatively secure, most crypto wallets — even hardware wallets — can not provide perfect security, and are routinely subject to malware, supply chain, and firmware vulnerabilities. Here are some recent notable incidents:Ledger Vulnerabilities:
- The Connect Kit Attack (2023): The Connect Kit breach was discovered by the security teams of Ledger.
- Ledger User Data Breach (2020): A major data breach exposed the personal information of thousands of customers, leading to phishing attacks.
- Another User Data Breach (2021): Ledger announced on Twitter that it has been targeted by rogue Shopify team members who exported over 200 merchants’ customer databases.
- Ledger Live (2020): Users were exposed to basic double spending attacks, amplified double spending attacks, and DoS attacks without user consent.
- Potential Supply Chain Attack Vulnerability (2020): Kraken Security Labs Identifies Supply Chain Attacks Against Ledger Wallets.
No software is perfect, and no wallet is ideal. However, some designs have been compromised more than others.
Summary of Ledger Stax and Ledger Nano X Comparison
The Ledger Stax and Ledger Nano X both provide a respectable set of security measures, and support a broad spectrum of cryptocurrencies, making them suitable for diverse crypto portfolios.
The Ledger Stax is more mobile-friendly, and offers a balance of security and convenience features at a very premium price. It offers an unconventionally large display with delayed response, with the advantage of wireless connectivity options like Bluetooth.
On the other hand, the Ledger Nano X, at a lower price point, is still mobile-friendly and offers a balance of security and convenience features. It offers a small display and uncomfortable input, but still has the advantages of a Secure Element and wireless connectivity options like Bluetooth.
The decision between the two will likely hinge on individual preferences for the target user interface with screen, and should take into account the planned frequency of use.
Whichever you choose, remember to add crypto inheritance to your choice of wallet to ensure the long-term safety of your digital assets. Both the Ledger Stax and Ledger Nano X are compatible with Vault12 Guard Inheritance planning.Vault12 Guard: a decentralized solution for Crypto Inheritance
Vault12 is the pioneer in Crypto Inheritance Management, and delivers an easy-to-use and secure method for assigning a legacy contact to your crypto wallets. This enables you to pass on your wallet seed phrases and private keys for all types of digital assets to future generations. Vault12 Guard is designed for everyday people, yet strong enough for Crypto OGs.
Vault12 Guard has a uniquely-secure design. Utilizing advanced encryption and decentralized storage, it ensures that crypto assets are not only safe but also transferable under predefined conditions, filling a critical need unmet by most traditional hardware wallets. Vault12 Guard applies a hybrid approach of software fused with the hardware-based Secure Element of phone devices (The Secure Enclave for iOS devices, and Strongbox for Google devices). Vault12 Guard's decentralized design reduces possible points of failure. Nothing is stored on cloud servers or Vault12 servers, and no assets are stored on local devices, making them less of a target.
From a user perspective, the Vault12 Guard app asks users to appoint one or more people (or mobile devices) as Guardians. The designated Guardians are entrusted to protect the user's comprehensive collection of wallet seed phrases and private keys, which are safely stored within a decentralized digital Vault. Its simple, user-friendly workflow removes the necessity for regularly revising wallet inventories or modifying instructions for your lawyers — a process that otherwise could lead to privacy breaches.
Both the Ledger Stax and Ledger Nano X are compatible with Vault12 Guard Inheritance. This addresses the seed phrase backup dilemma for any hardware wallet. It also makes less-secure backup methods, such as paper or steel plates, unnecessary.
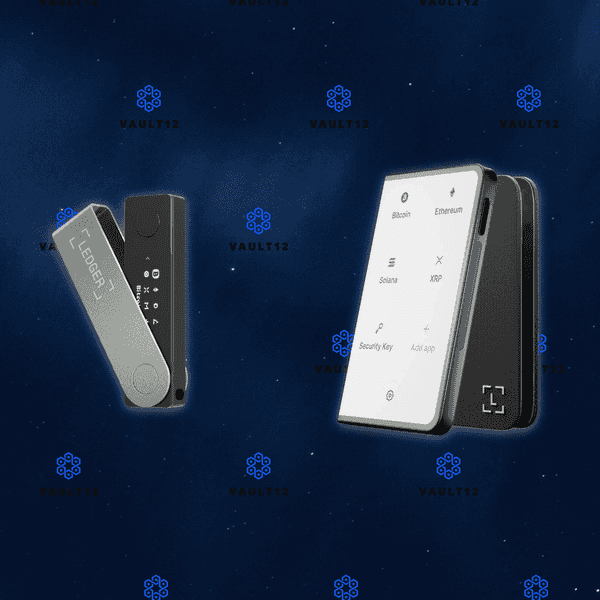
MetaMask browser extension
Step 1. What is MetaMask?
MetaMask consists of two main parts: a wallet and a web browser. The wallet supports any token compatible with Ethereum, and the web browser is preconfigured for interacting with dapps and smart-contracts.
MetaMask was first released in 2016, as a browser-extension, by ConsenSys - the first company focused on building decentralized tools and infrastructure. Both MetaMask and ConsenSys have played monumental roles in bringing Ethereum to the mainstream.
It is hard to overstate the effect MetaMask has had on the Ethereum ecosystem. By making dapps and smart-contracts simple and intuitive to use, activity on the Ethereum blockchain has enjoyed consistent growth.
Metamask is an open-source wallet, active development happens on github. The wallet has tons of features, and is constantly being updated and improved.
MetaMask is available as a browser-extension for Chrome, Firefox, Brave, and Edge. In September of 2020, MetaMask released a mobile app for iOS and Android.
Step 2. How can you download MetaMask?
MetaMask is installed as a browser-extension. The process of installing MetaMask involves going to the extension/add-on store for your browser and downloading MetaMask.
- The first step is crucial. Navigate to the official MetaMask website. The only valid URL for metamask is https://metamask.io
- Verify the closed lock to the left of the URL. This signifies you are connected through SSL - an encrypted connection. SSL encrypts data in transit and prevents attacks like phishing, and man-in-the-middle attacks.
- If you do not see the closed lock, exit the page immediately.
How can you prevent phishing attacks when you download MetaMask?
- MetaMask is a target for phishing attacks. Phishing is a way of stealing your credentials, by tricking you into downloading a malicious version of the app you want to download. A common tactic for phishers is to purchase domain names of common misspellings - hoping you make a mistake typing the URL.
- Advanced phishers will install an SSL certificate on their phishing site. For extra verification, click on the closed lock, then click on `Certificate` to bring up the certificate details. Verify that the certificate was issued to https://metamask.io - the only valid URL for MetaMask.
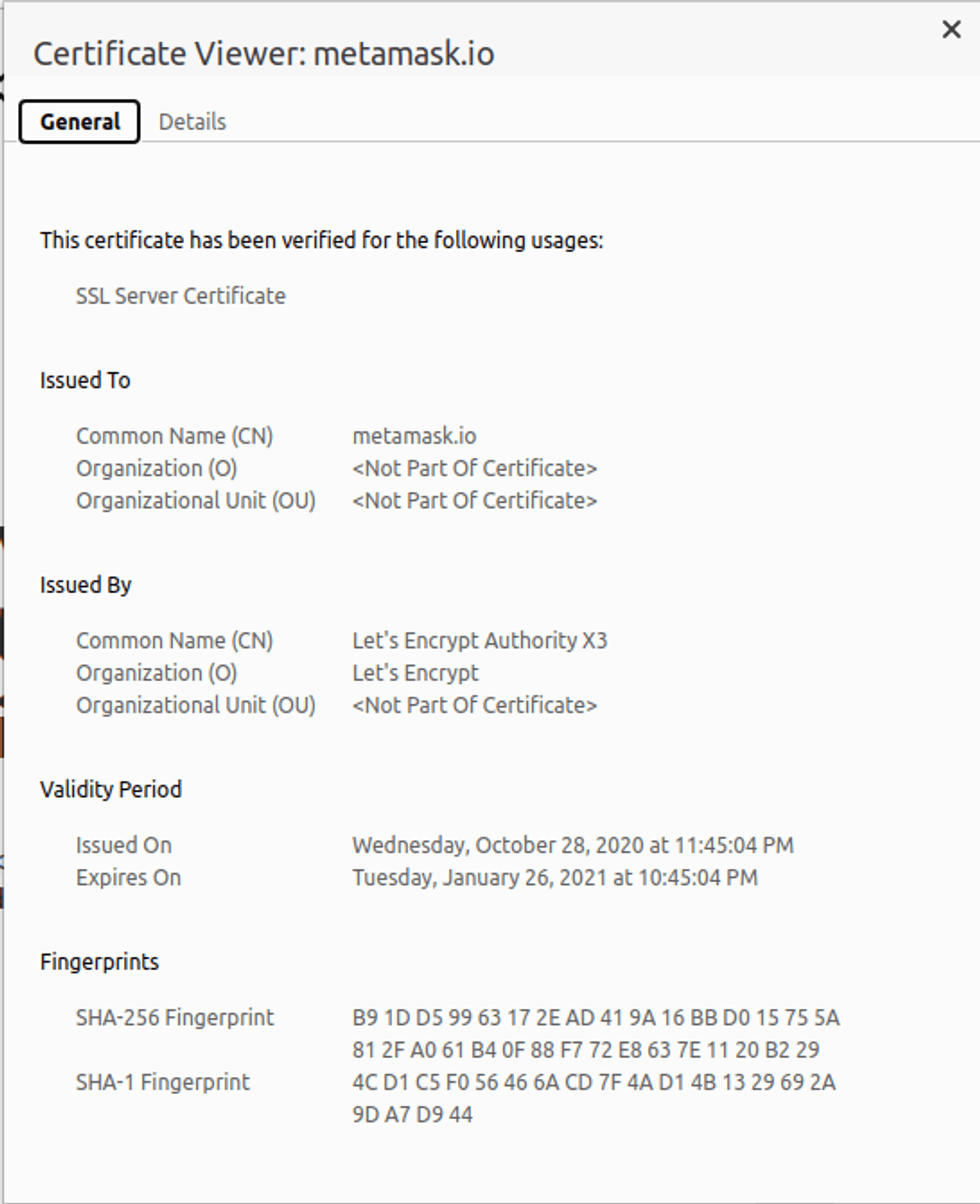
How do you go from the MetaMask download page to your browser's extension store?
After you have verified you are on the correct URL - https://metamask.io - click on `Download` in the upper right corner, or `Download Now` in the main section.
- The MetaMask download page contains the official links to download MetaMask from your web browser's extension store. By following or verifying the links from the official MetaMask site, we can prevent phishing.
- On the MetaMask download page, click on your Web Browser's icon to go to the browsers extension store
Which browser extension or Add-On stores can you use to install MetaMask?
- Chrome Web Store - https://chrome.google.com/webstore/detail/metamask/nkbihfbeogaeaoehlefnkodbefgpgknn?hl=en
- Firefox Browser Add-Ons - https://addons.mozilla.org/en-US/firefox/addon/ether-metamask/
- Microsoft Edge Add-Ons - https://microsoftedge.microsoft.com/addons/detail/metamask/ejbalbakoplchlghecdalmeeeajnimhm?hl=en-US
- Brave Browser (Brave Browser is a Chromium-based browser, it sources add-ons from the Chrome Web Store.) - https://chrome.google.com/webstore/detail/metamask/nkbihfbeogaeaoehlefnkodbefgpgknn?hl=en
Follow the official link from MetaMask to your browser's web store, then click `Add to browser`.

Before installing, you will get a pop-up letting you know MetaMask can access and alter data on any website you visit. Let's go over the details
Why does MetaMask need access to your browser's data?
- Since MetaMask works by connecting your web-browser to an application running on the blockchain, MetaMask needs these permissions to form the connection and establish the flow of data between the blockchain and your web browser.
- To maximize security, consider running MetaMask in a browser profile that only consists of MetaMask. This creates a separation between regular browsing activities and MetaMask activities.
- Click on `Add Extension` and MetaMask will finish installing and open a new tab with a welcome screen. Congrats! You just installed MetaMask browser-extension
Good job on safely installing MetaMask. By verifying the authenticity of the MetaMask download, like this guide shows, a whole range of attacks can be prevented. When doing anything in the world of crypto, having a security mindset is so important. Having a security mindset is the best way to prevent loss of funds or a breach of personal information.
Trust, but verify - This means even if a source is trusted, such as an official website or a trusted community member, you should always take the additional steps to verify the information - no matter what.
You are now ready to move on to the next section. Click on `Get Started` on the welcome screen.
Step 3. How can you create and setup a MetaMask wallet?
MetaMask is a very easy wallet to get started with. No email address or personal identification is required. The process consists of two main steps - creating a password and backing up your seed phrase. You will be ready to explore the world of Ethereum in just a few minutes.
MetaMask supports any token built on the Ethereum blockchain. You might come across terms such as ERC-20 and ERC-721; these are just types of tokens.
ERC-20 tokens are fungible; meaning they are like money - each token represents the same value.
ERC-721 are NFT's, non-fungible tokens - where each token represents a unique digital asset - like a collectible.
On the Ethereum Blockchain, there are a couple hundred thousand tokens in existence. MetaMask includes most of the popular tokens by default.
To add a token, simply tap `Add Token` and search for the token. If your token is not listed, select `Add Custom Token` and input the contract address - MetaMask will then pull the info automatically.
Safely backing up your MetaMask wallet is essential. This guide covers in detail how to securely back up your seed phrase in Section 5. Securely back up your seed phrase.
MetaMask uses BIP39 to generate a seed phrase for your wallet. Your seed phrase will cover every token, address, and transaction generated by your wallet. Think of it as your backup master key. Backing up your seed phrase ensures you will always have access to your funds.
When creating a new MetaMask Wallet, the default method is to create your wallet within the app. The more advanced method is to generate your own seed phrase. We created detailed guides on generating your own seed phrase. By following the right directions, you can generate a seed phrase that is more secure than the default method used by wallets.
If you already have a recovery phrase, proceed to Section 6. Initialize or import seed phrase.
Create a New Wallet in MetaMask
In this section, you are going to create a new wallet in the MetaMask browser extension using the wallet's default method. Let's get started.
To create a new wallet with a new recovery phrase in MetaMask:
- Open the MetaMask extension and tap on `Get Started`. This will bring you to the `Wallet Setup` screen
- On the `Wallet Setup` screen you will be presented with 3 options:
- `Import using seed phrase`
- `Create a new wallet` ← This is the one you want to select

Help us improve MetaMask? Before setting up your wallet, MetaMask wants to know if you want to help contribute to MetaMask development by contributing anonymous data. This is a personal decision for you to make based on your own value system. The data MetaMask wants to collect is anonymous clicks and pageviews.

- The first step is to create your password
- Create a secure password! MetaMask does not have 2FA, so creating a secure password is very important
- Make your password unique, do not reuse an old password
- Consider using a passphrase instead, a sequence of 4 or more random words
- Consider using a password generator and manager, like Bitwarden
- Setup a time frame to rotate to a new password
- Learn how to make secure passwords
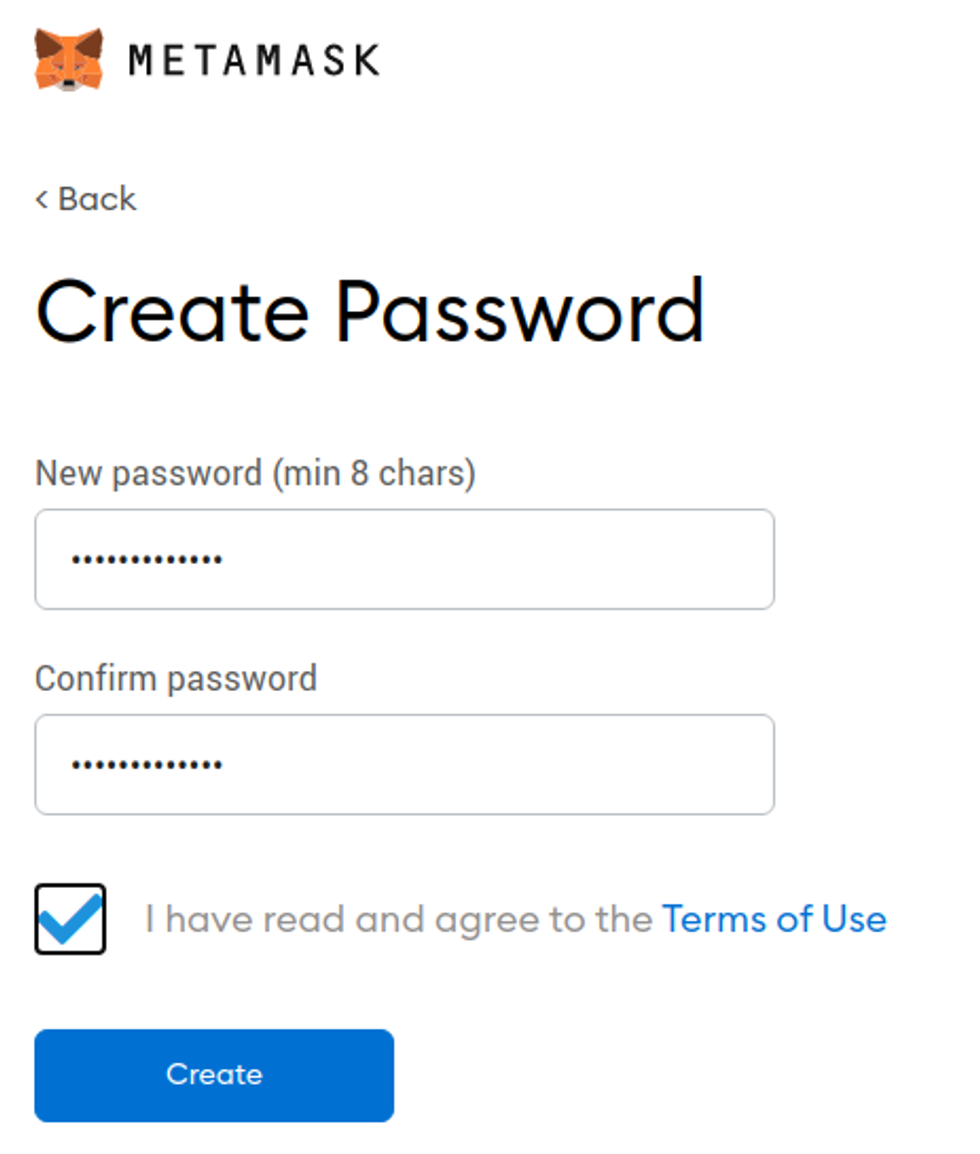
- Prepare your Seed Phrase for Backup - Backing up your seed phrase is the most important step in creating a wallet. In this step, you will find your seed phrase and prepare it to be backed up. Section 5. Securely back up seed phrase of this guide focuses on how to safely backup your seed phrase.
- MetaMask will first show you your secret backup phrase, called your `Seed Phrase`, grayed out. Click in the box to reveal your seed phrase.
- There are a few options for backing up your seed phrase mentioned here, only one suggested option is secure enough - backing the seed phrase up on an encrypted medium.
- Remind me later ← Never Select this option.
- MetaMask encrypts data on the client-side, this means your seed phrase is the only method of recovering funds.
- Temporarily write your seed phrase on paper ← Only acceptable with additional safety measures
- Please read Section 5. Securely back up seed phrase, multiple additional steps need to be taken to ensure the safety of funds.
- Store seed phrase in password manager ← Never select this option.
- Your seed phrase should be nowhere near the internet.
- Store seed phrase on encrypted medium← The only good option listed
- There are a few different ways you can safely back up your seed phrase. We have done the research and compiled all the ways to do so in Section B of this guide
- To move on to the next step, you will have to write down your 12-word seed phrase. Click in the gray box to reveal your 12-word seed phrase.
Step 4. How can you verify your recovery phrase?
At this point, you will have a fully functioning cryptocurrency wallet that is able to store, send, and receive cryptocurrency. Before you put funds in your wallet, you need to verify and create a backup of your recovery phrase. Your recovery phrase is the only way to restore access to your funds if you lose access to your wallet - backing up your recovery phrase is a very important step. Before moving on to Section B, you need to find out what your recovery phrase is, so you can back it up.
WARNING: When you follow the steps to find your recovery phrase, you will be writing the recovery phrase on a piece of paper. It is very important that you back up the recovery phrase on a more reliable medium, and then destroy that piece of paper. Paper is vulnerable to accidental loss, theft, and damage. It is not the safest method of backing up your recovery phrase.
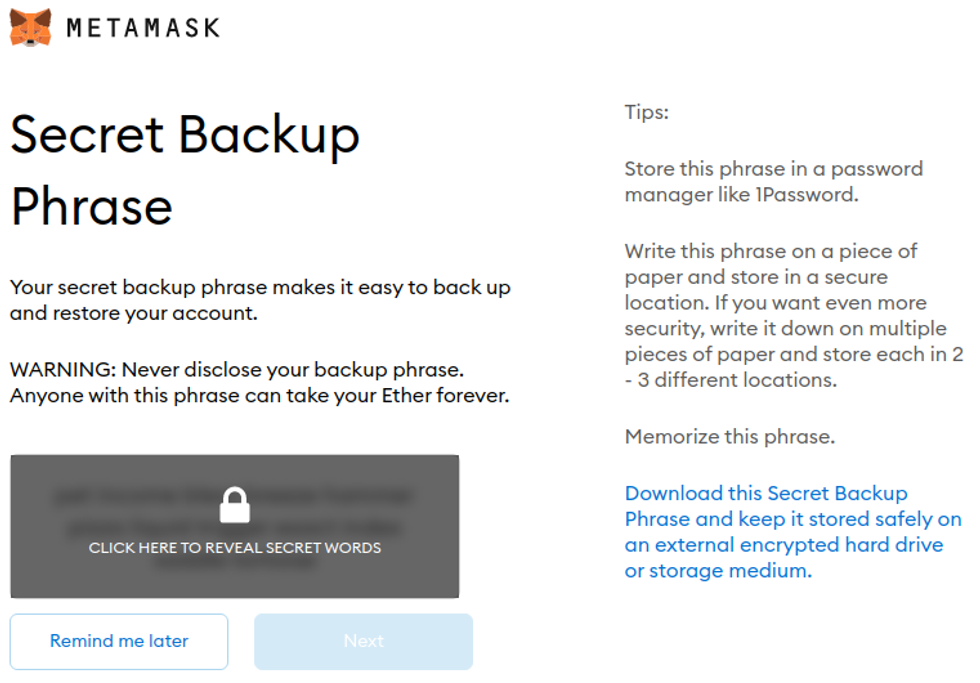
- Now you need to confirm you accurately prepared your Seed Phrase for backup. MetaMask will display your 12 words in a random order. Starting with the first word, click on each word in the correct order.
- MetaMask encrypts data on the client-side. This means all data is encrypted locally in your web-browser before being transmitted over the internet. If you lose access to your account, MetaMask cannot help you recover your account
- Pay attention to the piece of paper you have written your seed phrase on. Do not leave this paper anywhere where someone else can find it. It is advisable to destroy the paper after you have backed up your seed phrase.
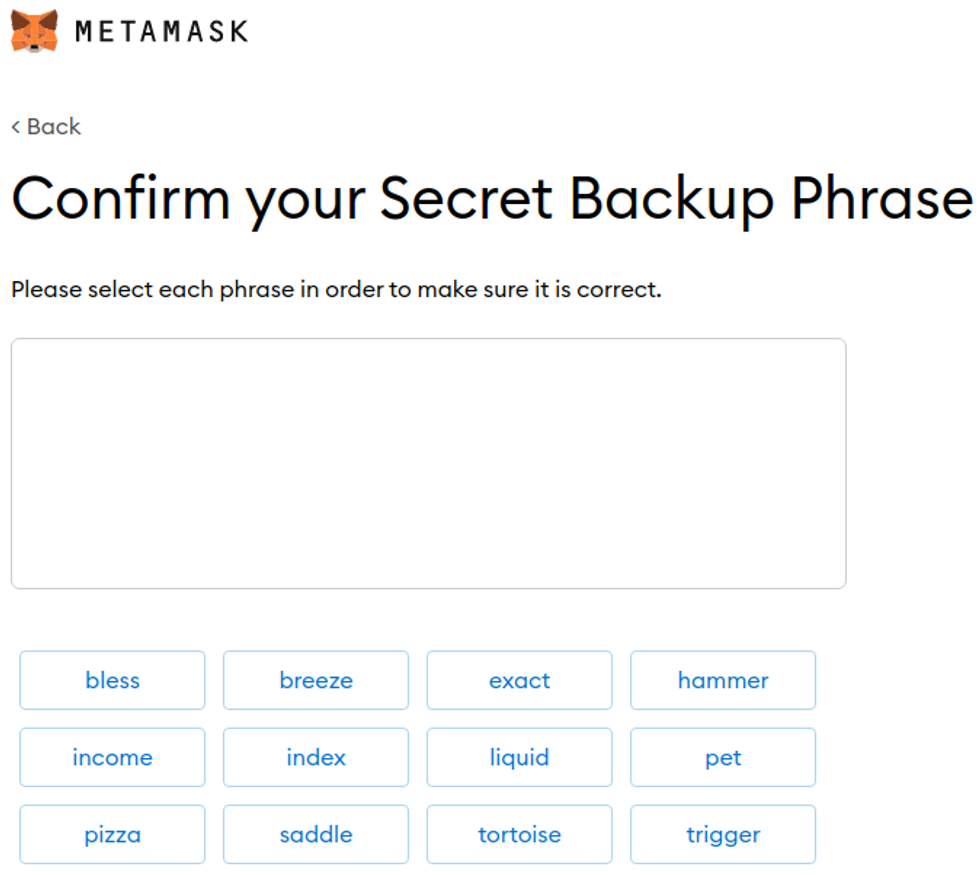
- Congratulations! Your wallet has been created and is ready to be used. You have also prepared your seed phrase for backup. Read over the advice given on the Congratulations screen and click `All Done` when you are ready.
- Get ready to explore the world of Ethereum. Your MetaMask wallet can store, send, and receive any token on the Ethereum blockchain. MetaMask is more than just a wallet - it's your portal to interact with apps and smart-contracts built on Ethereum.
- Before you put funds in your wallet, you need to create a safe backup of your seed phrase. Your seed phrase is the only way to restore access to your funds if you lose access to your wallet.
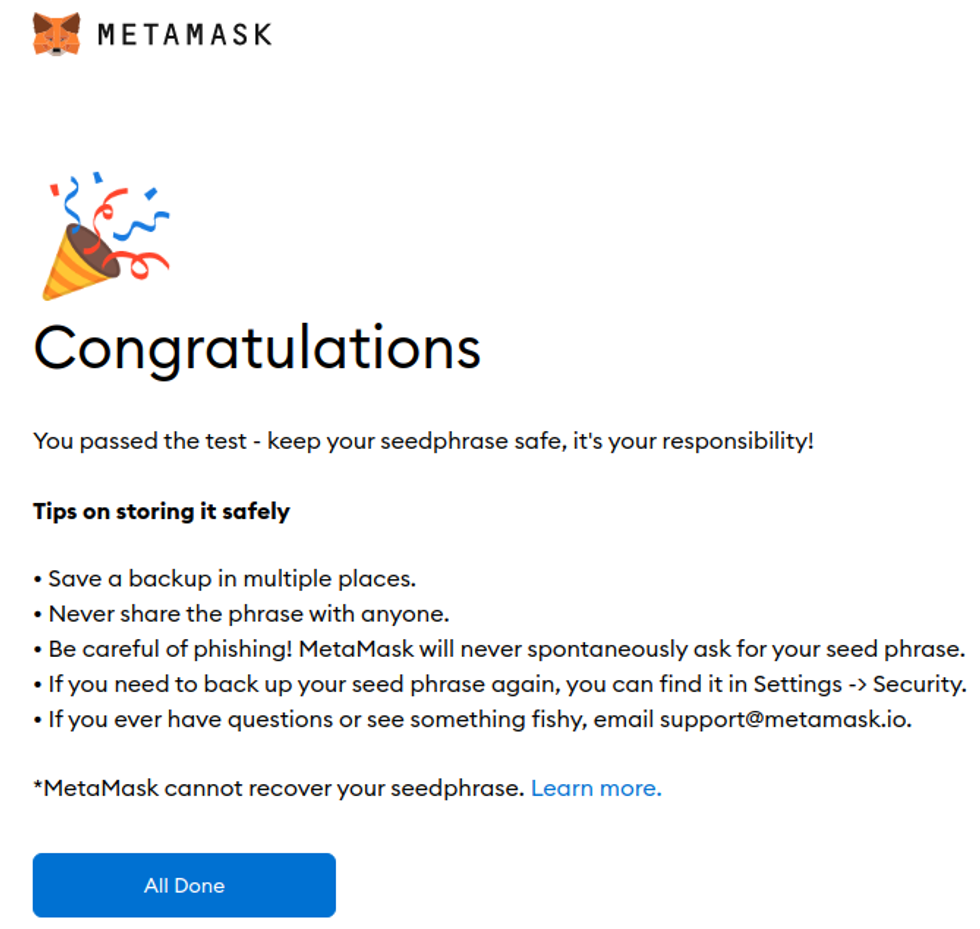
You are now ready to proceed to Section 5. Securely back up your seed phrase and securely back up your funds.
Recommended Action: After you securely back up your recovery phrase, it is important to destroy the paper you temporarily wrote your recovery phase on.
Step 5. How can you securely back up your seed phrase?
If you used Vault12 to generate your recovery phrase, your recovery phrase is already securely backed up in your digital vault.
Your recovery phrase is the master key to all of your cryptocurrency funds. BRD Wallet uses BIP39, which is the current industry best practice for generating recovery phrases. The majority of modern wallets today use BIP39. This means your MetaMask seed phrase can be used to access your funds across many different wallets.
Securely backing up your recovery phrase is the most important step in creating a new wallet. To emphasize how important this is, consider how someone with your recovery phrase could access your funds without you knowing.
Imagine a bad actor has your recovery phrase, and you have your BRD Wallet locked down with 2FA, IP address whitelisting, blocked tor access, and all the other security features. The attacker could simply open any wallet application, and import your recovery phrase. The attacker now has access to all of your funds.
We want you to have a secure backup, so this never happens to you.
Nine out of ten wallet providers only mention one way to back up your recovery phrase - by writing the recovery phrase on paper. Wallet providers only mention this paper backup method because it is easy for beginners to do. Paper backups are simply not that secure.
We did extensive research and compiled the best ways to back up your recovery phrase. We cover all the most well-known options, including next-generation options like how to back up your recovery phrase in Vault12.
Once you have safely backed up your seed phrase, you can initialize your wallet using any BIP39 compatible wallet. In the next section, you will learn how you can initialize a MetaMask wallet using your seed phrase.
Step 6. How can you Initialize or import your seed phrase?
If you are following this guide from the beginning, and you created your wallet using the default approach, using the app to `Create a Wallet`, then congratulations! You are ready to start using your wallet.
However, be careful about storing large amounts of funds secured only by a wallet-generated recovery phrase.
If you followed one of our guides for pre-generating a more secure seed phrase, for instance using Vault12, and you want to use that seed phrase with your wallet - this section is for you!
In this section, you will learn how to initialize your wallet using only your recovery phrase. There are 3 main reasons to generate your wallet using this method:
- You lost access to your wallet, and you need to regain access to your wallet and your funds.
- You want to access your wallet and funds using a different wallet app.
- You want the best security, and you generated a recovery phrase using an advanced method.
The Metamask Wallet makes the process super easy and user friendly. Let's get started.
In this section you are going to create a new wallet in the MetaMask browser extension by importing your seed phrase. Let's get started.
To create a new wallet with a new recovery phrase in MetaMask:
- Click on the MetaMask extension and tap on `Get Started`. This will launch the wallet setup process.
- On the `Wallet Setup` screen you will be presented with 2 options:
- `Import Wallet`← This is the one you want to select
- `Create a new wallet`
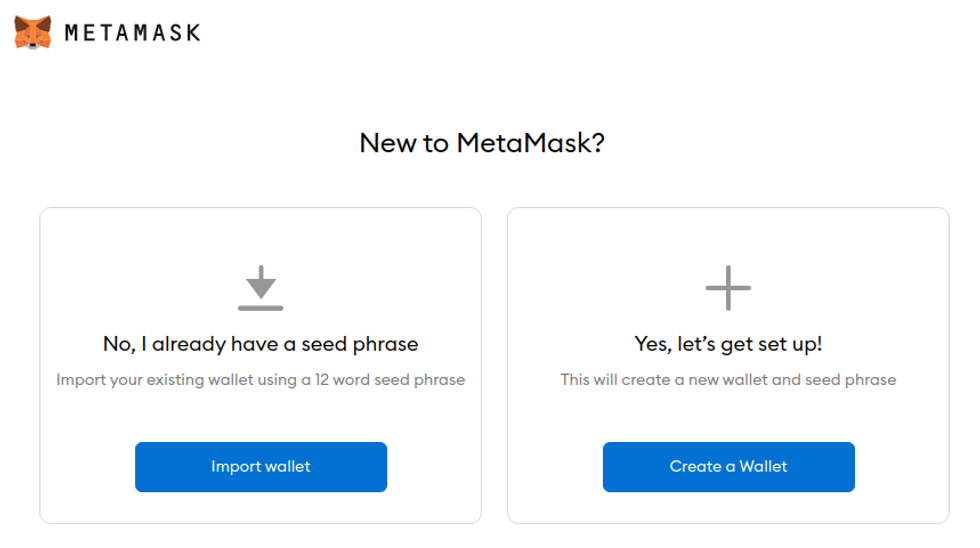
- Help us improve MetaMask? Before setting up your wallet, MetaMask wants to know if you want to help contribute to MetaMask development by contributing anonymous data. This is a personal decision for you to make based on your own value system. The data MetaMask wants to collect is anonymous clicks and pageviews.
- Enter your seed phrase and create a new password.
- Proceed to type in your 12 word recovery phrase. Any typos, misspellings, or typing the words in the incorrect order will invalidate the process and you will have to start over
- Create a secure password! MetaMask does not have 2FA, so creating a secure password is very important
- Make your password unique, do not reuse an old password
- Consider using a passphrase instead, a sequence of 4 or more random words
- Consider using a password generator and manager, like Bitwarden
- Setup a time frame to rotate to a new password
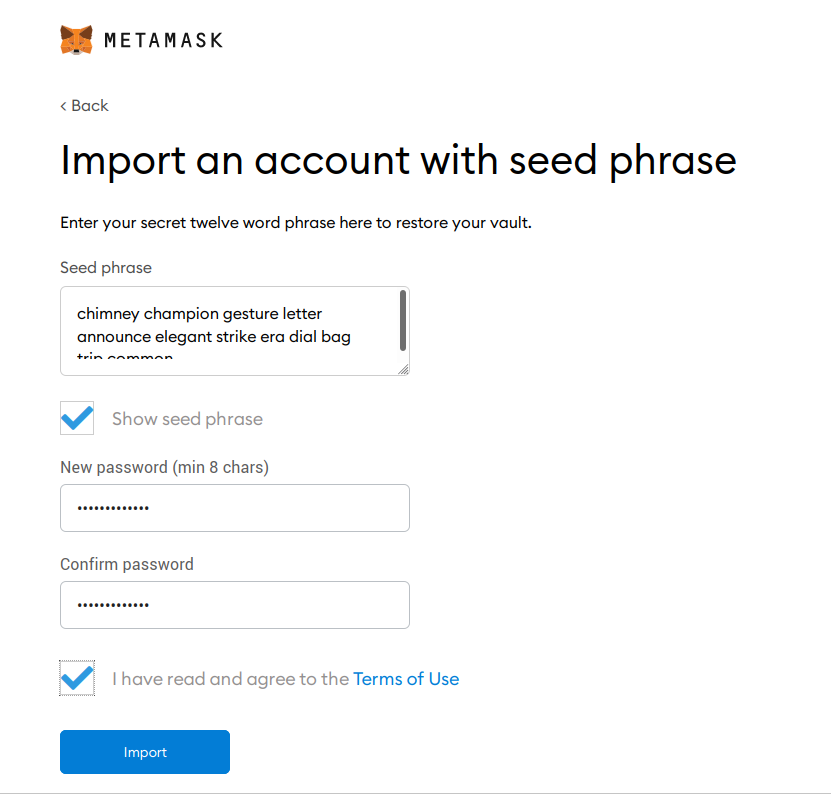
- Congratulations! Your wallet has been created and is ready to be used. Get ready to explore the world of Ethereum. MetaMask is more than just a wallet - it's your portal to interact with apps and smart-contracts built on Ethereum. Your MetaMask wallet can store, send, and receive any token on the Ethereum blockchain.
- Read over the advice given on the Congratulations screen and click `All Done` when you are ready to start using MetaMask.
Recommended Action: do you have a safe backup of your seed phrase? Your seed phrase is the only way to restore access to your funds if you lose access to your wallet. Review Section 5. Securely Backup Seed Phrase of this guide for compiled information on best practices for secure seed phrase backups.
Where can you read more about MetaMask?
In the world of cryptocurrency, knowledge is your best friend.
Crypto Wallet providers will almost always have their own user documentation, and sometimes they may even have a user community where you can ask questions.
Check out these resources about MetaMask Wallets:
Information about best practices on the topic of security can be scattered all over the internet. We work hard to distill the best practices into one place for you.
Check out these resources about securing digital wallets:
- Benefits of using an encrypted digital vault, like Vault12
- How to back up a seed phrase on paper
- All about RNG's - Random Number Generators and why they are important
Ethereum is home to a rapidly growing ecosystem of dApps, smart contracts, communities, and more.
Check out these resources about Ethereum:

Ledger Stax and Trezor Model T: two strong wallets compared
When choosing hardware wallets, many crypto users base their decisions on day-to-day asset management needs and perceived device security. However, savvy crypto users first consider a wallet's ability to handle long-term security scenarios. Long-term security includes expected essentials like backup and recovery tools, and also often-overlooked features related to secure and fault-proof third-party recovery. You can think of third-party recovery as your ability to allow crypto assets to be inherited by successors. Successful crypto users require a comprehensive security strategy for the full life cycle of crypto assets. This article will help you achieve that.
Let's jump into helping you understand the pros and cons of the Ledger Stax and Trezor Model T for day-to-day activities, as well as their potential to safeguard the long-term security and longevity of your assets.
Overview
The Ledger Stax and Trezor Model T both provide a wide variety of reliable security features and support a broad spectrum of cryptocurrencies, making them suitable for diverse crypto portfolios. However, several differences are clear:
Ledger Stax
- Mobile-Centric Usability: Designed with mobility in mind, the
- Ledger Stax features wireless connectivity options like Bluetooth and
- NFC, making it highly compatible with mobile platforms.
- Premium Design: Its unconventionally large display enhances readability, though it comes with slower responsiveness included.
- Price Point: Positioned as a premium product, its cost reflects its advanced features and sleek design
Trezor Model T
- Mobile-Centric Usability: No Bluetooth connectivity. iOS app is view-only.
- General Usability: Smaller set of wallets, coins, and apps.
- Design: The touchscreen and input are very well-thought-out experiences.
- Price Point: More affordable.
In terms of crypto asset longevity features, such as backup, recovery, and crypto inheritance, both devices provide industry-standard and proprietary options with certain trade-offs, as well as compatibility with third-party solutions like Vault12 Guard for succession planning scenarios.
The decision between the two will likely hinge on individual preferences for the target platform (mobile or desktop), and should take into account the planned frequency of use.
Approach to comparison
When choosing the best hardware wallet for cryptocurrency security, you may wonder:
- Which is better, the Ledger Stax or the Trezor Model T?
- How easy to use are these wallets?
- How do their security features compare?
- Do these wallets have vulnerabilities, and have they been hacked?
- What happens if your wallet is lost or stolen?
- How do these wallets accomodate user errors, and complex scenarios like inheritance of crypto assets?
This article compares important characteristics for these two popular wallets. We’ll break down the strengths and weaknesses of each, focusing on security, ease of use, and backup and recovery methods.
By the end of this comparison, you’ll clearly understand which wallet is right for you, as well as how to recover your crypto assets in case of accidents.
What happens if your wallet is lost or stolen?
Wise wallet owners recognize the critical importance of crypto recovery before they find themselves in an unexpected bind! That's why it's important to understand the fundamental topic of crypto asset longevity, including features such as backup, recovery, and inheritance for crypto assets. These considerations are central to long-term planning.
Technical security is paramount, but in the world of crypto, the degree to which backup and recovery solutions are foolproof for users is at least equally important. Here are the backup and recovery options for these two wallets:
How do these wallets handle Crypto Inheritance?
Crypto Inheritance Features
Currently, most hardware wallets, including the Ledger Stax and Trezor Model T, lack any features for establishing and managing crypto inheritance. This gap presents a challenge for users who want to be sure that their crypto assets can be transferred to their heirs.
Backup and recovery differentiators
Ledger Stax Recovery service Disadvantages:
- The optional Ledger Recover backup service is a paid service provided by three corporations that each hold parts of the user’s seed phrase in a Cloud. This introduces risks, as the seed phrase could potentially be accessed via subpoena; business partners could terminate agreements or become involved in lawsuits that result in locked data or resources (like, for example, Gemini and Genesis); and there are multiple potential points of failure.
- Very important detail: The terms of the optional Ledger Recover service do not mention support for inheritance, meaning any unfortunate accident related to the user will make crypto assets unrecoverable for his or her successors. Ledger itself suggests using 3rd-party crypto inheritance services for those purposes.
Ledger Stax Recovery service Advantages:
- People have different preferences. If a user is comfortable trusting a bank with their assets, they may also feel confident using Ledger Recover for securing their seed phrase backup (even though Ledger is not providing the complete cloud backup solution).
Trezor Model T backup Disadvantages:
- Trezor has a Multishare backup service, but it is fully manual, and challenging to maintain. The user is responsible for generating, distributing, and keeping track of the encrypted shards.
Trezor Model T backup Advantages:
- Trezor does offer a Multishare backup option for those who are able and willing to set it up.
How easy are these crypto wallets to use?
Let's compare the key aspects of both wallets side by side, and then summarize what really stands out for user convenience:
Crypto wallet user experience differences
User holding a mobile phone and using Ledger Stax as FIDO U2F security key
Ledger Stax Disadvantages:
- The display has a noticeable response delay due to the "E Ink" touchscreen technology, and could be irritating.
- Not all apps are ported to Stax yet. Even the native Passwords app still has no release date identified as of this article's publish date, so check in advance whether your favorite network/coin is supported.
- Extremely expensive. The value in Stax is more about design, rather than practical aspects.
Ledger Stax Advantages:
- Huge informative display and "Clear Signing" allows you to review and confirm all transaction details directly on Ledger Stax and in a human-readable language before they are signed and sent. This enhances security and ensures that you see exactly what you are approving in a secure and tamper-proof manner.
- Offers Bluetooth connectivity as well as NFC — works with or without a cable, at least with smartphones.
- Wide support for third-party wallets and dapps, allowing the Ledger Stax to sign transactions directly in MetaMask, Uniswap, and other platforms without relying on Ledger Live software. This is a huge advantage for DeFi users.
Trezor Model T Disadvantages:
- No wireless connectivity: you always have to use a cable.
- iOS is a balance view-only app, so you can't send transactions from iOS.
Trezor Model T Advantages:
- The display is much more convenient to work with on a regular basis, and easy to read.
- The touchscreen and input are very well-thought-out experiences on Trezor Model T — you can use it without any discomfort.
How do these wallets' security features compare?
Now, we dive deeper into the core specification of every hardware wallet: security features.
| Ledger Stax | Trezor Model T | |
| PIN-code | 4 - 8 digits | up to 50 digits |
| BIP39 Passphrase | Yes | Yes |
| Open-source | Partial | Full |
| Secure Element | Yes | No |
| Multisignature | Yes | Yes |
Crypto wallet security feature differentiators
Ledger Stax security Disadvantages:
- Critical components like the Secure Element and its operating system are closed-source. This has raised concerns, especially after the controversial introduction of the Ledger Recover backup service, which challenged the assumption that the Secure Element could never transmit the recovery seed phrase outside the hardware wallet.
Ledger Stax security Advantages:
- Includes a Secure Element, giving Ledger devices a strong reputation for withstanding physical attacks. This is important for users who prefer not to complicate their security with BIP39 passphrases, prioritizing ease of use.
- Clear Signing is also a security feature.
Trezor Model T security Disadvantages:
- Lacks a Secure Element, making it resistant to physical attacks only if a BIP39 passphrase is used. This is a significant drawback in both convenience and its ability to be fault-proof.
Trezor Model T security Advantages:
- Fully open-source software and hardware. This minimizes third-party risks, and avoids any need to rely on trust.
- Allows for longer PIN codes, which might appeal to particularly cautious users.
Have there been vulnerabilities or hacks of these wallets?
There have been vulnerabilities and hacks associated with both the Ledger and Trezor products, however given Stax is very new we will cover it's manufacturer's hacks history.
Far from delivering uncompromised security, these wallets are routinely subject to malware, supply chain, and firmware vulnerabilities. Here are some recent notable incidents:
Ledger Vulnerabilities:
- The Connect Kit Attack (2023): The Connect Kit breach was discovered by the security teams of Ledger.
- Ledger User Data Breach (2020): A major data breach exposed the personal information of thousands of customers, leading to phishing attacks.
- Another User Data Breach (2021): Ledger announced on Twitter that it has been targeted by rogue Shopify team members who exported over 200 merchants’ customer databases.
- Ledger Live (2020): Users were exposed to basic double spending attacks, amplified double spending attacks, and DoS attacks without user consent.
- Potential Supply Chain Attack Vulnerability (2020): Kraken Security Labs Identifies Supply Chain Attacks Against Ledger Wallets.
Trezor Model T Vulnerabilities:
- Ability to Physically Hack Trezor T Wallet (2023): Crypto Security Firm Unciphered Claims Ability to Physically Hack Trezor T Wallet
- Five Reported Vulnerabilities in Two Models of Trezor Hardware Wallets (2019): Ledger’s Attack Lab has found five vulnerabilities in hardware wallets of its direct competitor Trezor.
- Kraken Identifies Critical Flaw in Trezor Hardware Wallets (2020): Kraken Security Labs has devised a way to extract seeds from both cryptocurrency hardware wallets offered from industry leader Trezor, the Trezor One and Trezor Model T.
Summary of Ledger Stax and Trezor Model T Comparison
The Ledger Stax and Trezor Model T both provide a respectable set of security measures, and support a broad spectrum of cryptocurrencies, making them suitable for diverse crypto portfolios.
The Ledger Stax is very mobile-friendly, and offers a balance of security and convenience features at a very premium price. It offers a big, but unconventional display and with delayed input, but with the advantages of a Secure Element and wireless connectivity options like Bluetooth.
On the other hand, the Trezor Model T, at a much lower price, boasts a fully open-source framework, larger display with colors, and touchscreen interface for enhanced user interaction, but with reduced security and convenience from not having a Secure Element and working only with USB connections the offer sounds non-attractive.
The decision between the two will likely hinge on individual preferences for the target platform (mobile or desktop), and should take into account the planned frequency of use.
Whichever you choose, remember to add crypto inheritance to your choice of wallet to ensure the long-term safety of your digital assets.
Vault12 Guard: a decentralized solution for Crypto Inheritance
Vault12 is the pioneer in Crypto Inheritance Management, and delivers an easy-to-use and secure method for assigning a legacy contact to your crypto wallets. This enables you to pass on your wallet seed phrases and private keys for all types of digital assets to future generations. Vault12 Guard is designed for everyday people, yet strong enough for Crypto OGs.
Vault12 Guard has a uniquely-secure design. Utilizing advanced encryption and decentralized storage, it ensures that crypto assets are not only safe but also transferable under predefined conditions, filling a critical need unmet by most traditional hardware wallets. Vault12 Guard applies a hybrid approach of software fused with the hardware-based Secure Element of phone devices (The Secure Enclave for iOS devices, and Strongbox for Google devices). Vault12 Guard's decentralized design reduces possible points of failure. Nothing is stored on cloud servers or Vault12 servers, and no assets are stored on local devices, making them less of a target.
From a user perspective, the Vault12 Guard app asks users to appoint one or more people (or mobile devices) as Guardians. The designated Guardians are entrusted to protect the user's comprehensive collection of wallet seed phrases and private keys, which are safely stored within a decentralized digital Vault. Its simple, user-friendly workflow removes the necessity for regularly revising wallet inventories or modifying instructions for your lawyers — a process that otherwise could lead to privacy breaches.
Both the Ledger Stax and Trezor Model T are compatible with Vault12 Guard Inheritance. This addresses the seed phrase backup dilemma for any hardware wallet. It also makes less-secure backup methods, such as paper or steel plates, unnecessary.
How to choose between the Ledger Stax and Trezor Safe 5 Wallets
When choosing hardware wallets, many crypto users base their decisions on day-to-day asset management needs and perceived device security. However, savvy crypto users first consider a wallet's ability to handle long-term security scenarios. Long-term security includes expected essentials like backup and recovery tools, and also often-overlooked features related to secure and fault-proof third-party recovery. You can think of third-party recovery as your ability to allow crypto assets to be inherited by successors. Successful crypto users require a comprehensive security strategy for the full life cycle of crypto assets. This article will help you achieve that.
Let's jump into helping you understand the pros and cons of the Ledger Stax and Trezor Safe 5 hardware wallets for day-to-day activities, as well as their potential to safeguard the long-term security and longevity of your assets.
Overview
The Ledger Stax and Trezor Safe 5 both provide a wide variety of reliable security features and support a broad spectrum of cryptocurrencies, making them suitable for diverse crypto portfolios. However, several differences are clear:
Ledger Stax
- Mobile-Centric Usability: Designed with mobility in mind, the Ledger Stax features wireless connectivity options like Bluetooth, making it highly compatible with mobile platforms.
- Premium Design: Its unconventionally large display enhances readability, though it comes with slightly slower responsiveness.
- Price Point: Positioned as a premium product, its cost reflects its advanced features and sleek design.
Trezor Safe 5
- Open-Source Transparency: Built on an NDA-free framework (full disclosure), Trezor Safe 5 emphasizes trust through transparency, appealing to users who value open-source security.
- Simplified Connectivity: Limited to USB connections, it offers reliable functionality for desktop and Android users only.
- Affordable Access: At a much lower price point, it delivers solid security and usability without the premium cost.
In terms of crypto asset longevity features, such as backup, recovery, and crypto inheritance, both devices provide industry-standard and proprietary options with certain trade-offs, as well as compatibility with third-party solutions like Vault12 Guard for succession planning scenarios.
The decision between the two will likely hinge on individual preferences for the target platform (mobile or desktop), and should take into account the planned frequency of use.
Approach to comparison
When choosing the best hardware wallet for cryptocurrency security, you may wonder:
- Which is better, the Ledger Stax or the Trezor Safe 5?
- How easy to use are these wallets?
- How do their security features compare?
- Do these wallets have vulnerabilities, and have they been hacked?
- What happens if your wallet is lost or stolen?
- How do these wallets accomodate user errors, and complex scenarios like inheritance of crypto assets?
This article compares important characteristics for these two popular wallets. We’ll break down the strengths and weaknesses of each, focusing on security, ease of use, and backup and recovery methods.
By the end of this comparison, you’ll clearly understand which wallet is right for you, as well as how to recover your crypto assets in case of accidents.
What happens if your wallet is lost or stolen?
Wise wallet owners recognize the critical importance of crypto recovery before they find themselves in an unexpected bind! That's why it's important to understand the fundamental topic of crypto asset longevity, including features such as backup, recovery, and inheritance for crypto assets. These considerations are central to long-term planning.
Technical security is paramount, but in the world of crypto, the degree to which backup and recovery solutions are foolproof for users is at least equally important. Here are the backup and recovery options for these two wallets:
How do these wallets handle Crypto Inheritance?
Crypto Inheritance Features
Currently, most hardware wallets, including the Ledger Stax and Trezor Safe 5, lack any features for establishing and managing crypto inheritance. This gap presents a challenge for users who want to be sure that their crypto assets can be transferred to their heirs.
Backup and recovery differentiators
Ledger Stax Recovery Disadvantages:
- The optional Ledger Recover backup service is a paid service provided by three corporations that each hold parts of the user’s seed phrase in a Cloud. This introduces risks, as the seed phrase could potentially be accessed via subpoena; or business partners could terminate agreements or become involved in lawsuits that result in locked data or resources (like, for example, Gemini and Genesis). These scenarios contain multiple potential points of failure, and should be taken into account.
- Very important detail: The terms of the optional Ledger Recover service do not mention support for inheritance, meaning any unfortunate accident related to the user will make crypto assets unrecoverable for his or her successors. Ledger itself suggests using 3rd-party crypto inheritance services for those purposes.
Ledger Stax Recovery Advantages:
- People have different preferences. If a user is comfortable trusting a bank with their assets, they may also feel confident using Ledger Recover for securing their seed phrase backup (even though Ledger is not providing the entire Cloud backup solution).
Trezor Safe 5 Recovery Disadvantages:
- Trezor has a Multishare backup service, but it is fully manual, and challenging to maintain. The user is responsible for generating, distributing, and keeping track of the encrypted shards.
Trezor Safe 5 Recovery Advantages:
- Trezor offers the Multishare backup option for those who are able and willing to set it up.
How easy are these crypto wallets to use?
User holding a mobile phone and using Ledger Stax as FIDO U2F security key
Let's compare the key aspects of both wallets side by side, and then summarize what really stands out for user convenience:
Trezor Safe 5 wallet and desktop software
Crypto wallet user experience differences
Ledger Stax UX Disadvantages:
- The display has a noticeable response delay due to the "E Ink" touchscreen technology, and could be irritating.
- Not all apps are ported to Stax yet. Even the native Passwords app still has no release date identified as of this article's publish date, so check in advance whether your favorite network/coin is supported.
- Extremely expensive. The value in Stax is more about design, rather than practical aspects.
Ledger Stax UX Advantages:
- Huge informative display and "Clear Signing" allows you to review and confirm all transaction details directly on Ledger Stax and in a human-readable language before they are signed and sent. This enhances security and ensures that you see exactly what you are approving in a secure and tamper-proof manner.
- Offers Bluetooth connectivity — works with or without a cable, at least with smartphones.
- Wide support for third-party wallets and dapps, allowing the Ledger Stax to sign transactions directly in MetaMask, Uniswap, and other platforms without relying on Ledger Live software. This is a huge advantage for DeFi users.
Trezor Safe 5 UX Disadvantages:
- No wireless connectivity: you always have to use a cable.
- iOS integration is view-only: you can watch your balance, but can't send transactions from iOS apps.
Trezor Safe 5 UX Advantages:
- The display is easy to read and convenient to use on a regular basis.
- The touchscreen and input are very well-thought-out experiences on Trezor Safe 5 — you can use them without any discomfort.
How do these wallets' security features compare?
Now, we dive deeper into the core specification of every hardware wallet: security features.
| Ledger Stax | Trezor Safe 5 | |
| PIN-code | 4 - 8 digits | up to 50 digits |
| BIP39 Passphrase | Yes | Yes |
| Open-source | Partial | Full |
| Secure Element | Yes | Yes, and it's NDA-free |
| Multisignature | Yes | Yes |
Crypto wallet security feature differentiators
Trezor Safe 5 with a void sticker on it - security seal of genuineness
Ledger Stax Security Disadvantages:
- Critical components like the Secure Element and its operating system are closed-source. This raises concerns, especially after the controversial introduction of the Ledger Recover backup service, which challenged the previous assumption that the Secure Element could never transmit the recovery seed phrase outside the hardware wallet.
Ledger Stax Security Advantages:
- Includes a Secure Element, giving Ledger devices a strong reputation for withstanding physical attacks. This is important for users who prefer not to complicate their security with BIP39 passphrases, instead prioritizing ease of use.
- Clear Signing is also a security feature.
Trezor Safe 5 Security Disadvantages:
- Trezor does not fully rely on open-source software and hardware, but mitigates this limitation architecturally, so that the seed phrase is not touched by any closed-source software on the device.
Trezor Safe 5 Security Advantages:
- Along with this new flagship product, Trezor introduces Secure Element chips, raising the security bar. More importantly, its Secure Elements are "NDA-free," which is good: the chips are not bound by Non-Disclosure Agreements (NDAs) that could restrict Trezor from publicly discussing any security flaws.
- The Secure Element is responsible for verifying device authenticity via secure boot protection, and for storing a part of the secret that is used to decrypt the recovery seed (but it never actually knows what your recovery seed is).
- Allows for longer PIN codes, which might appeal to particularly cautious users.
Have there been vulnerabilities or hacks of these wallets?
Given that both of these products under review are very new, we will examine their manufacturers' histories of hacks. There have been vulnerabilities and hacks associated with both the Ledger and Trezor products.
While relatively secure, most crypto wallets — even hardware wallets — can not provide perfect security, and are routinely subject to malware, supply chain, and firmware vulnerabilities. Here are some recent notable incidents:
Ledger Vulnerabilities:
- The Connect Kit Attack (2023): The Connect Kit breach was discovered by the security teams of Ledger.
- Ledger User Data Breach (2020): A major data breach exposed the personal information of thousands of customers, leading to phishing attacks.
- Another User Data Breach (2021): Ledger announced on Twitter that it has been targeted by rogue Shopify team members who exported over 200 merchants’ customer databases.
- Ledger Live (2020): Users were exposed to basic double spending attacks, amplified double spending attacks, and DoS attacks without user consent.
- Potential Supply Chain Attack Vulnerability (2020): Kraken Security Labs Identifies Supply Chain Attacks Against Ledger Wallets.
Trezor Vulnerabilities:
- Ability to Physically Hack Trezor T Wallet (2023): Crypto Security Firm Unciphered Claims Ability to Physically Hack Trezor T Wallet
- Five Reported Vulnerabilities in Two Models of Trezor Hardware Wallets (2019): Ledger’s Attack Lab has found five vulnerabilities in hardware wallets of its direct competitor Trezor.
- Kraken Identifies Critical Flaw in Trezor Hardware Wallets (2020): Kraken Security Labs has devised a way to extract seeds from both cryptocurrency hardware wallets offered from industry leader Trezor, the Trezor One and Trezor Model T.
Summary of Ledger Stax and Trezor Safe 5 Comparison
The Ledger Stax and Trezor Safe 5 both provide a respectable set of security measures, and support a broad spectrum of cryptocurrencies, making them suitable for diverse crypto portfolios.
The Ledger Stax is more mobile-friendly, and offers a balance of security and convenience features at a very premium price. It offers an unconventionally-large display with delayed response, with the advantage of wireless connectivity options like Bluetooth.
On the other hand, the Trezor Safe 5, at a much lower price, boasts a more open-source and NDA-free framework, a reasonably-sized display with colors, and a touchscreen interface for enhanced user interaction. However, it has fewer convenience features: it works only with USB connections, and is missing iOS integration.
The decision between the two will likely hinge on individual preferences for the target platform (mobile or desktop), and should take into account the planned frequency of use.
Whichever you choose, remember to add crypto inheritance to your choice of wallet to ensure the long-term safety of your digital assets. Both the Ledger Stax and Trezor Safe 5 are compatible with Vault12 Guard Inheritance planning.
Vault12 Guard: a decentralized solution for Crypto Inheritance
Vault12 is the pioneer in Crypto Inheritance Management, and delivers an easy-to-use and secure method for assigning a legacy contact to your crypto wallets. This enables you to pass on your wallet seed phrases and private keys for all types of digital assets to future generations. Vault12 Guard is designed for everyday people, yet strong enough for Crypto OGs.
Vault12 Guard has a uniquely-secure design. Utilizing advanced encryption and decentralized storage, it ensures that crypto assets are not only safe but also transferable under predefined conditions, filling a critical need unmet by most traditional hardware wallets. Vault12 Guard applies a hybrid approach of software fused with the hardware-based Secure Element of phone devices (The Secure Enclave for iOS devices, and Strongbox for Google devices). Vault12 Guard's decentralized design minimizes possible points of failure. Nothing is stored on Cloud servers or Vault12 servers, and no assets are stored on local devices, making them less of a target.
From a user perspective, the Vault12 Guard app asks users to appoint one or more people (or mobile devices) as Guardians. The designated Guardians are entrusted to protect the user's comprehensive collection of wallet seed phrases and private keys, which are safely stored within a decentralized digital Vault. Its simple, user-friendly workflow removes the necessity for regularly revising wallet inventories or modifying instructions for your lawyers — a process that otherwise could lead to privacy breaches.
Both the Ledger Stax and Trezor Safe 5 are compatible with Vault12 Guard Inheritance. This addresses the seed phrase backup dilemma for any hardware wallet. It also makes less-secure backup methods, such as paper or steel plates, unnecessary.
Advanced
Managing digital assets like cryptocurrencies can be complex, especially when it comes to inheritance.
View all articles